Posted on 1 Comment

Spring Lace Pullover: Zegue-Along Class

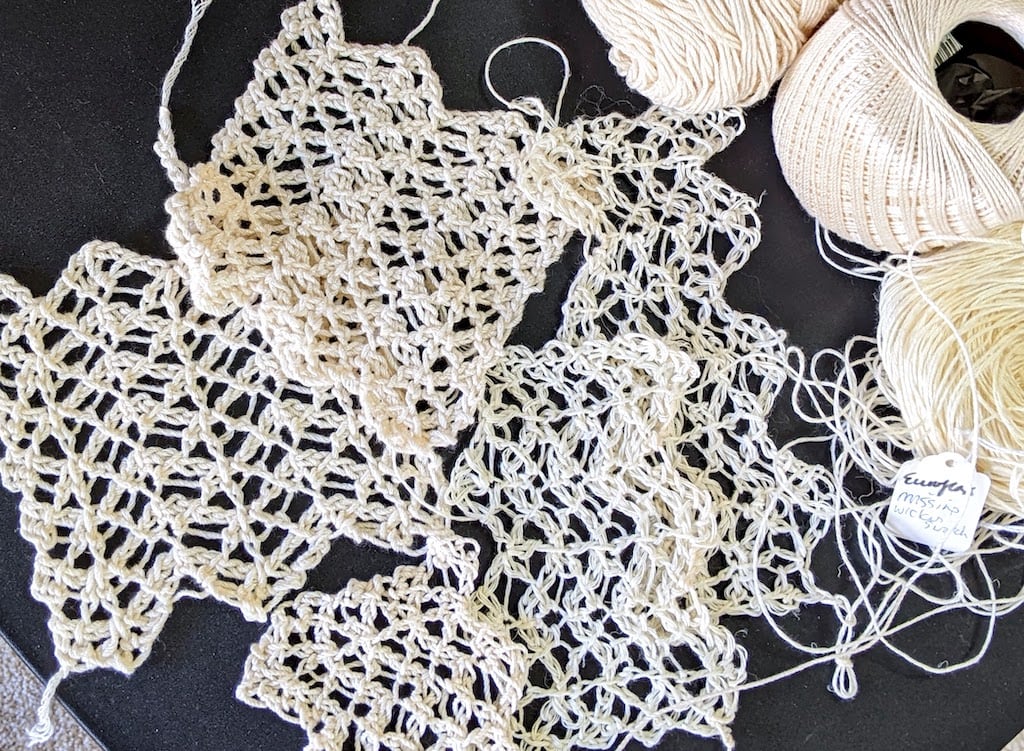
Pile of lacy cream-colored antique-looking Tunisian crochet swatches

I’m ready to commit to one of these five swatches for a Jane Austen-y lace pullover. My new Zegue-Along online class starts in a few weeks. This blog post will give you initial information in case you want to make something like this in class. My goal is a beautiful, uplifting springtime layer–a roomy pullover–that might even make a great Mother’s Day gift, or bridal accessory.
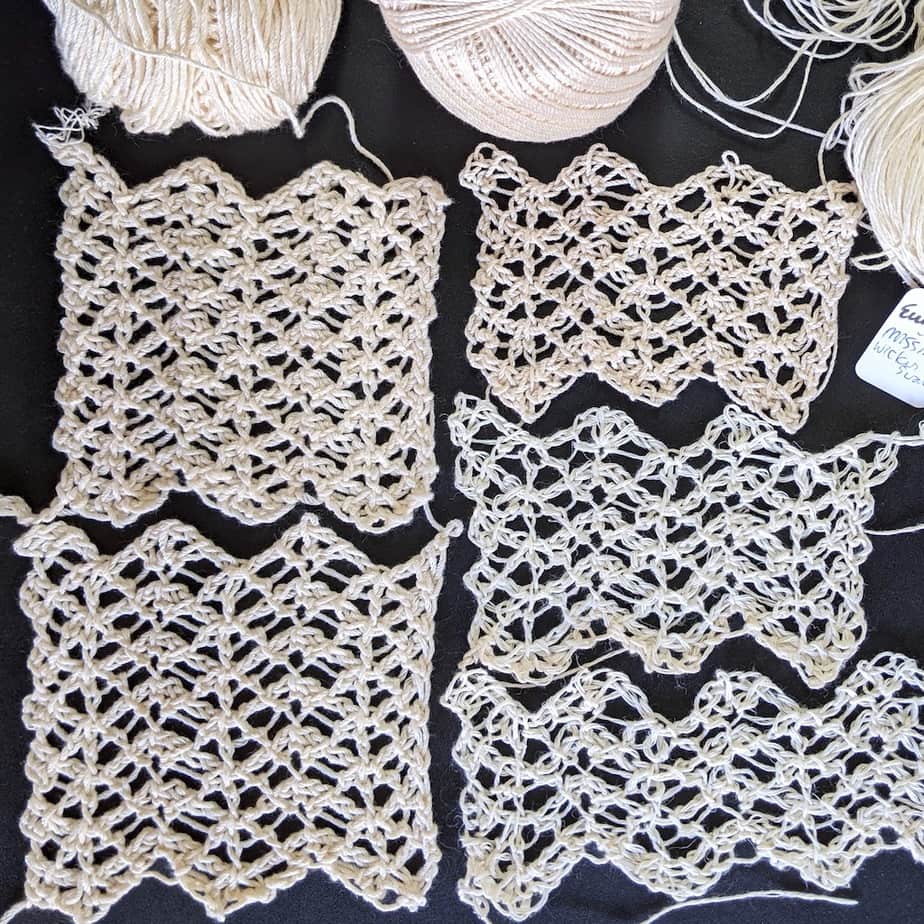
Five lace swatches arranged flat, each a bit different.

These 5 swatches test many things like yarn twist, fiber content, crochet hook size, and a stitch variation. The two leftmost swatches are my Lotus yarn with a 5 mm (H) crochet hook and a 5.5 mm (I) hook. Top right: J.P.Coats Royale and an H hook. The other two are Euroflax linen with a 4.5 mm (G7) hook and an H hook.

I’ll get to these in a bit.

First, my “pullover” plans.

Basic Lace Pullover Shape

Most of all, I want long sleeves of this lace. Kind of roomy but not as much as a kimono. Long sleeves are a commitment! And, I’d like to use only simple shapes—no shaping, just a few rectangles—but I might need to do a bit of tapering to avoid kimono sleeves.

I’l be crocheting from the top down instead of bottom up (or possibly from side-to-side), because I want the option to stop at a cropped length. This way I could wear it during class and then add length later.

What About the Head Opening? Neckline?

I like wearing V-necks, and boatnecks if modified slightly. Both are great for a lace pullover. This lace will be easy to steek! This means it’s “self-healing” if you cut it. So I have a nice option of just crocheting big rectangles, then cutting a head opening later!

If I crochet the rows horizontally, a steeked neckline would be a boatneck type. If crocheted side-to-side, the rows would run vertically, and a steeked head opening would result in a V neckline.

All of these things help bring the construction method into focus.

The Swatches

I used the same Zegue variation for all five swatches. Instead of extended Tunisian knit stitch (“Teks”), I used a twisted Tunisian extended stitch (“TwTes”). I’ll demonstrate how to crochet both of these in class, and more.

The three yarns I tested are considered sport weight. I used hook sizes ranging from 4.5mm to 5.5mm because this is Tunisian crochet. A crochet hook size of 3.5 (E), 3.75 (F), or 4.0 (G6) with sport weight is more typical for regard crochet.
Twist and Spin

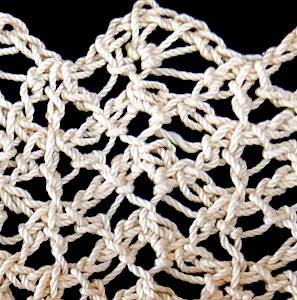
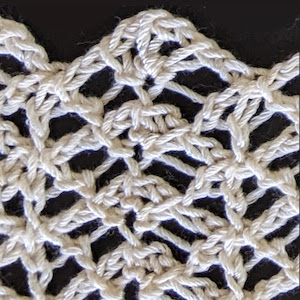
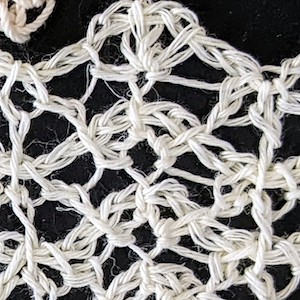
Three kinds of twist are going on in these swatches! The yarn is twisted, the crocheter adds some twist, and the stitch loops are twisted. So, I tested this pattern with yarns spun in both directions. You can see the texture differences in the close up photos.

I crochet right handed, so I automatically add a little counter-clockwise or “Z”-twist to the yarn as I go. Crocheting left handed does the opposite: adds a bit of clockwise “S”-twist to a yarn. The twisted-loop Tunisian stitch I used adds “S” twist. A leftie would twist the loop in a “Z” direction. It’s a lot of twisting. Or, untwisting.

Please bear with me, I just have to get this out of the way: yarns with two or more plies twisted together also tend to start off with twist in the opposite direction, but this doesn’t concern us here. The Lotus and Royale yarns have S-twisted plies that are then twisted together in a Z direction. This is called its “final twist”. For this project I’m only concerned with a yarn’s final twist direction.

Yarns vary not only in their twist direction, but also in how much twist. A yarn with a lot of twist is said to have a “hard twist”. The Euroflax yarn is a good example of a “soft twisted” yarn.

The Lacy Verdict

I started out hoping I would love the Euroflax. I’ve had 1600 yds of it waiting in my yarn stash since 2007! Still waiting for the perfect project for it, I guess. I love linen and I only want to use it if the project shows it off. Here, though, it looks old and stringy.

Until I tried a 5.5 mm hook with the Lotus, I preferred the Royale. The surface texture looks rich and fascinating in person (in photos the surface texture tends to look flat). It has enough twist to stay twisted even with all the S-twisted stitch loops. The ropy look gives a slight nautical and casual effect compared with the fine-grained sheen of the 12-ply Lotus.

If you can pick out the return pass chains in the Euroflax swatch, you might see that my Z-twist crocheting of them has canceled out almost all of what little S-twist the yarn has. Then see how the forward pass stitches with their S-twisted loops preserve the yarn’s S-twist better.

Lace Pullover: Next Steps

  • Measure the rows and stitch repeats per inch of the Lotus swatch I did with the 5.5 mm crochet hook.
  • Decide the finished length and width I want of the sleeves.
  • Decide if I’m crocheting the rows from sleeve cuffs to cuff, or widthwise. I’m leaning toward two widthwise sleeve pieces for a v-neck result like this top (except with longer sleeves).

My working name for it is Clarenzeg (link goes to its Ravelry project page). I can’t wait to start!
Posted on 1 Comment

An Advanced Tall Stitch Pattern

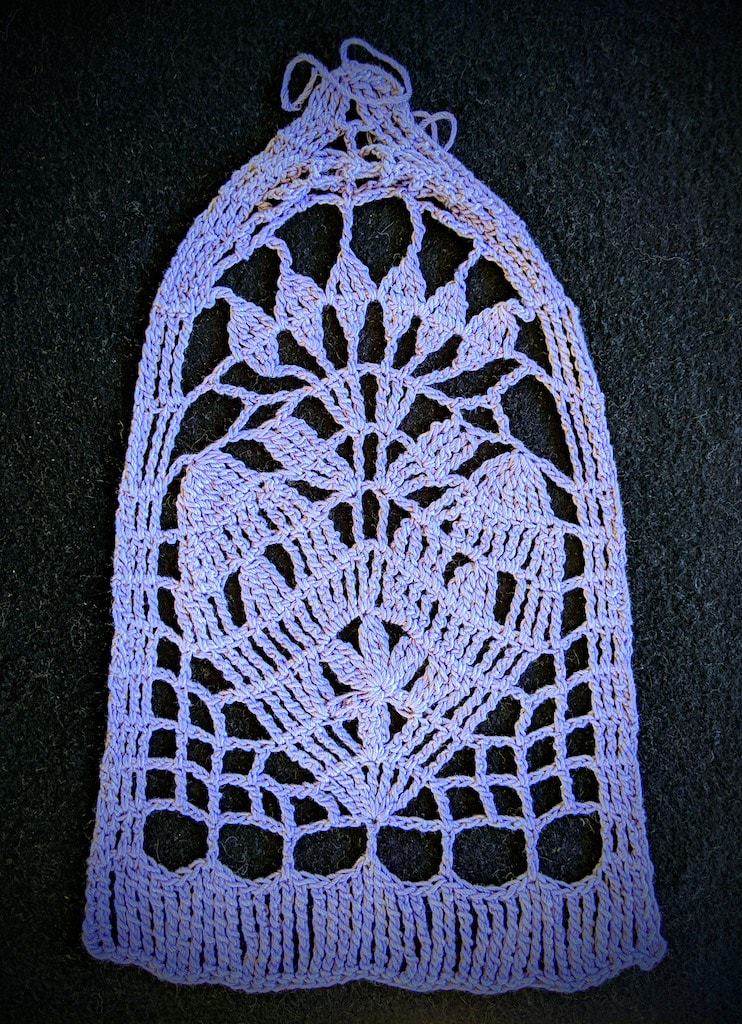
I swatched a fancy tall stitch pattern recently. It’s actually a section that I isolated from a larger all-over pattern in issue #187 of Duplet magazine (September 2016). Each of its nineteen rows is unique. This is a first-time-puzzling-through swatch, so please ignore the uppermost rows which need re-doing. I worked exclusively from the symbol diagram because I don’t know how to read Ukrainian or Russian.

I added turning chains and opted to link the first tall stitch to them. It’s easier to see this in the extreme close up further down. Also, the first row of very tall stitches (quadruple trebles) along the bottom is not in the Duplet pattern; I started off by testing very tall foundation stitches.

Arch-shaped swatch of a framed folk-style heart with a flower at the center, all in very tall crochet stitch combinations.

Tall Stitch Pattern Symbols

Something I love about symbols for very tall stitches is that the initial yarn overs required show as small lines crossing the long vertical line of the stitch post. You just count the wee hashes. Even nicer for UK and Australian crocheters, the number of them also tells you the name of the stitch. (American crocheters: just use the name for the next shorter stitch.)

Below is a sampling of Duplet’s symbols for the very tall stitches. Notice the four longest vertical lines at the far right edge, with five little hash marks: it means you yarn over five times to begin the stitch. These are quintuple trebles in the UK & AUS, or call them quadruple trebles in the US.

According to the symbols, crochet these four very tall stitches into four tall stitches that have only two hash marks: they are double trebles in UK/AUS or just trebles in US terminology.

An Upside Down Y-Stitch

Cover of Ukrainian Russian Duplet magazine issue 187 (shows yellow sunflowers, and model wears summery Irish crochet top)
Duplet 187

See that symbol in the upper left that looks like an upside-down Y with hash marks ? See how its right leg stands over a sort of horizontal line? That line is some number of chains (4 in my swatch). The other leg skips some stitches that are mostly outside of the picture. This symbol means you begin with five yarn overs, then insert the crochet hook into a chain or the chain space. Work two of the five yarn overs off of your hook, as if to make a treble (UK/AUS dtr). Then, yarn over twice to begin the other leg of the stitch while the 3 unused yarn overs are still waiting on the hook. Work the treble of the other leg into another chain space, and then finish working the remaining 3 yarn overs off of the hook.

A variety of clusters and shell stitches flow into each other to give the crocheting an undulating feeling. It’s exciting to see it take shape, and it kept me on my toes. I’d do a few things differently if I swatch it again. Duplet and Zhurnal magazines offer many expressive patterns and innovative ways to use very tall stitches.

As Class Material

This particular tall stitch pattern is mainly research for me. It’s too involved for the Tall Stitch Virtuosity class, but of course I’ll bring the swatch and magazine with me. When there’s time in class we can take a closer look at examples like this.

It’s not too involved, however, for…my Pinterest board called Tall Stitch Artistry!

Posted on Leave a comment

New-to-Me Size 5 Crochet Thread

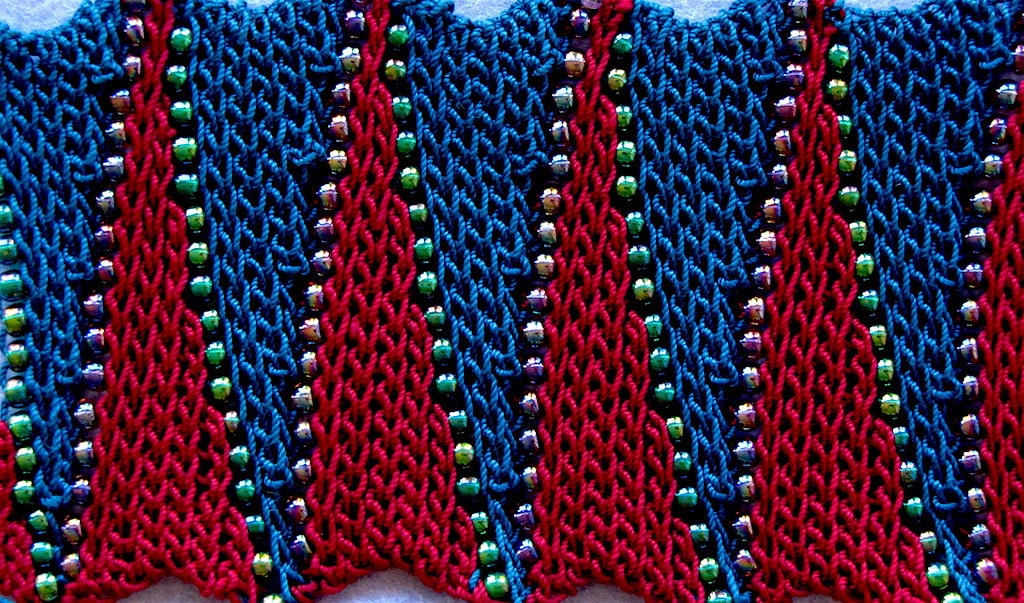
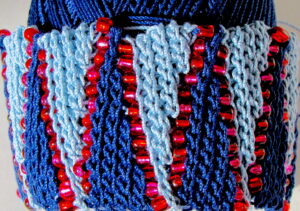
Pattern of short row wedges in alternating colors separated by beads shown flat

I’m excited to learn that Handy Hands now carries a size 5 crochet thread called Elisa. Like Lizbeth (the thread that Handy Hands is known for), Elisa is 6-cord gassed, singed mercerized cotton. If you don’t understand all of these terms, just know for now that they indicate improved strength, durability, and appearance. In other words, Elisa is a good choice for crocheting heirloom items, and in my case, jewelry.

This excites me because it’s the kind of thread needed for my Bivector Bangle class. Finding size #5 cotton thread for jewelry (roughly equivalent to fingering weight/sock weight wool yarns) is not always easy. I’ve tested Lizbeth for jewelry and it would be great for its color range, but size 5 is pretty much the only size it doesn’t come in.

Initial Elisa Test

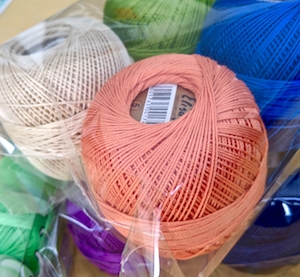
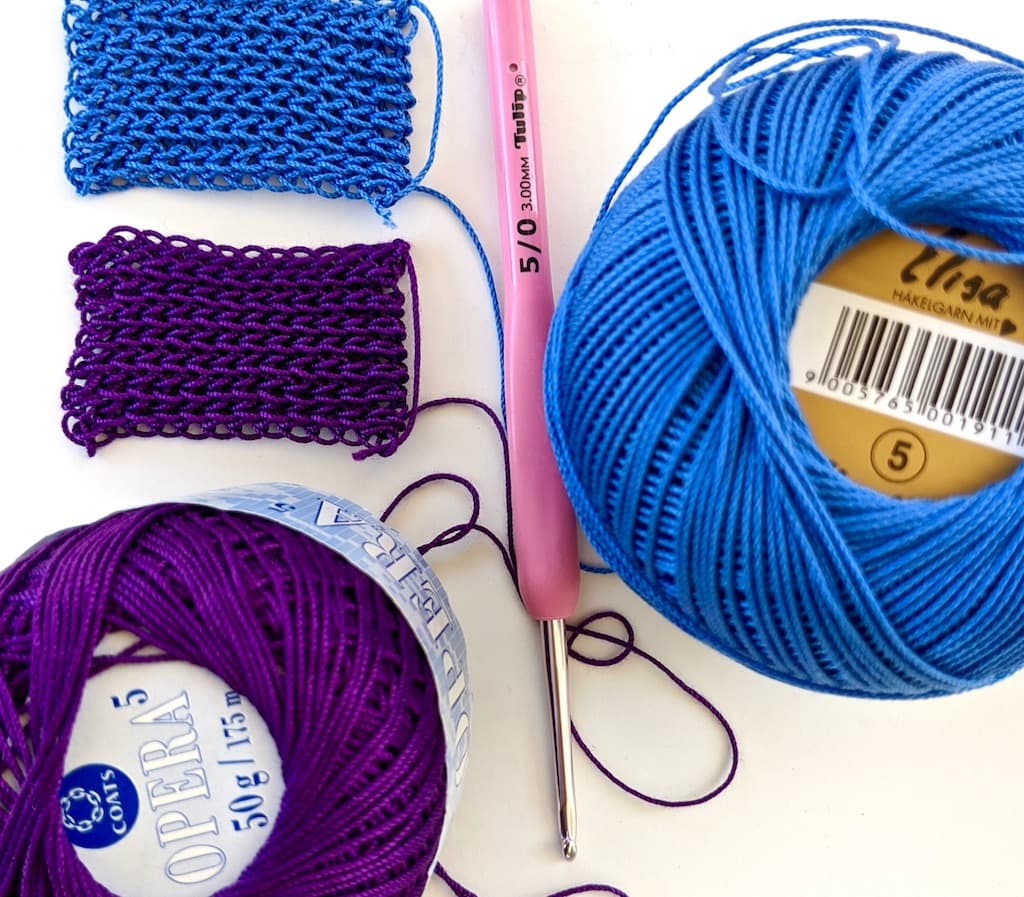
Elisa differs from Lizbeth in more ways besides its size 5 weight: Elisa is made in Austria, in a limited number of colors. (In addition to the five pictured above, a yellow and white are available.) Lizbeth is made in China and the color range is unbelievable. The two threads feel slightly different: Elisa has a softness and slight bounce whereas Lizbeth has the crisp feel that is more typical of this very hard wearing, hard twist thread category. Lizbeth’s “bounce” is a bit more wiry.

My quick Elisa swatch (blue) came out slightly larger than the purple Opera one. I think this is due to the added bounce of a 6-cord thread; the loops want to stand out from my hook a bit as I crochet. I’ll try being more aware of this when I swatch it again, with beads added.

Bivector Bangle Threads

For my first Bivector Bangle I used size 5 Coats Opera thread in burgundy and teal (pictured at the top). It has since been discontinued. Opera is a 3-cord (meaning 3 plies), not a 6-cord thread. This enables it to have a silky, supple feel. Many widely available crochet threads in the USA are 3-cord; some are even 2-cord and may be called perle or pearl.

Crochet Thread Quality

When you’re using a crochet thread with a low number of plies and/or a low amount of twist for crochet jewelry (as well as heirloom items), the quality of the cotton fiber itself matters even more. The longer the fibers, like Pima or Egyptian (“mako”), the better. Mercerizing also adds strength to any cotton fiber.

For me the closest thing to Opera nowadays is DMC’s Cébélia. It’s an elegant mercerized 3-cord with a good color range for its size 10 and 20 weights. Unlike Opera, Cébélia was never a size 5 crochet thread, to my knowledge. I’ve seen it here (USA) in the big chain craft stores for years.

L’il Bivector

2nd version, less wide (smaller wedges): light and dark blue with pinka nd red glass beads.

My second Bivector is a narrower bracelet in two blue threads and glass beads in alternating pink and red. For both colors I used a 6-cord size 5 crochet thread by Manuela. Its dense, wiry-crisp texture is very similar to Lizbeth thread. Maybe you can get a sense of its texture from its photo.

I crocheted both Bivectors about eight years ago. For a third one I tried a sock yarn of loosely twisted silk and merino wool in yellow and green, with pairs of stacked beads.

Understanding Thread Sizes

There’s plenty more to know about crochet thread. It takes a surprisingly long time to understand how the thread and yarn weight categories work (longer than it takes to progress from one crochet skill level to the next!).

Size 5 crochet thread is thicker than Size 10 and thinner than Size 3. Perhaps Size 5 is less common because by traditional Victorian standards even Size 10 was considered “coarse”. Nowadays crocheters use a lot of Size 10. Within each size, there is some slight variation in thickness among brands. Sound familiar? Crochet hook sizing is like this too.

I’ve been blogging about crochet thread types for a long time. For more details on the basics, see Cotton Crochet Thread Sizes and Equivalents and Choosing Cotton Thread for Crochet Jewelry. Also Plying and Spinning Cotton Crochet Thread. See my more recent posts tagged with crochet thread.

Posted on 2 Comments

Foundation Star Stitches Step by Step

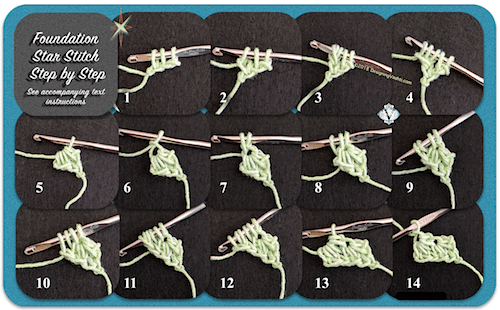
How to Crochet the Foundation Star Stitch in 14 Steps
View the full size hi-res image.

Star Stitch Foundation

It’s the perfect way to start a Starwirbel! We’re going to use it in the upcoming Starwirbel Way class this July. (CGOA Chain Link conference this July in Portland, Oregon).

For this unusual stitch, two foundation chains must be created as you complete each star. In the text instructions below, a [bracketed number] refers to a numbered photo step above.

First foundation star stitch (fstar):

Chain 3 loosely.

  • [image #1] Pull up a loop in each of the second and third chains; you have 3 loops on your hook.
  • [image 2] Chain 1 (counts as first foundation chain of first star),
  • [3] Yarn over and pull up a loop in the two outermost strands of the chain just made,
  • [4] Chain 1 (counts as second foundation chain of first star),
  • [5] Pinch it while you yarn over and pull through all 5 loops on your hook so that the last loop doesn’t tighten,
  • [6] Chain 1 (eye of this first fstar).

Tips: Pinching also helps you recognize which loops are the new foundation chain loops. Pull up loops loosely enough that a second crochet hook could fit in them.

Add more foundation star stitches:

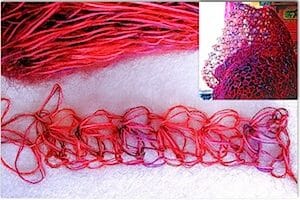
Vashti's lacy Star Stitch Foundation in a hand dyed mohair for the "Firewirbel" Starwirbel Cowl.*Pull up a loop in each of these places:

  • [7] The Eye,
  • [8] Side of star,
  • [9] Two loops of second foundation chain of star;
  • [10] Chain 1 (counts as first foundation chain of next star),
  • [11] Yarn over and pull up loop in chain just made,
  • [12] Chain 1 (counts as second foundation chain of next star) and pinch it,
  • [13] Yarn over and pull through all 6 loops on hook,
  • [14] Chain 1 for eye.

Repeat from * for each new fstar.

You might be interested in the resources page for the Starwirbel Way class.
Posted on Leave a comment

Flowerfall Vest Update

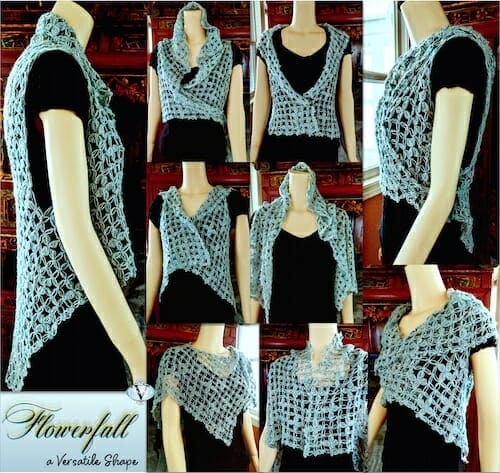
Flowerfall Vest is a versatile shape that can be worn several different ways. Nine shown here.

Remember my Crochet Class in a Vest blog post about a week ago? I’m happy to report that Flowerfall is progressing nicely through the pattern writing obstacle course. View full size image.

Snip & Unzip An Armhole Mini-Video

Watch me open the armholes after I finished crocheting the lace: Snip & Unzip An Armhole. These self-healing stitches don’t mind being cut. It’s the low-stress way to create armholes. Really! Much easier than breaking the crochet flow to place them correctly.

Special Shape

Flowerfall is a modified diamond shape: imagine a diamond with its top and bottom corners lopped off. You start crocheting the shape at the left front corner and end at the right front corner.

When you wear it upside down, the hem ends at a different place and the amount of fabric in the collar changes. (It’s also reversible.)

The armholes are generous and not centered, which increases its wearable ways. You can even treat the armholes like head openings. That results in a poncho look, see the bottom images.

An older design, the Leftfield Diamond, is the first time I crocheted this shape. That’s when I found out how versatile it is.

Side-Tied Waist Option

See the top right-hand image above? There’s a hint of a tie belt at the waist. It inspired me to add ties to the front corners for a wrap belt option. These are removable and repositionable, with a petal-like accent that echoes the chained petals in the stitch pattern. I don’t have photos of them yet.

You can keep up with Flowerfall at its project page. It’ll work out great for at least two of my class topics: 21st Century Love Knot Adventures and Self-Healing Stitches & How to Cut Them.