These are the questions I most often answer in slip stitch crochet classes and by email in response to my slip stitch patterns.
Q: How much more yarn does slip stitching use?

A: It seems to use LESS than single crochet! I tested this by using the same yarn and crochet hook size to make same-sized swatches of:
- Slip stitch in the back loop [Bss]
- Single crochet in the back loop [blsc]
- Slip stitch in the front loop [Fss]
The blsc swatch used the most yarn of all. Fss used the least yarn of all.
Q: Why doesn’t my slip stitch ribbing look ribbed?

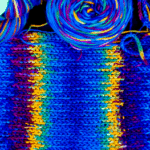
A: Some crocheters don’t see the ribs forming until they look along the row edges while stretching them apart. You need at least 10 rows, which will create 5 ribs. Until then, it might seem like nothing’s happening.
The ss rib is so corrugated, or accordion-like, that sometimes students don’t see the ribs and valleys even though they’re there! (This is what makes it such a great ribbing when you wear it, especially with wool and wool blend yarns.) At rest, the ribbing is even more compressed and springy than sc in the back loop, because sc “bodies” stand independently of each other and make wider ribs than the ss bodies do. Ss bodies mesh together more both in height and in width.
Q: Why do my edges look uneven?
A: Usually this is caused by accidentally increasing stitches, or decreasing them, or both. The best fix is to place a stitch marker in the first stitch of each new row. By the time you get to the end of each row, the end slip stitch (ss) is usually partly covered by strands from the turning ch. This makes it very easy to overlook for beginners, or even if you’re slip stitching with a new yarn. The result of missing the last ss of the row is a decrease.
It can also be tempting to think the turning chain is another ss, but that would result in an increase.
The turning chain (ch) might be the cause. Occasionally a student’s turning chs look loose and kind of messy along the sides of rows. The easy fix is to simply crochet a tighter turning ch. Some slip stitchers omit the turning ch altogether. If you do this, be sure to use stitch markers to keep the end ss from melting away even more. Personally I never omit the turning ch because I like the extra stretchiness along the row ends.
Q: My foundation chain looks loose, and each row is getting tighter. I have the right number of stitches so why does it look like I’m missing some?
A: Does your swatch feel stiff, and do you struggle to get your hook into the back loop of the next stitch? If so, then the stitches really are too tight. A common problem is when the stitches feel a bit too tight to crochet into, some crocheters reach for a smaller crochet hook to make it easier. This is the worst thing you can do. Instead, focus on making each stitch looser. The two top loops of the stitch should have a large enough space between them to fit the size of the hook you’re using. (This is what I call “hook-led gauge“. It’s an important skill for many kinds of crochet projects.)
Q: I’ve tried everything so why are my slip stitches still too tight?
A: Sometimes a crocheter is careful to make a loose ss, but then after s/he makes the NEXT ss, the previous loose one is tight! This is usually because the yarn is being pulled from the completed stitch while forming the next ss. This habit doesn’t affect other crochet stitches as much, but ss are closely interlooped, so it’s easy to affect nearby stitches in a big way.
Making each slip stitch in two steps helps some folks: 1) insert hook in stitch, yarn over and pull loop through stitch; pause, then 2) pull that loop through the other loop on your hook to complete the slip stitch. (It’s like the 2-step process of making a single crochet except that you don’t yarn over again to complete the ss.) This tip tends to help long-term crocheters who are deeply habituated to making their slip stitches (ss) quickly and tightly.
Occasionally a crocheter is not crocheting into the correct row. See the next two answers.
Q: Why am I having so much trouble finding the back loop?
A: Slip stitches tilt away from you as you crochet them in rows. This causes their front loops to stick up in the air, tempting you to crochet into them. The back loops fall lower to the back of the row. Some crocheters overcompensate and look too far back for the back loop, and choose a loop from the row below instead.
Q: It isn’t stretchy. It doesn’t really seem like ribbing. Am I doing it wrong?
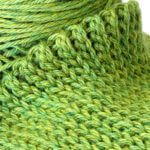
A: The most common cause is choosing the wrong loop as the back loop. If you’re choosing a loop from the row below instead, you’ll make a tighter, thicker, less stretchy, less ribbed fabric. Understandably, some new slip stitchers accidentally crochet into that tempting front loop sometimes, instead of in the back loop. Rows of Fss are less stretchy and are not ribbed.
Occasionally a crocheter mixes some single crochets (sc) with their Bss or Fss. This tends to happen when crocheting ss with the two-step method described above.
Q: Should I change to a smaller hook? Then I’d be able to crochet into the back loops easier and faster.

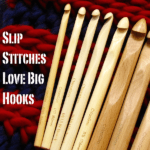
A: No. Resist the temptation! A smaller hook never solves the problem of crocheting ss tightly. If the back loop of a ss is too tight for the hook you’re using, it means you’re not using the hook size as a guide to how big (loose) your stitches should be.
Q: What happens if you do a row of Bss and then a row of Fss (slip stitch in the front loop)?
A: Try it! And try other repeat sequences like 2 rows Bss, 2 rows Fss, or 2 Bss rows and 4 Fss. Try changing colors, incorporating a single crochet row here and there, and so on.
Q: Does it matter if I chain 1 when beginning a new row? Does it matter which way I turn?
A: Sometimes it matters a lot, or a little, or not much at all. It depends on the crocheter and the project. I teach all slip stitch newbies to chain 1, and to be consistent about turning the same direction each time. Both of these habits help to make the last ss of each row easier to recognize. I prefer to turn so that the yarn is at the back of my hook instead of front.
In designs, I almost always use turning chs because I like the extra drape. See this newsletter issue: “Crochet That Pours“. Undaria and Slip Swoop slip stitch designs have 2 or 3 turning chains!
Q: How would I change the width of the Slip Slope Scarf?
A: The short answer is that this would require a redesign. Many crocheters could figure out how to do this, using the Slip Slope Scarf free pattern as a guide. The best thing to do is to crochet two complete short row “wedges” of Slip Slope. After that, not only will you have a swatch of how wide your scarf would come out if you change nothing as a starting point, you’ll also understand the simple system of short rows, and can then try your own variations. You could simply add or subtract a stitch repeat; or you could also shorten each short row more gradually, or less, to create wedges of different sloping angles.
Q: Does slip stitch ribbing get any easier/faster?
A: Yes! Slip stitch crochet is a little faster than knitting, it’s as fast, or a bit slower than sc ribbing, depending on the crocheter. Fss is faster than Bss. All looser ss is faster than all tighter ss.
Some ways to improve speed:
- Focus on the unique rhythm of slip stitch crocheting until it becomes an ingrained tactile/muscle memory.
- Make the ss in ONE step instead of two for a swift, fluid motion. (Make sure your ss are consistently loose first.)
- Use a pointy-headed crochet hook. You can customize your crochet hook by filing the head of it.
Some ways to increase fun:
- Use bulky yarn and jumbo crochet hooks for quick projects.
- Listen to audiobooks & podcasts.
- Add a pinch of stitch ‘spice’: change colors; short rows; use a fun or luxe yarn; mix different stitches; add beads!
