Posted on 1 Comment

Crochet Herringbone Chains Class Resources

Up to date as of 5/14/2022. This page will be updated again before class time and possibly after. 
View high-res versions of Herringbone Chains images in its photo album.
This page is a conveniently clickable group of things I mention in the new Crochet Herringbone Chains class. This two-day class will be held Wednesday, May 18 & Thursday May 19, 2022 at 1:00 pm – 2:00 pm Central Time.  — Vashti Braha

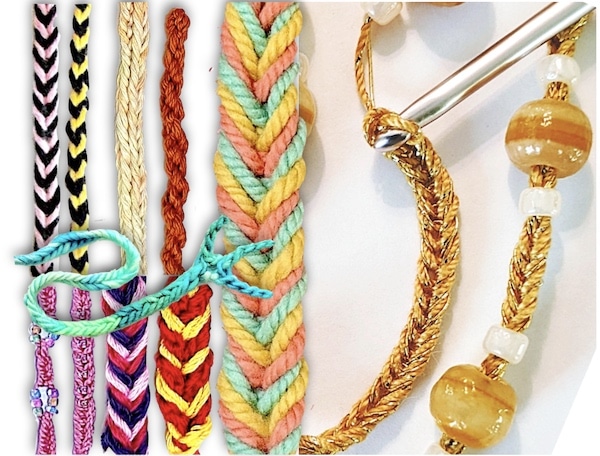
A Unique & Versatile Stitch

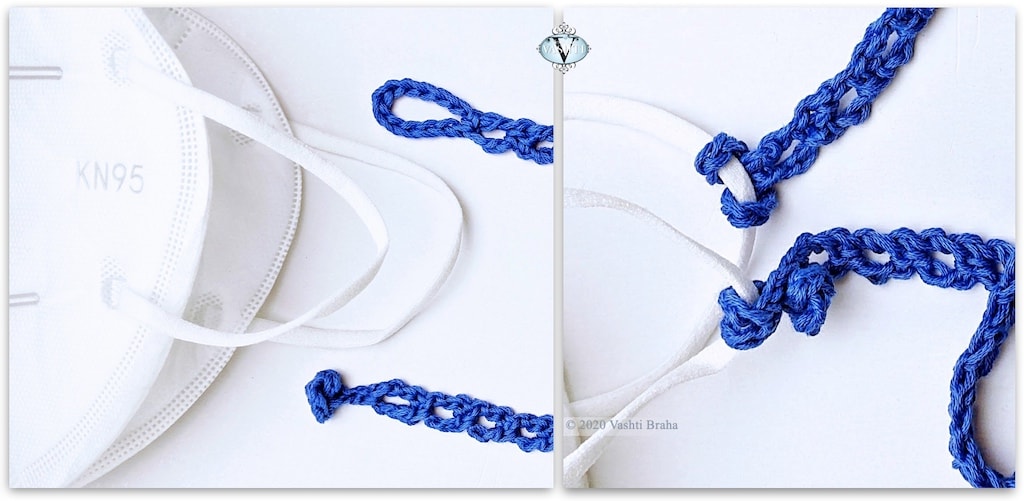
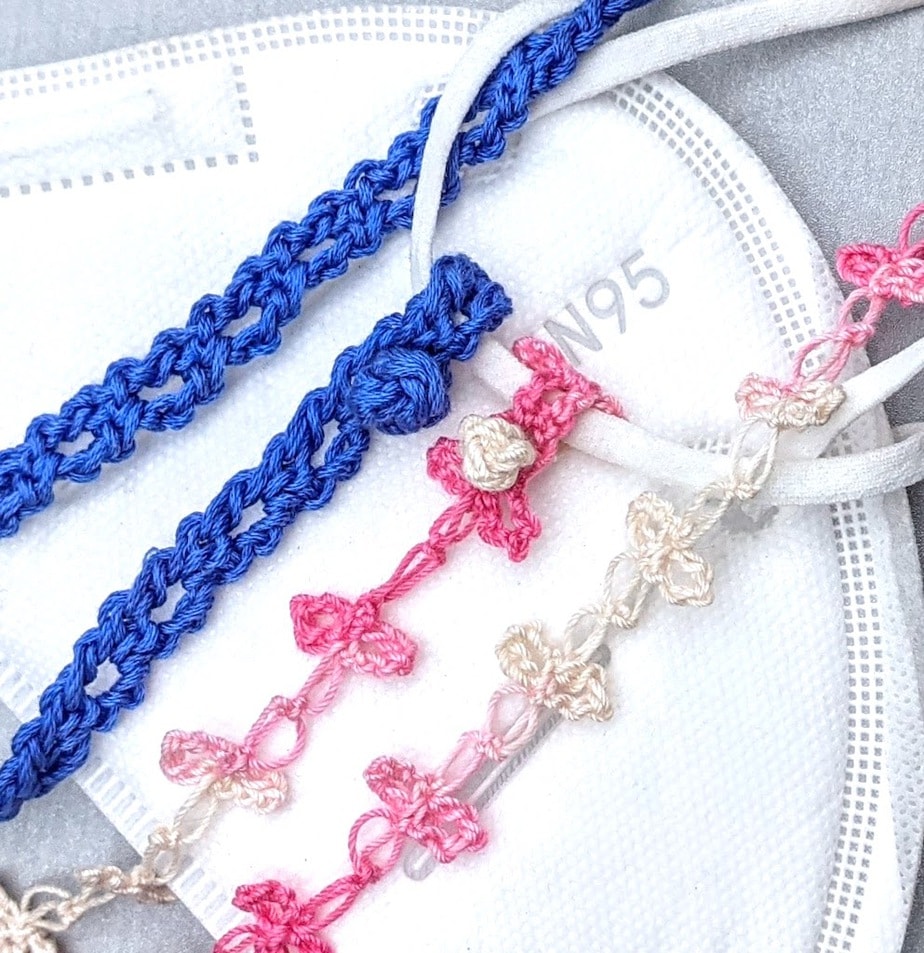
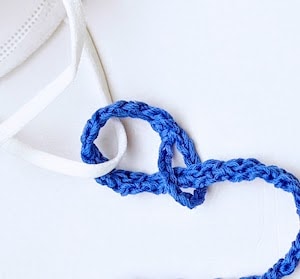
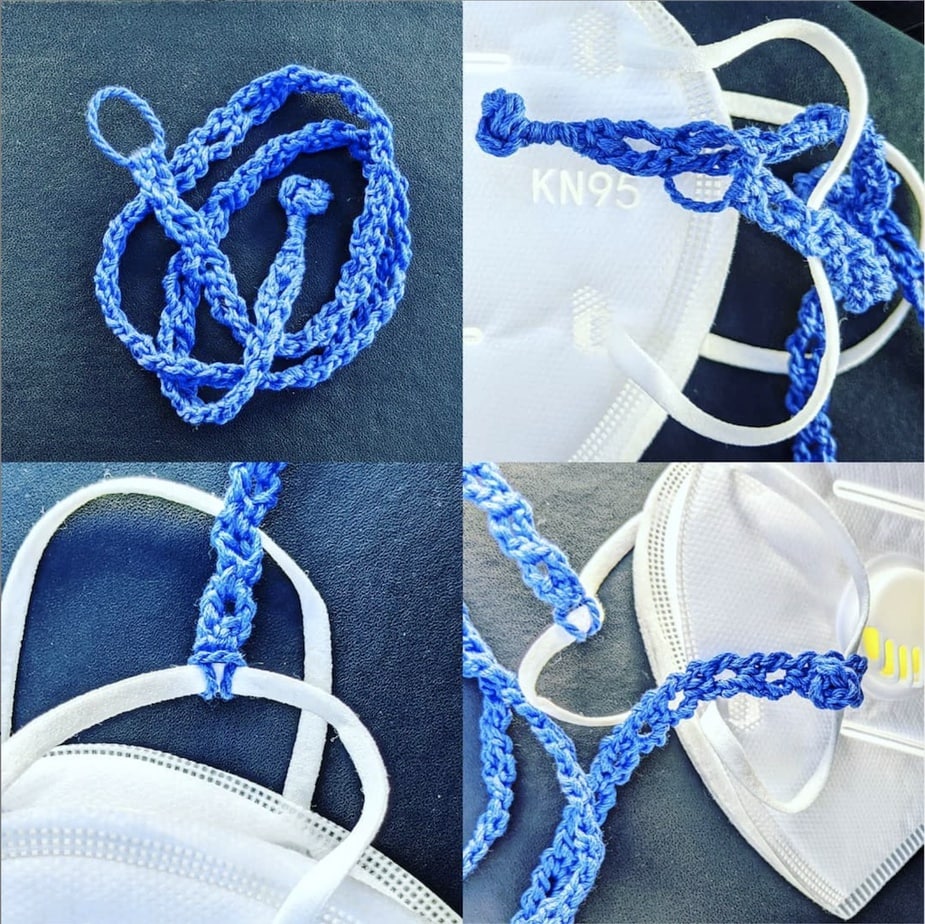
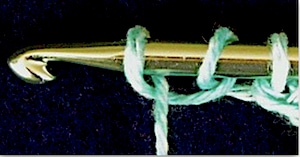
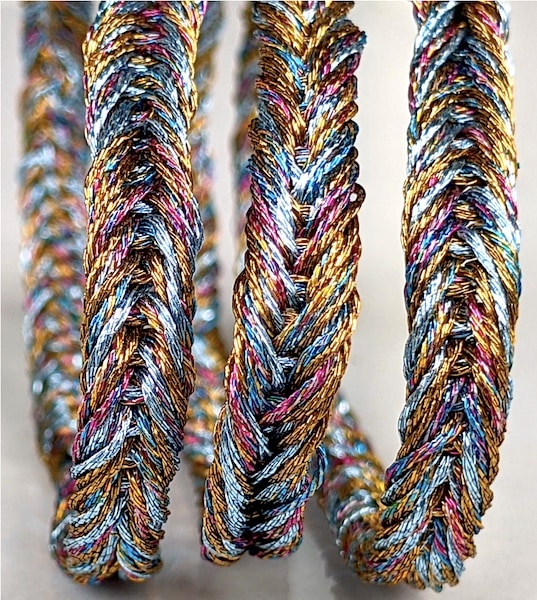
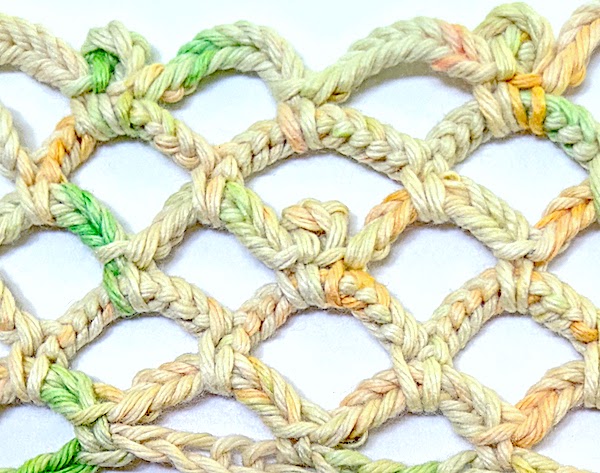
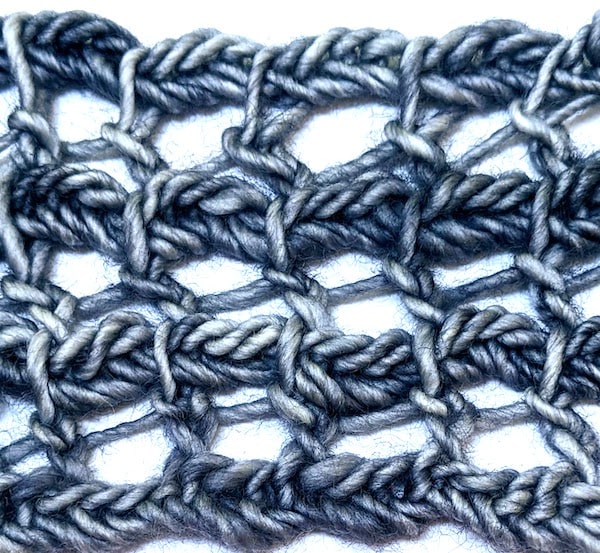
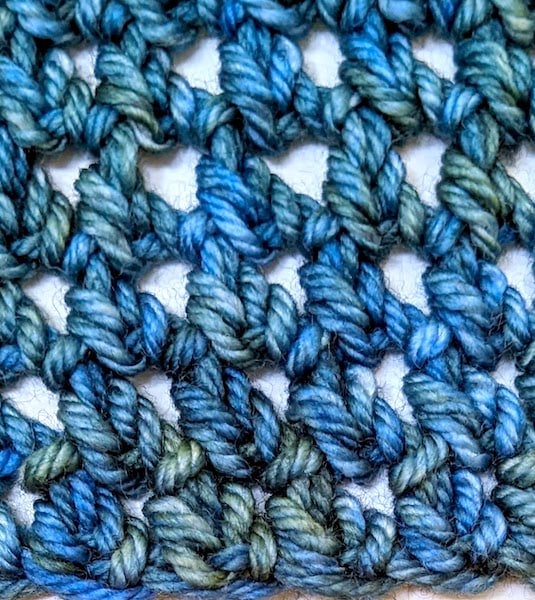
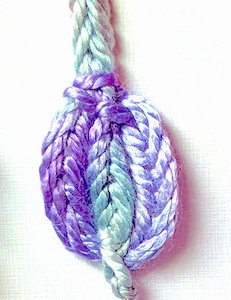
Herringbone chains are naturally sleek, strong, dense and flatter than regular crochet chains. This makes them as useful for functional reasons as for decorative ones. They twist up less than regular chains. This type of chain stitch has the same structure as the decorative military bugle cord that knot tyers traditionally make. They have a single bugle, double bugle, triple and more; we’ll learn how to crochet all of these!

Herringbone Chains on a big scale in three colors of chunky wool
Herringbone Chains on a big scale: triple-herringbone variation in three colors of chunky wool

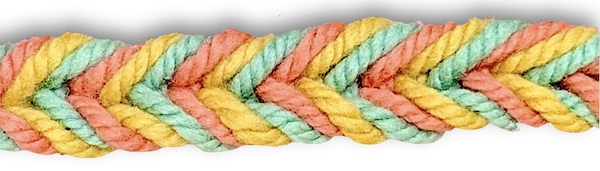
This handy new crochet stitch resembles fishtail braids and soutache cord. When crocheted very loosely, it also looks like nålbinding.

Projects & Stitch Patterns

(In progress.)

Crochet Herringbone Chains and regular chain stitches
  1. Nankeen Necklace (2022).
  2. Tunisian Herringbone Zegue (2022).
  3. Lizzie Cuff (2021). Pictured at the top of this page.
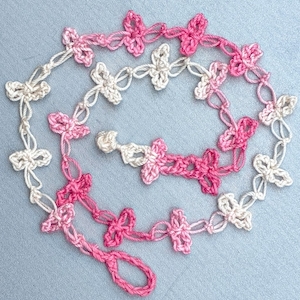
  4. Beaded Herringbone Barefoot Sandals (2019), at right (or below if you’re on mobile).
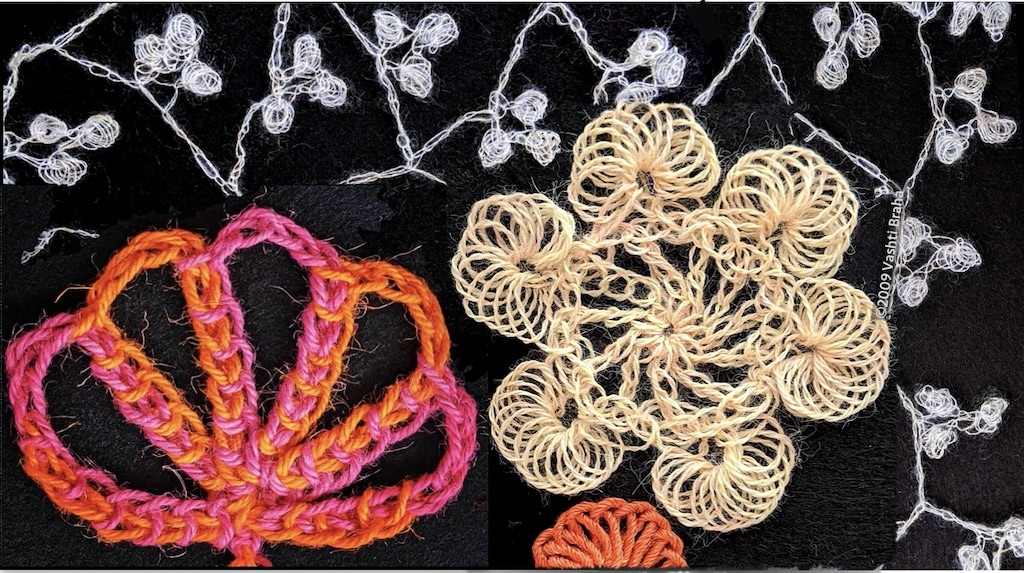
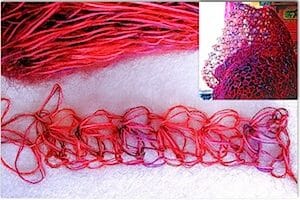
  5. Rainchains silk skinny scarf (2018). See close up of raindrop in gallery, above.
  6. Lizard Cord (2018).

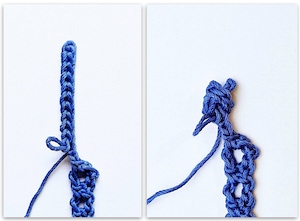
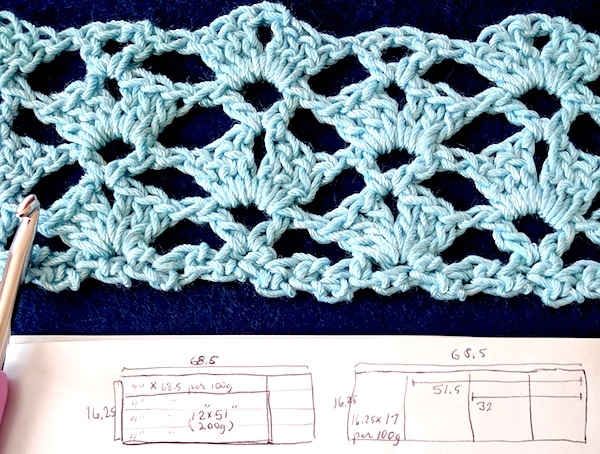
Herringbone Chain Swatches & Tests

Eleven Herringbone-Chain Cord experiments in fiber, color changes, beading, and stitch size
Herringbone-Chain cord experiments with beads, stitch size, color & fiber changes.

Flickr photo album for this class. A great way to see class material at full resolution, and an array of new uses and variations. I use stitch albums like this one for my own reference. I’m continually creating swatches and photos to add to this album.

My Pinterest Herringbone Chains Pin Board created for this class topic. It compares the look of herringbone chains with other arts–beading, leatherwork, embroidery, etc.

Recommended Articles

  • “Fancy Cords in 360°” Crochet Inspirations Newsletter Issue #17 (04/28/2011; most links in it are out of date)                  
  • “Tweak Those Gaps Along Row Edges” Crochet Inspirations Newsletter Issue #25 (08-2011; most links are out of date)
  • “Effect of ‘Sproing’ fibers on stitches”: Vashti’s Crochet Inspirations Newsletter Issue #11 (Feb 3 2011; links in it are out of date) 
  • “Wish Bracelets: Why Not Crocheted?” Vashti’s Crochet Newsletter Issue #69 (07/04/2015; most links are out of date)
  • “What IS Crochet, Really?” Vashti’s Crochet Newsletter Issue #103 (10/2020)  

Inspiration Boards for this Class

Still need to register for this class? Register with CGOA. This is a NEW two-hour class held online over two days: Wednesday, May 18 & Thursday May 19, 2022 at 1:00 pm – 2:00 pm Central Time. Registration closes 5/15/22 or when the class is filled.

Posted on 6 Comments

Crochet Mask Lanyard, A Hook-Only Free Pattern

Crocheted fasteners before and after attaching to mask

This reversible crochet mask lanyard attaches to each ear loop of a face mask with 100% crocheted fasteners. No sewing on buttons or metal hardware!

Wear the lanyard around your neck. If you remove your mask, there it hangs, already found, like wearing reading glasses on a chain.

The chain loop end attaches with a lark’s head knot, explained below. The other end has a crocheted peg-like “shank” button. It loops around the other ear loop and buttons into a stitch space of the lanyard. This makes the length easy to adjust. The mask loops can be any thickness.

Three Favorite Things

My favorite thing about this pattern is that it’s “hook-only”: 100% crochet, even the fasteners.

My second-favorite thing is it’s a chance to use my new rosebud button idea for a project. It’s reminiscent of a Chinese frog closure, but like I say, no sewing! Also, unlike some button knots, zero chance of it coming unknotted.

Crochet mask lanyard button in two thread sizes
Free crochet mask lanyard pattern below is for the blue one in sport weight cotton yarn.
The pink one in size 10 thread uses parts of the same pattern.

And, third, this pattern doubles as a versatile template. I’m already borrowing individual elements from it. The lacy pink love knot lanyard has the same chain-loop end, rosebud button end, and even a few repeats of the blue cord to serve as buttonholes (near the button end). If you have a cord pattern you like, add a few elements from this pattern to keep it hook-only.


Crochet Mask Lanyard Pattern

A PDF version of this pattern was emailed to members of the Crochet Guild of America (CGOA) as a part of a Holiday Shopping Guide, December 1, 2020.

Materials 

  • About ten yards of a sport weight (CYC Size #2 Fine Weight) yarn. Shown (in blue): Lang Fiorina (100% cotton, 135 yds / 125 m per 1.75 oz/50 g)
  • Size E / 3.5 mm hook
  • A stitch marker is recommended for the first few rows
  • Yarn needle

Abbreviations used

Pattern uses US terms. UK/AUS terms are in { }

  • ch = chain
  • dc = double crochet {UK: treble}
  • hdc = half double crochet {UK: half treble}
  • sc = single crochet {UK: double crochet}
  • sl st = slip stitch
  • st = stitch
  • yo = yarn over {UK: yarn over hook}

Gauge 

8 pattern repeats (row pairs) = 4″ {10 cm}. Exact gauge is not necessary for this pattern to work.

Size

21 inches {53.34 cm} long. Length is determined by the number of pattern repeats so it’s easy to choose a different finished length.

Pattern Notes

  • Pattern begins at the fastening loop and ends at the other end with the button. The strap between these two ends has a two-row repeat: it’s a long narrow column of just one stitch per row.
  • To begin each new row, turn your work clockwise. (If you’re crocheting left handed, turn the other way.) The yarn will end up in back of the hook and turning chains instead of in front of them.

Instructions

Time needed: approximately 30 minutes


Chain 12. Hdc in 12th ch from crochet hook to form a ring.
This is the fastening loop.

  1. Ch 3, dc in the same ch as the hdc.

    Simple chain loop lanyard fastener close up

  2. Ch 1, turn, place marker in bump of ch and in a top loop of dc, sc in space between dc and ch-3.

  3. Ch 3, turn. Dc in bump of turning ch-1 and back loop of dc (the marked loops). 

  4. Ch 1, turn, move marker (until you can identify the loops to crochet into), sc in space between dc and ch-3.

  5. Repeat steps 3 & 4: 38 times or until it’s the length you prefer.

    Do not fasten off.

  6. Rosebud Button

    Crochet all stitches tightly. Ch 13, sl st in the front loop of the 2nd ch from crochet hook, sl st in the front loop of each of next 10 chs. Leave last ch unworked to form the “shank” at the button’s base. Remove crochet hook from loop for the next step. Place marker in loop to secure.
    Tie the strip of 11 sl sts into a simple overhand knot so that the tip of the sl st strip peeks out. Ignore how it looks for the moment. Replace hook in loop and in two or three strands of the sl st tip, and tightly sl st around the unworked ch-1 of shank. (Knot will bend over.) Sl st in same ch, sl st in nearest next stitch, fasten off, and weave in ends.
    Tug on sections of the button knot to even it out; plump it up to make it cute. The goal is to center the shank under a mushroom cap shape. Spritz with water to set it.Crochet Rosebud Button steps 1 & 2 of 4 © Vashti Braha 2020

  7. Attach to face mask

    Slide loop end under an ear loop of the mask. Feed the button end through the loop end and pull the full length of the lanyard through so that the loop wraps around the ear loop tightly with a lark’s head knot.
    Slide the button under the other ear loop of mask. Fold button over and press it through one of the nearby spaces of a dc row. (Reverse these steps to release lanyard from mask.)
    If the length you made doesn’t fit over your head, attach the button end after you’ve placed it around your neck.How to attach crochet loop to mask ear loop

  8. Variation I

    Wrap the fastening loop with the starting yarn end, and wrap the shank of the button with the other yarn end when you’re about to weave in the ends. It’s a nice look. I did this for the button shank of this prototype.Crochet mask lanyard prototype shows a wrapped fastening loop and button shank.

  9. Variation II

    Use your own favorite crochet cord pattern and incorporate sections from this pattern. Here’s how the complete pink love knot example looks:Crochet mask chain of lacy pink love knots and crocheted fasteners.


FAQ About Crochet Mask Lanyards

Why crochet a face mask lanyard? Is it better to crochet one?

Crocheting a lanyard is easy and fast, especially when you can also crochet the fasteners. Crochet makes a strong and durable lanyard with very little yarn (about ten yards).

Are crocheted lanyards washable and comfortable to wear?

Yes: use a soft, washable yarn. It’s comfortable and almost weightless. I forget that I’m wearing it sometimes.

How much yarn do I need to crochet a mask lanyard?

The pretty blue one shown here required only ten yards of a sport weight cotton yarn, and a size E (3.5 mm) crochet hook. Even the lanyard clips are crocheted!

What’s the difference between a mask holder, mask extender, mask chain, and mask lanyard?

“Mask holder” and “mask extender” usually refer to a small strip that has a button at each end. Wear it to eliminate pressure or irritation behind the ears. It shows at the back of the head where the ear loops of the mask hook around the buttons instead of the ears. Another term is “ear saver”.
“Mask chains” and “mask lanyards” drape around the neck like necklaces. It’s the same idea as wearing a badge holder, or a chain for reading glasses.

How long does it take to crochet mask lanyards?

The simplest one of all—just crochet chain stitches—would take 5-10 minutes. The fancier one shown here took 30 minutes.

Do I have to sew buttons or metal clips onto a crocheted mask lanyard?

No. It’s possible to crochet the whole lanyard, even the fasteners! That’s what it means when a crochet project is “hook-only”.

Posted on 8 Comments

Limpet Stitch: Crochet Half Hitches (Issue 3)

Limpet stitch crochet swatches: an airy net, a lotus-shaped 2-color fan of half hitches, lacy wheel with big limpets around the rim
Limpet Stitch crochet issue 3 original front page
How the original looked. Issue #3 September 2010.

Updates October 20, 2020: I expanded the Timeline entries for 1977, 1982, and 1991.


The limpet stitch crochet topic evolved dramatically in the ten years since I wrote my third newsletter about it. As of September 4, 2020, this greatly updated version is now my ultimate resource page for crocheting limpets, limpet variations, and more reasons to crochet with half hitches. It even has a timeline and a table of related terms.

“Limpets, those cheery, little-used sideways shells.”

Sue Perez (a.k.a. Mrs. Micawber)

Issue #003 went out to just over 370 subscribers in 2010. That’s about 70 more than for issue #002. I remember feeling very encouraged by that. One of my early goals was to find likeminded crocheters. Back then, the only folks talking (enthusiastically!) about the limpet stitch, like Mel, Myra, Barbara, Margaret, and Pippin, were members of FFCrochet, the International Freeform Guild (INTFF) yahoo group. Limpet stitches have expanded their reach, as you’ll see below.

From the Archives: A Very Different Kind of Crochet Stitch

Vashti’s Crochet Inspirations Newsletter, Issue #3 (First Published September 30, 2010)

I’ve been looking forward to writing up a little love letter to the Limpet Stitch. It’s not like any other crochet stitch because it is a fundamentally different way to add loops onto the crochet hook. (September 2010)

The first thing a crocheter learns, after making a slip knot and putting the loop on a crochet hook, is to yarn over (wind or wrap the yarn around the crochet hook). We can’t make any basic stitches without it. Strictly speaking there’s only one way to do it. If you wind the yarn around your hook the opposite direction, it’s a yarn under. (Read all about yarn overs, yarn unders, and reasons to use both.)

There are other ways to add new loops to the crochet hook beside yarning over (or under). The one we use for limpet stitch crochet is challenging at first only because changing how you yarn over feels very alien! It’s actually simple, easy, and quick to do. The limpet stitch has an avid fan club.

Beyond the Standard Yarn Over

Half hitch or crossed loop on crochet hook
This is a Tunisian crochet hook but any crochet hook is fine for crocheting limpets.

From a crocheter’s point of view, limpet stitch yarn overs have an added half-twist in them. In the photo at right you can see how the two loose loops on the hook have a little twist at the bottom of them. Adding the half-twist as you yarn over is a neat trick.

This simple little twist is powerful. It is the basis of all needle lace, macramé, and tatting. It’s fundamental to sewing and embroidery. Latch hook rug making requires it, and bobbin lace starts with it. It’s the simplest cast on in knitting.

Making room for it in our crochet toolbox means reclaiming the DNA that crochet shares with these other string arts. You may wish to make room for two more, like I have. The little half-twist can turn in two different directions: to the left (counterclockwise), or to the right (clockwise). The two loops in the photo turn to the left, as if a cursive letter “e” is written backwards: “ɘ”.

Continue reading Limpet Stitch: Crochet Half Hitches (Issue 3)
Posted on 2 Comments

Foundation Star Stitches Step by Step

How to Crochet the Foundation Star Stitch in 14 Steps
View the full size hi-res image.

Star Stitch Foundation

It’s the perfect way to start a Starwirbel! We’re going to use it in the upcoming Starwirbel Way class this July. (CGOA Chain Link conference this July in Portland, Oregon).

For this unusual stitch, two foundation chains must be created as you complete each star. In the text instructions below, a [bracketed number] refers to a numbered photo step above.

First foundation star stitch (fstar):

Chain 3 loosely.

  • [image #1] Pull up a loop in each of the second and third chains; you have 3 loops on your hook.
  • [image 2] Chain 1 (counts as first foundation chain of first star),
  • [3] Yarn over and pull up a loop in the two outermost strands of the chain just made,
  • [4] Chain 1 (counts as second foundation chain of first star),
  • [5] Pinch it while you yarn over and pull through all 5 loops on your hook so that the last loop doesn’t tighten,
  • [6] Chain 1 (eye of this first fstar).

Tips: Pinching also helps you recognize which loops are the new foundation chain loops. Pull up loops loosely enough that a second crochet hook could fit in them.

Add more foundation star stitches:

Vashti's lacy Star Stitch Foundation in a hand dyed mohair for the "Firewirbel" Starwirbel Cowl.*Pull up a loop in each of these places:

  • [7] The Eye,
  • [8] Side of star,
  • [9] Two loops of second foundation chain of star;
  • [10] Chain 1 (counts as first foundation chain of next star),
  • [11] Yarn over and pull up loop in chain just made,
  • [12] Chain 1 (counts as second foundation chain of next star) and pinch it,
  • [13] Yarn over and pull through all 6 loops on hook,
  • [14] Chain 1 for eye.

Repeat from * for each new fstar.

You might be interested in the resources page for the Starwirbel Way class.
Posted on Leave a comment

CGOA’s Lotus Yarn Pattern (Last Day Free!)

My swatch in Crystal Blue DesigningVashti Lotus yarn, and sketches of scarf and yarn amount options

Happy NatCroMo! (National Crochet Month)

Designer Andee Graves featured our Lotus yarn with her new Shining Day Wrap crochet pattern. She’s one of CGOA’s 2018 board members. At her blog she explains,

“There will be 3 other patterns available free for CGOA members only, each only for 1 week. Be sure you’ve renewed your membership or joined CGOA before you miss out!”

Today is the last day you can get this pattern for free.

Why? It’s part of the 2018 CGOA NatCroMo celebration and this one is free for everyone—CGOA members and nonmembers.

Shining Day is crocheted in a lacy stitch pattern that is flowing wonderfully off my [pink] hook. I think it flows so much because you crochet into chain spaces at an easy gauge.

A Flowing Foundation Row

This wide lacy rectangle is worked from the center out on both sides of the foundation row. You’ll have matching ends, each with a pretty picot border.

For a design like this, you wouldn’t want the foundation chains to look noticeable or feel tighter than the rest of its flowing lace. No problem! Andee uses a great type of foundation row. It’s not only stretchy, it has a nice texture that blends in.

About Yarn Amounts

Andee used four 100g. balls of Lotus to get a wrap that is 16.25″ X 68.5″. Four balls is 1,024 yds (4 X 256 yds).

The Cone Idea

Some folks have wisely been ordering Lotus Z-Bombes, which are value-priced one-pound cones. One pound of Lotus is a bit over 1,100 yds, or about 4.5 balls. (I always allow a Z-Bombe to go a bit over a pound after subtracting the weight of the cardboard. I write the exact unique weight of each Z-Bombe on its tag.)

The Lotus Snacks Idea

A floral six-pack: Orange Luxe, Grenadine, Pink Sugar, Peachy SHeen, Rose Red, Lala Yellow.
One of several springtime color combos!

In my recent newsletter issue #90, I mentioned a multicolored Shining Day using a six-pack of Lotus Snacks. I think spring fever made me do it. I kept picturing a riot of floral colors like I do every spring.

Unfortunately I miscalculated the yarn amount for that in the newsletter. The mini Snacks are one-third the size of a regular Lotus ball: 85 yds per 33 g. Not one-half.

CORRECTION: A Six Pack O’ Snacks totals 512 yds, not the 768 yds I stated in the newsletter.

My 512-yd. Shining Day

Andee Graves aka Mamas2Hands produced a lovely PDF to match her pretty lace wrap design.
Page one of Andee’s pattern. Isn’t it pretty? 

See my drawings above in that photo of my light blue swatch? That’s me figuring out that a two-ball (same as six Snacks) Shining Day would come out to 12″ X 51″ (or a bit longer).

My swatch is 11.5″ wide. I needed 46 foundation stitches to do 4 stitch pattern repeats.

Andee’s Shining Day pattern is definitely worth paying for if you miss the free version. It includes stitch charts and a photo-tutorial on making the picots.

Join the CGOA MEGA CAL group in Facebook!