See gallery below. Here’s what July was all about: planning for my first Designing Vashti show booth. Then building it. Then meeting lots of people! Then breaking it down.
My regular blogging, newslettering, and crochet designing resumes as soon as I finish recovering from that big adventure!
Click each photo for full view.
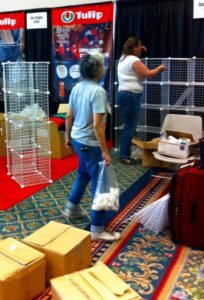
Building the Booth with metal grid panels. that’s Doris Chan in the foreground, Linda Dean behind her.
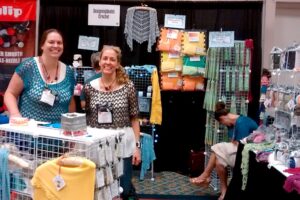
First full day in the completed booth! That’s Linda and me standing, and my knitting niece Ashley in the chair.
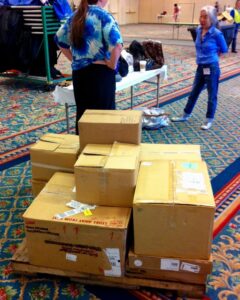
Booth is all boxed up and fits on one pallet.
The Event:
The Knit and Crochet Show (a.k.a. the annual Chain LinkConference of the Crochet Guild of America/CGOA), July 22–25 2015. This year in was in San Diego CA.
Want to know about the 2016 show? July 13–16 in Charleston, South Carolina. Why YES, I’ll be there!! So will the DesigningVashti booth!
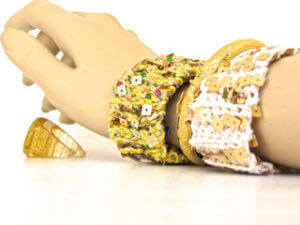
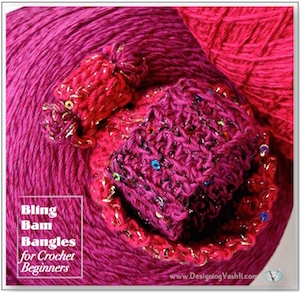
Crocheting *Bling* Bangles, My Cheerful Distraction
I’ve had several stressful challenges this month. Each evening I curl up with super sparkly yarn, crochet hooks, and simple stitches. I go to bed in a merry mood and drift asleep picturing other stitches or color combinations to try.
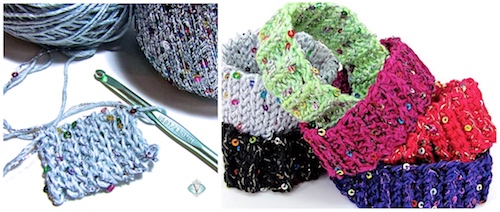
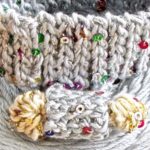
As I described in yesterday’s post, these slip-on crochet bling bangles are based on the simplest ribbing stitches. The red one is rows of single crochet in the back loop only (outside of the USA it’s called a double crochet). The silvery one in progress is rows of slip stitch in the back loop only.
* Twinkly * sequined * ribbing * is very satisfying.
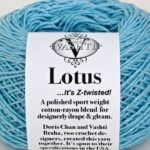
It also makes sense for a slide-on bracelet! Ribbing is nice and stretchy. I had some sequined carry-along metallic threads in my yarn stash. Now is the perfect time to crochet a *bling* strand of Premier Yarns Enchant with a strand of…my Lotus yarn! I chose Lotus for its cheerful colors that can stand up to all the bright bling action.
I also chose Lotus because it’s sport weight: once you crochet double-stranded (with two strands of yarn held together), you naturally make thicker stitches. I didn’t want super thick stitches for these small crochet bling bangles. The bling string I used is slightly thinner (“fingering weight”).
The yarn math: Add 1 sport strand + 1 fingering strand and you get “DK wt,” a.k.a. “light worsted.” A G-7 (4.5 mm) hook is a good all-purpose size to use for this weight.
Let’s Talk About * Sequin * Management *
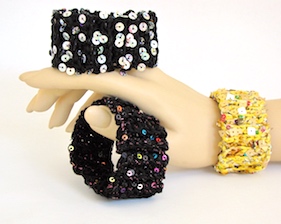
I tested the sequin theory with these. See the giant square sequins? It took longer to crochet. Worth it though!
Sometimes, sequins get in the way of smooth, stress-free crocheting. If sequins can catch on a loop while you’re trying to pick up crocheting speed, it slows things down.
The secret is pairing a thick enough yarn with a sequined strand to buffer or neutralize the sequins. To me, “thick enough” means it roughly matches the diameter of the sequins. The tiny sequins in the Enchant yarn match the thickness of my Lotus yarn. Lotus gives the stitch loops smooth passage through other loops.
Result: the sequins only pile on more joy. No interruption of the joy.
The Right Kind of * Stretchy *
Enough stretch puts the bangle in crochet * Bling Bangles *—literally. A bracelet earns the right to be called a bangle when it can be slid on and off instead of requiring some kind of clasp.
The bling string (Enchant) has zero elasticity. I expected this (it’s typical of carry-along bling strings) but didn’t know its strength and durability. To reduce the stress that could be put on the bling strand, I avoided stretchy yarns like wool. DesigningVashti Lotus has no stretch either, so these two yarns are nicely matched: Lotus won’t let my crochet project stretch more than the Enchant strand can, so both yarns will share the wear and tear equally.
It’s the crochet stitches that provide all the necessary stretchiness of a slip-on bangle! That way I can use whatever yarns I wish. The crochet * bling bangle pattern * includes several kinds of ribbing for beginners and beyond.
This photo is from a mock art gallery-style photoshoot, 2012 (See the whole set in better resolution here). Aslip-on cuff experiment with mock bracelet clasp became the prototype for Bling Bam Bangle, my cheerful holiday distraction in Dec. 2014.
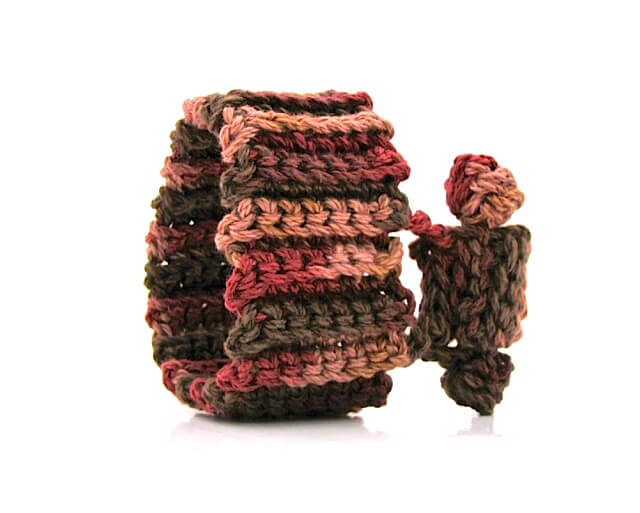
Crochet Bangle from the Archives
It makes me giggle. “Bam-Bam” began as a test of ribbing stitches for a simple crochet bangle in 2012.
I remember reasoning that if a crochet bracelet is stretchy enough, a clasp is optional. You could just slide it on and off your wrist—i.e., a crochet bangle.
A back-loop slip stitch rib (Bss) version was planned after this back-loop single crochet rib (Bsc) one—minus the “Bam-Bam” part.)
Hold 2 Yarns together
The “Bam-Bam” Part
Remember Pebbles and Bamm Bamm? Back in September 2012, I was preparing to teach a crochet jewelry class at a CGOA conference in Reno NV.
I don’t remember where my head was at, but after completing its band, I amused myself by free-forming the fake clasp. It made me think of Bamm Bamm Rubble, the baby boy who hit everything with a stone club in the The Flintstones cartoon.
Then, to test a new light box, I photographed it as if it’s an art gallery piece, which amuses me even more!
This is its project page in Ravelry. I’m writing a holiday pattern for the Bam-Bam Crochet Bangle now. It makes me giggle too much to keep it to myself.
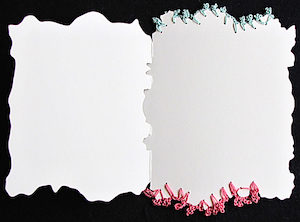
Isn’t this greeting card crochet experiment lovely?
I made it about four years ago. The recipient was touched by it. I’m glad I took a photo before I gave it away—I smile whenever I see it.
My goal was to try crocheting a fine irregular edge in a freeform way. (I had already crocheted chunky, evenly-spaced borders into other things, such as with the Venus Flytrap Action Toy, and the Cheerful Chores.) tablecloth
The first step was to punch tiny holes randomly spaced along a portion of the card’s irregular edges. Instead of poking holes with a needle, I found a 1/16″ single hole paper punch at my local craft store. I’m glad I did. The holes are clean-edged and look like the card came with them.
Randomly spaced holes can vary in distance from each other, and from the edge of the card. When you’re crocheting into these holes, you just have to chain more to get to a hole that’s farther away, and chain fewer to get to a closer hole.
In standard pattern language, this is eyeballing (i.e. freeform), because it’s adjustable instead of being a fixed pattern. This automatically puts it in the Intermediate Skill Level category.
Sometimes I slip stitched (sl st) into a new hole, then chained one (ch 1) so that I could sl st again into the same hole.
The picot petals are just long picots. I added extra chains before the sl st or single crochet that closes the picot.
Greeting card crochet is a useful Intermediate Level skill to know for other kinds of crochet too.
I’ve listed a few other links below to other crocheters’ blog posts about greeting card crochet edgings. Each blogger describes a similar step of adjusting the number of chains to accommodate the space between the holes.
I’m looking over the photos I’ve taken so far of my newest Tunisian crochet design. Lately, the weather here has created some moody lighting. Have a look at these!
My first filet-like Tunisian crochet lace in opalescent mohair and silk.
I’m calling it Aery-Faery because it is faerie-like and diaphanous, like fairy wings. I’ve crocheted most of it while watching the first season of Once Upon a Time. In fact, I’m pretty sure the idea for this design first came to me while watching the show.
Scarf shown draped like a stole. It’s very stretchy!
The yarn is divine for a lacy Tunisian crochet scarf.
It’s Artyarns Silk Mohair Glitter; a strand of Lurex is plied with the silk and mohair. It’s particularly fine and smooth. The dyeing is gorgeous. You can’t tell from some of the photos, but it’s the subtle colors of a milky opal. The colors shift like they do in an opal, too.
The Aery-Faery pattern draft is done. I’m testing a variation tonight and have the final proofreading to do before sending it off for tech editing and testing.
Site-wide Search
Vashti’s Crochet Shop
Get the Newsletter
Sign up to receive Vashti’s Crochet Inspirations Newsletter in your inbox monthly.