Posted on 2 Comments

Crochet Beginners’ Tip: Slip Stitch Fake Facts

Beginner Crochet tip: tune out the fake facts still being circulated about our most basic and versatile crochet stitch, the slip stitch!

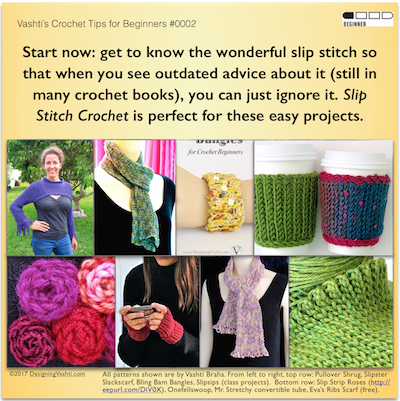
About Today’s Tip for Crochet Beginners

I’m going to unpack that “outdated advice” part in the tip pictured above.

For reasons I still haven’t figured out, misconceptions and outright errors (“alternative facts”?) about slip stitches are still repeated uncritically in English-language crochet books.

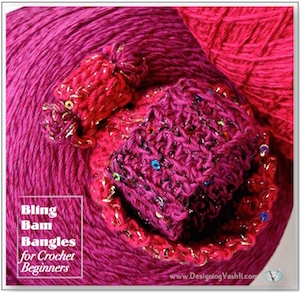
This has been going on for decades. Think about how it affects whole generations of crocheters. It’s the only reason it took me 30 years to try crocheting a whole swatch of just slip stitches. I was immediately smitten. My first slip stitch design was the 2004 Pullover Shrug (the cropped purple top I’m wearing in the tip above).

I have distilled every fake fact about slip stitches into the following four sentences, below. I begin my Slip Stitch Crochet 101 classes with them so that we can deal with them head on.

Can you spot all the unhelpful advice?

  1. There is one kind of slip stitch and you crochet it tightly.
  2. It is useful only occasionally, for a few things, such as joining a round, closing a picot, or seaming.
  3. Don’t bother trying to make anything with it, it has no height.
  4. It doesn’t really count as a stitch at all; it’s a nonstitch

(I underlined the fake facts to help you.) This false information discourages crochet beginners and all crocheters from exploring only slip stitches, not other basic stitches. Why? It’s not because slip stitches are tricky for beginners. It’s the most basic crochet stitch of all, along with the chain stitch! In my classes, the experienced crocheters struggle more—but that’s just due to the years of misinformation.

The more I explore slip stitch crocheting, the more insight I get into all crochet. This is why I want every crocheter to know about it. (The things you can make are also awesome.)

New Rules About Slip Stitches

1. Think of slip stitches as a group of stitches.

Lattice textured border of a 100% slip stitch crochet mobius "Bosnian" style (in rounds with no turning).
“Bosnian” crochet: slip stitches crocheted in the round with no turning.

Slip Stitch Crochet is actually a whole technique. When you know this, you can retain what you learn about them easier. It also spurs innovation, and aids pattern writing. I use the abbreviation SSC, as do others in the international SSC community.

Slip stitches look, feel, and behave very differently when crocheted with turning or without (“Bosnian”), and in just the front or back loop or both (or between stitches!). Invert them or twist their loops for more slip stitch types.

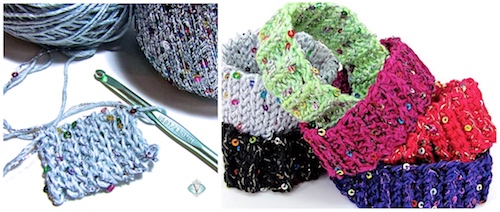
2. Go up at least two crochet hook sizes to crochet them loosely. 

Big-hook slip stitch is especially fun! Start with your bounciest wool yarns. 

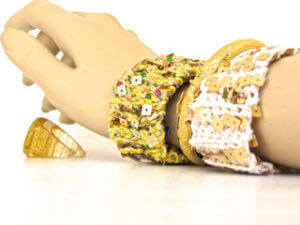
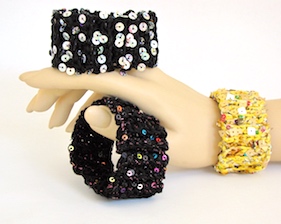
3. Slip stitches are exceedingly versatile, useful, and pleasing for many of the things crocheters make.

In fact, slip stitches are often preferable to other stitches, such as for ribbing, or for a thin, supple fabric that conserves yarn.

A slip stitch may also be fine for joining a round, closing a picot, or seaming, but not always. For example, slipping a loop through to join is more invisible than a slip stitch. A single crochet sometimes closes a picot better with some yarns or for certain patterns. For seaming, sometimes alternating a slip stitch or single crochet with a chain-1 is better. (I also like to use inverted slip stitches for seams.)

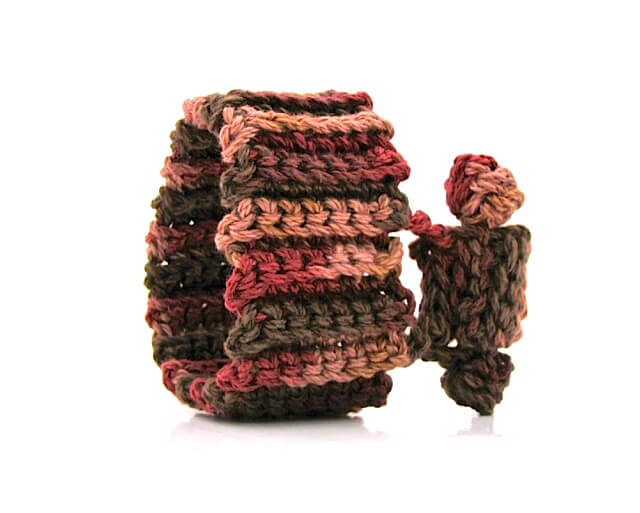
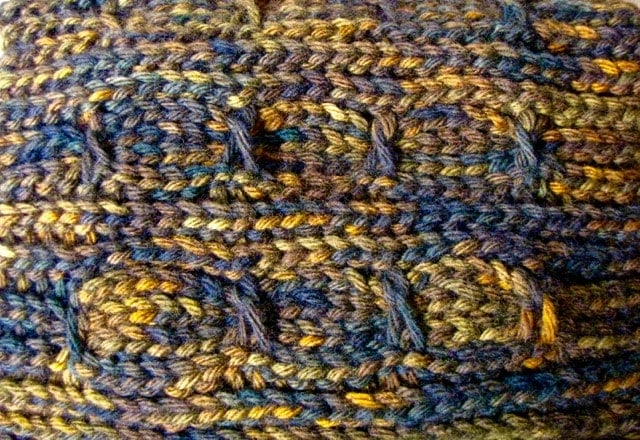
4. Slip stitches clearly have height.

How odd that it needs to be stated. The simple evidence is the heaps of very wearable scarves and sweaters. You should see the overflowing table of them that I bring to classes!

Not only does a slip stitch have height, the height varies depending on the type of slip stitch. As a starting point, expect front-loop types to be taller than back-loop types. (This is the case for single crochet too.) 

Yes, you can even crochet around the post of a slip stitch.

Please Don’t Wait Like I Did.

I learned about crocheting slip stitch projects decades after learning how to crochet everything else. There’s no reason for crochet beginners to wait decades like I did!

Posted on Leave a comment

Simple Pleasures Crochet Bling Bangles

Several Kinds of Easy Crochet Ribs for Stretchy Holiday Bling Bam Bangles

Crocheting *Bling* Bangles, My Cheerful Distraction

I’ve had several stressful challenges this month. Each evening I curl up with super sparkly yarn, crochet hooks, and simple stitches. I go to bed in a merry mood and drift asleep picturing other stitches or color combinations to try.

As I described in yesterday’s post, these slip-on crochet bling bangles are based on the simplest ribbing stitches. The red one is rows of single crochet in the back loop only (outside of the USA it’s called a double crochet). The silvery one in progress is rows of slip stitch in the back loop only.

* Twinkly * sequined * ribbing * is very satisfying.

It also makes sense for a slide-on bracelet! Ribbing is nice and stretchy. I had some sequined carry-along metallic threads in my yarn stash. Now is the perfect time to crochet a *bling* strand of Premier Yarns Enchant with a strand of…my Lotus yarn! I chose Lotus for its cheerful colors that can stand up to all the bright bling action.

I also chose Lotus because it’s sport weight: once you crochet double-stranded (with two strands of yarn held together), you naturally make thicker stitches. I didn’t want super thick stitches for these small crochet bling bangles. The bling string I used is slightly thinner (“fingering weight”).

The yarn math: Add 1 sport strand + 1 fingering strand and you get “DK wt,” a.k.a. “light worsted.” A G-7 (4.5 mm) hook is a good all-purpose size to use for this weight.

Let’s Talk About * Sequin * Management *

Two Bling Bam Bangles of DesigningVashti Lotus yarn and sequined strands.
I tested the sequin theory with these. See the giant square sequins? It took longer to crochet. Worth it though!

Sometimes, sequins get in the way of smooth, stress-free crocheting. If sequins can catch on a loop while you’re trying to pick up crocheting speed, it slows things down.

The secret is pairing a thick enough yarn with a sequined strand to buffer or neutralize the sequins. To me, “thick enough” means it roughly matches the diameter of the sequins. The tiny sequins in the Enchant yarn match the thickness of my Lotus yarn. Lotus gives the stitch loops smooth passage through other loops.

Result: the sequins only pile on more joy. No interruption of the joy.

The Right Kind of * Stretchy *

Enough stretch puts the bangle in crochet * Bling Bangles *—literally. A bracelet earns the right to be called a bangle when it can be slid on and off instead of requiring some kind of clasp.

The bling string (Enchant) has zero elasticity. I expected this (it’s typical of carry-along bling strings) but didn’t know its strength and durability. To reduce the stress that could be put on the bling strand, I avoided stretchy yarns like wool. DesigningVashti Lotus has no stretch either, so these two yarns are nicely matched: Lotus won’t let my crochet project stretch more than the Enchant strand can, so both yarns will share the wear and tear equally.

It’s the crochet stitches that provide all the necessary stretchiness of a slip-on bangle! That way I can use whatever yarns I wish. The crochet * bling bangle pattern * includes several kinds of ribbing for beginners and beyond.

*  *  *

2018 update: Want to see my cheerful distraction during the 2017 holidays?

Posted on 1 Comment

Bam-Bam Crochet Bangle

The original experiment, a ribbed slip-on cuff with mock clasp.
This photo is from a mock art gallery-style photoshoot, 2012 (See the whole set in better resolution here)A slip-on cuff experiment with mock bracelet clasp became the prototype for Bling Bam Bangle, my cheerful holiday distraction in Dec. 2014

Crochet Bangle from the Archives

It makes me giggle. “Bam-Bam” began as a test of ribbing stitches for a simple crochet bangle in 2012.

I remember reasoning that if a crochet bracelet is stretchy enough, a clasp is optional. You could just slide it on and off your wrist—i.e., a crochet bangle.

A back-loop slip stitch rib (Bss) version was planned after this back-loop single crochet rib (Bsc) one—minus the “Bam-Bam” part.)

The “Bam-Bam” Part

Remember Pebbles and Bamm Bamm? Back in September 2012, I was preparing to teach a crochet jewelry class at a CGOA conference in Reno NV.

I don’t remember where my head was at, but after completing its band, I amused myself by free-forming the fake clasp. It made me think of Bamm Bamm Rubble, the baby boy who hit everything with a stone club in the The Flintstones cartoon.

Then, to test a new light box, I photographed it as if it’s an art gallery piece, which amuses me even more!

This is its project page in Ravelry. I’m writing a holiday pattern for the Bam-Bam Crochet Bangle now. It makes me giggle too much to keep it to myself.

Update! the pattern is called Bling Bam Bangle. I blogged about managing all the bling!

Posted on 5 Comments

Crochet Cable Boot Cuff Pattern in Progress

Lucky Twist Bootslip folded over boot top

New Crochet Cable Boot Cuff Pattern!

The Lucky Twist Boot Cuff in action!

A few days ago I sent out issue #65 of my Crochet Inspirations newsletter: “Mock Cables in Slip Stitch Crochet.” I’m getting questions from readers about the dark brown crochet cable boot cuff photo (shown below). I crocheted that one in November 2012. The gray striped one is fresh off the hook.

The 2012 brown one is actually a prototype of the new crochet slip stitch Lucky Twist Mitts. It’s my newest downloadable pattern. A matching Lucky Twist crochet cable boot cuff pattern is almost finished.

Update: The boot cuff pattern is done!

The early brown Lucky Twist swatch helped me test lots of things. For example, how stretchy the limp five-ply merino yarn would be as a mitt (not enough). How much to taper the ribbed edge with short rows. I wondered about the speckled dyeing and overall dark brown tones.

As I mentioned in the newsletter, I had to dramatically brighten these photos just so that the cabled stitch textures would show up! So in real life I’d need to be standing in full sunshine to see the cabled surface texture in a dark brown yarn. The short amber color flecks are pretty, but they distract a bit from the cables.

First swatch of Lucky Twists Boot Cuffs pattern

This was also the first boot cuff prototype I’d ever crocheted. So I learned about:

  • Finished dimensions for a good crochet cable boot cuff pattern.
  • Stitch surface textures and yarn colors that show up well on that area of the body. (Lighter colors help.)
  • Should one or both edges of a boot cuff taper? (I prefer it tapered at one end only.)
  • How much yarn and time does it take to crochet boot cuffs? (About as long as crocheting just 14 inches of a scarf!)
  • Thickness of yarn and of stitches that fit inside the boot top. (Medium weight yarn seems fine for the boots I own.)
  • Folded, unfolded, scrunched. All ways are fun!

Crochet Boot Cuffs, 2012 and beyond

Back in 2012, crochet boot cuffs were such a new trend that they might have just been a one-season fad. That November I traveled to northern Illinois to teach a crochet retreat. It was a boot-wearing opportunity that I don’t often get here in Florida.

It was in Illinois that I started the brown crochet cable boot cuff pattern prototype. I’d be able to test how much warmth they add, and if I enjoy wearing them.

I discovered that crochet boot cuffs feel great! I wore them over dark tights with skirts. They stayed put. I enjoyed wearing them all ways – scrunched, folded over the boot, and unfolded. Down low into the boot or up near the knee. I did find that I wanted longer ones that covered more of my legs for warmth.

Posted on Leave a comment

Free Slip Stitch Crochet Scarf Patterns and Answers

It’s fall! That’s when my two free slip stitch crochet scarf patterns are downloaded a lot, and I get questions about them.

I have nine slip stitch crochet scarf patterns published so far. These two are free downloads: Slip Slope Crochet Short Rows Scarf, and Eva’s Ribs Slip Stitch Scarf 101.

Molly asked me, “I am wondering if you allow our finished items to be sold if you are given credit as the designer?” The answer is yes I do, and thanks for including designer credit. I’m honored when my design inspires a crocheter to make several items. As a crocheter I love it when I’m making something and I start thinking, “Ooo… I could see making one of these for everyone on my gift list this winter.” Or, like Molly: I can imagine so many other people wanting the scarf I crocheted.

When I keep using the same pattern, I can try different yarns or color combinations. I find ways to perfect little things or increase my speed, like how I finish the edges or something. Another thing that happens is that I start naturally memorizing most or all of the pattern. That’s when I really pick up speed.

For more questions and answers, see this list of Slip Stitch Crochet FAQs students ask me in my slip stitch crochet classes. Scroll down for a slip stitch short row photo tutorial.

If you’re new to slip stitch crochet, try the free Eva’s Ribs scarf first. It makes for good TV crocheting, or while listening to an audiobook. The free Slip Slope scarf is the next step after Eva. It’s a lot like Eva with one new skill added (the short rows). A different next step after Eva is the Shamlian Weltie.

After the Slip Slope scarf, a bunch of my other slip stitch crochet scarf patterns will make perfect sense! For example, Undaria, Notch, and Slip Tectonics.