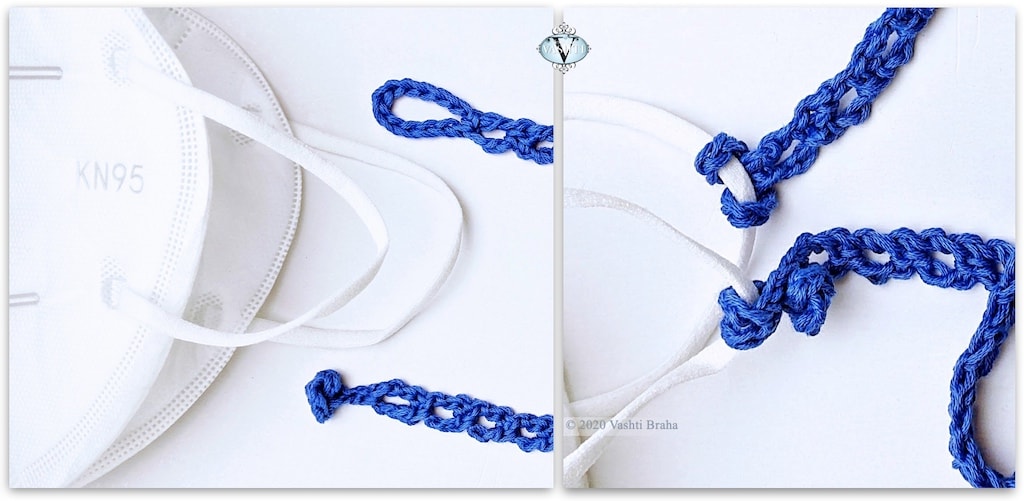
This reversible crochet mask lanyard attaches to each ear loop of a face mask with 100% crocheted fasteners. No sewing on buttons or metal hardware!
Wear the lanyard around your neck. If you remove your mask, there it hangs, already found, like wearing reading glasses on a chain.
The chain loop end attaches with a lark’s head knot, explained below. The other end has a crocheted peg-like “shank” button. It loops around the other ear loop and buttons into a stitch space of the lanyard. This makes the length easy to adjust. The mask loops can be any thickness.
Three Favorite Things
My favorite thing about this pattern is that it’s “hook-only”: 100% crochet, even the fasteners.
My second-favorite thing is it’s a chance to use my new rosebud button idea for a project. It’s reminiscent of a Chinese frog closure, but like I say, no sewing! Also, unlike some button knots, zero chance of it coming unknotted.
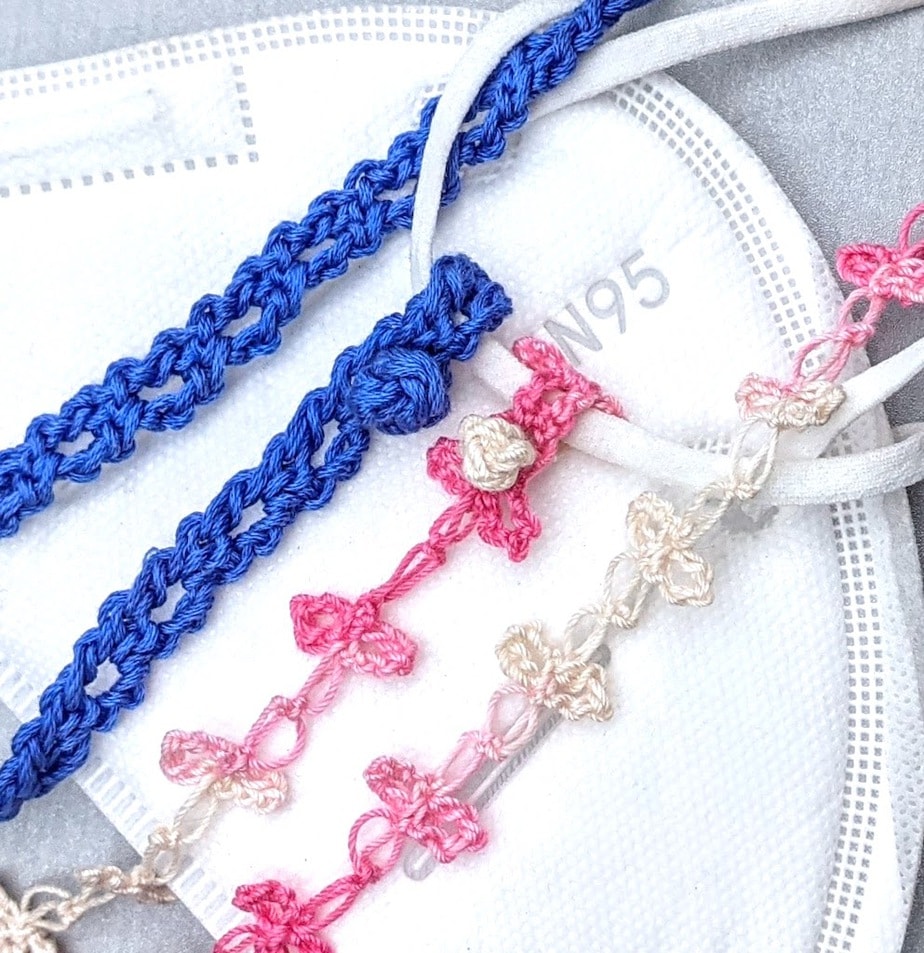
The pink one in size 10 thread uses parts of the same pattern.
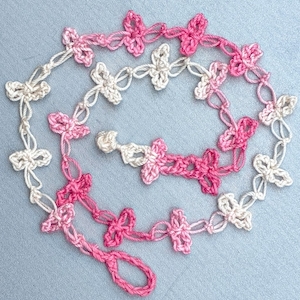
And, third, this pattern doubles as a versatile template. I’m already borrowing individual elements from it. The lacy pink love knot lanyard has the same chain-loop end, rosebud button end, and even a few repeats of the blue cord to serve as buttonholes (near the button end). If you have a cord pattern you like, add a few elements from this pattern to keep it hook-only.
Crochet Mask Lanyard Pattern
A PDF version of this pattern was emailed to members of the Crochet Guild of America (CGOA) as a part of a Holiday Shopping Guide, December 1, 2020.
Materials
- About ten yards of a sport weight (CYC Size #2 Fine Weight) yarn. Shown (in blue): Lang Fiorina (100% cotton, 135 yds / 125 m per 1.75 oz/50 g)
- Size E / 3.5 mm hook
- A stitch marker is recommended for the first few rows
- Yarn needle
Abbreviations used
Pattern uses US terms. UK/AUS terms are in { }
- ch = chain
- dc = double crochet {UK: treble}
- hdc = half double crochet {UK: half treble}
- sc = single crochet {UK: double crochet}
- sl st = slip stitch
- st = stitch
- yo = yarn over {UK: yarn over hook}
Gauge
8 pattern repeats (row pairs) = 4″ {10 cm}. Exact gauge is not necessary for this pattern to work.
Size
21 inches {53.34 cm} long. Length is determined by the number of pattern repeats so it’s easy to choose a different finished length.
Pattern Notes
- Pattern begins at the fastening loop and ends at the other end with the button. The strap between these two ends has a two-row repeat: it’s a long narrow column of just one stitch per row.
- To begin each new row, turn your work clockwise. (If you’re crocheting left handed, turn the other way.) The yarn will end up in back of the hook and turning chains instead of in front of them.
Instructions
Time needed: approximately 30 minutes
Chain 12. Hdc in 12th ch from crochet hook to form a ring.
This is the fastening loop.
- Ch 3, dc in the same ch as the hdc.
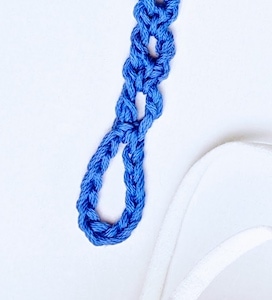
- Ch 1, turn, place marker in bump of ch and in a top loop of dc, sc in space between dc and ch-3.
- Ch 3, turn. Dc in bump of turning ch-1 and back loop of dc (the marked loops).
- Ch 1, turn, move marker (until you can identify the loops to crochet into), sc in space between dc and ch-3.
- Repeat steps 3 & 4: 38 times or until it’s the length you prefer.
Do not fasten off.
- Rosebud Button
Crochet all stitches tightly. Ch 13, sl st in the front loop of the 2nd ch from crochet hook, sl st in the front loop of each of next 10 chs. Leave last ch unworked to form the “shank” at the button’s base. Remove crochet hook from loop for the next step. Place marker in loop to secure.
Tie the strip of 11 sl sts into a simple overhand knot so that the tip of the sl st strip peeks out. Ignore how it looks for the moment. Replace hook in loop and in two or three strands of the sl st tip, and tightly sl st around the unworked ch-1 of shank. (Knot will bend over.) Sl st in same ch, sl st in nearest next stitch, fasten off, and weave in ends.
Tug on sections of the button knot to even it out; plump it up to make it cute. The goal is to center the shank under a mushroom cap shape. Spritz with water to set it.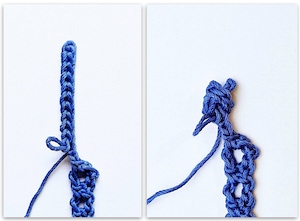
- Attach to face mask
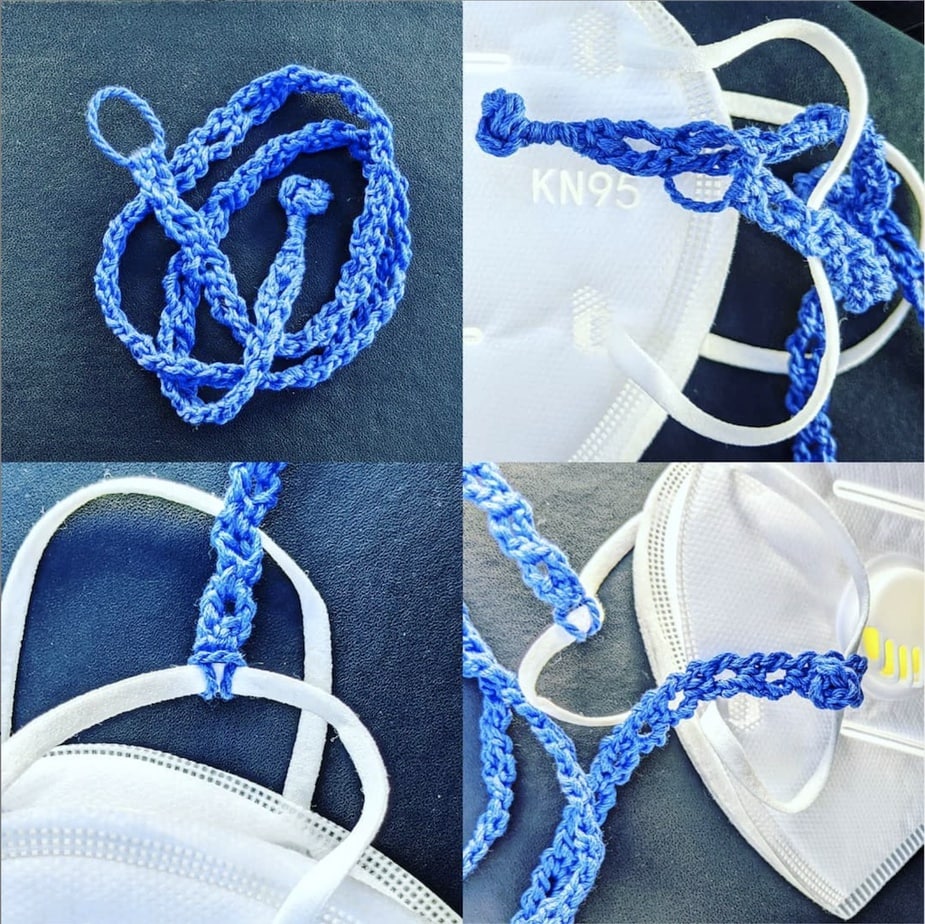
Slide loop end under an ear loop of the mask. Feed the button end through the loop end and pull the full length of the lanyard through so that the loop wraps around the ear loop tightly with a lark’s head knot.
Slide the button under the other ear loop of mask. Fold button over and press it through one of the nearby spaces of a dc row. (Reverse these steps to release lanyard from mask.)
If the length you made doesn’t fit over your head, attach the button end after you’ve placed it around your neck.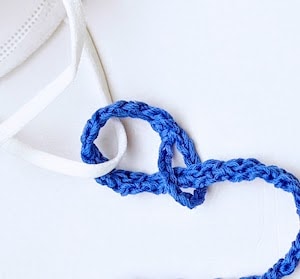
- Variation I
Wrap the fastening loop with the starting yarn end, and wrap the shank of the button with the other yarn end when you’re about to weave in the ends. It’s a nice look. I did this for the button shank of this prototype.
- Variation II
Use your own favorite crochet cord pattern and incorporate sections from this pattern. Here’s how the complete pink love knot example looks:
FAQ About Crochet Mask Lanyards
Crocheting a lanyard is easy and fast, especially when you can also crochet the fasteners. Crochet makes a strong and durable lanyard with very little yarn (about ten yards).
Yes: use a soft, washable yarn. It’s comfortable and almost weightless. I forget that I’m wearing it sometimes.
The pretty blue one shown here required only ten yards of a sport weight cotton yarn, and a size E (3.5 mm) crochet hook. Even the lanyard clips are crocheted!
“Mask holder” and “mask extender” usually refer to a small strip that has a button at each end. Wear it to eliminate pressure or irritation behind the ears. It shows at the back of the head where the ear loops of the mask hook around the buttons instead of the ears. Another term is “ear saver”.
“Mask chains” and “mask lanyards” drape around the neck like necklaces. It’s the same idea as wearing a badge holder, or a chain for reading glasses.
The simplest one of all—just crochet chain stitches—would take 5-10 minutes. The fancier one shown here took 30 minutes.
No. It’s possible to crochet the whole lanyard, even the fasteners! That’s what it means when a crochet project is “hook-only”.

Thanks, Vashti!
🙂
I was able to use a smaller hook and embroidery floss to make 2 of them. 1 skein of floss and a 2.0 hook for each one.
Great idea Dana. You get a huge choice of colors, and those little hanks of floss are so portable.
This is great! Can it be shortened to use as an extender? I wanted something delicate instead of the big patches of yarn with buttons as I wrap my hair and wanted it more apart of the overall wrap.
It should make a fine extender! I’m tempted to try one myself. You’d only need to do a few repeats of the cord section before crocheting the fastener step.