Posted on Leave a comment

Fascinating Crochet Texture: Chainmaille Cowl

Bottom band of my Oct. 2018 VOTE crochet poster in our Lotus yarn.
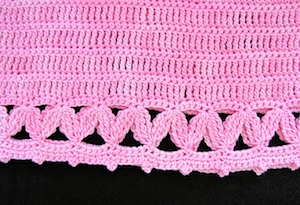
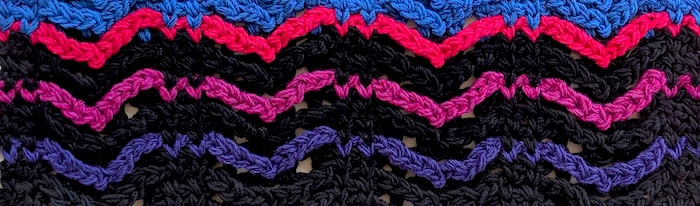
This is the bottom band of a crochet poster. See the rest of it below. View full size.


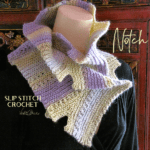
Chainmaille is a downloadable DesigningVashti crochet pattern that was recently the focus of a CAL (Crochet Along) in northern Illinois. I thought you and the CAL participants would enjoy seeing a few variations I’ve swatched of this fascinating crochet texture.

The Structure of a Fascinating Crochet Fabric

Brighid's Willow afghan block contributed to a pattern booklet.
For the Brighid’s Willow afghan block I added a simple cable and contrasting edge columns.

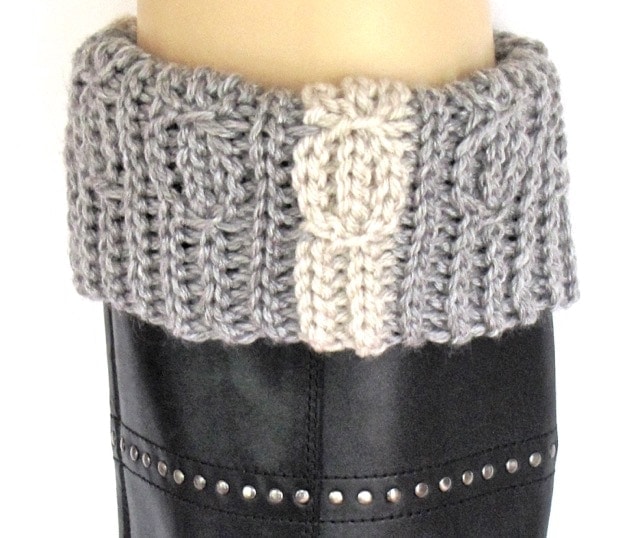
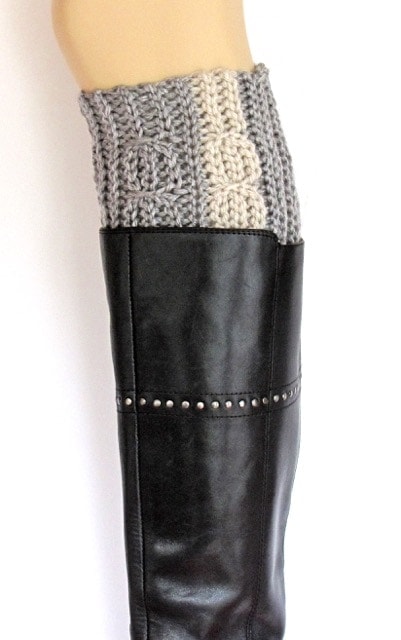
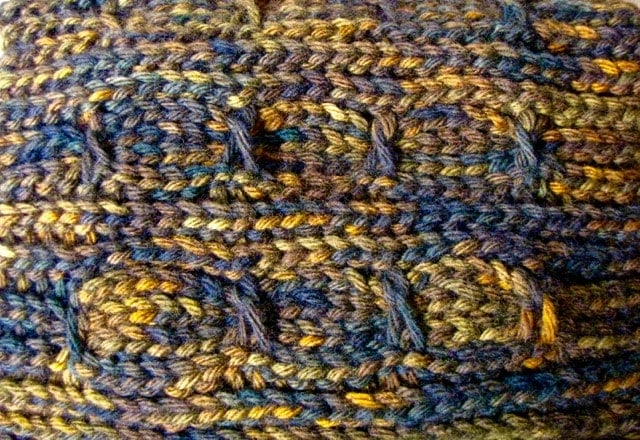
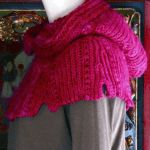
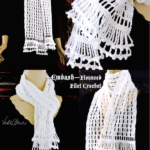
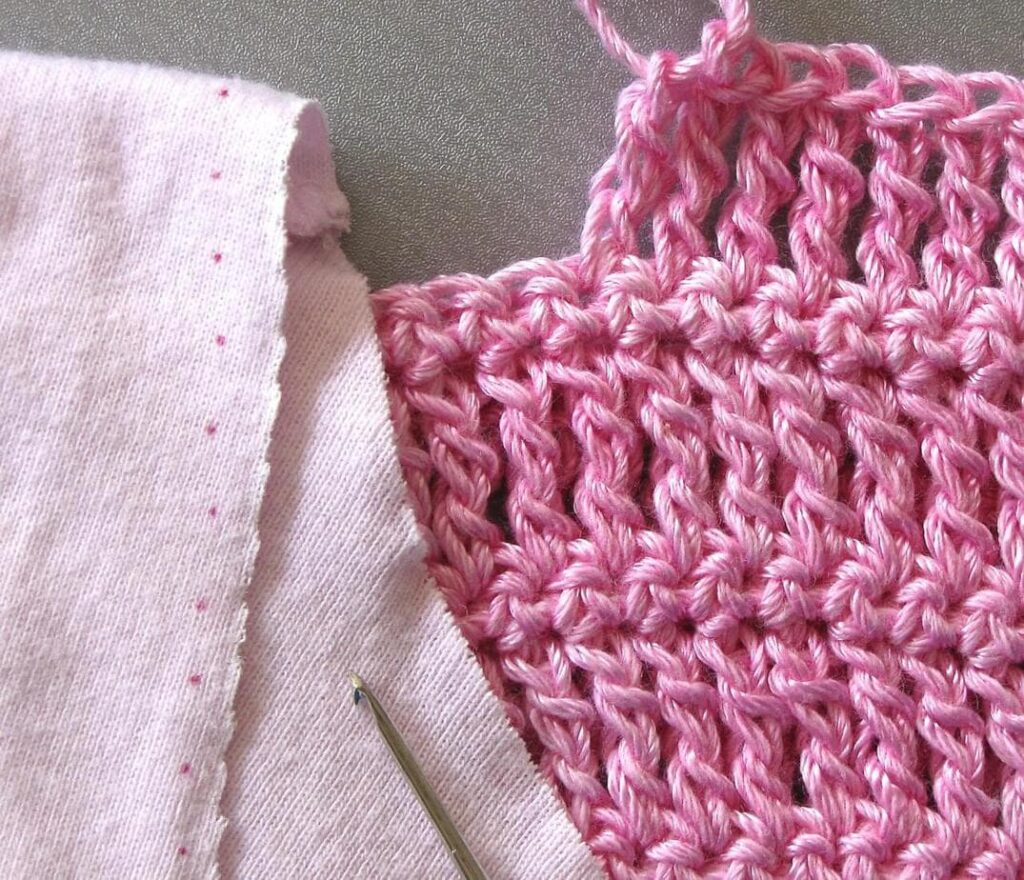
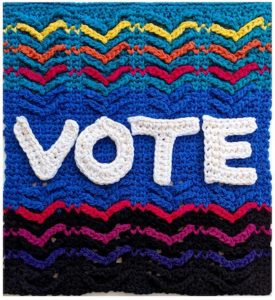
Long chains cross over a filet surface in a herringbone-like pattern. It’s easier to see in striping colors, above and below.

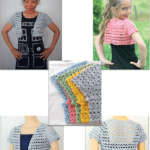
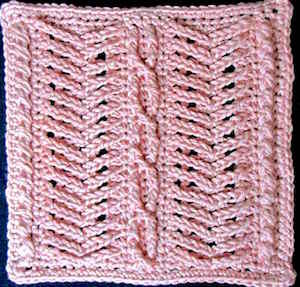
It might also be easier to see in different types of yarn. The alpaca-tencel yarn adds to the scarf’s unique look. I used a cotton-acrylic blend for the afghan block at right. For the V-o-t-e poster I used two strands held together of a cotton-rayon blend.

It helps me to think of it as two layers of lace: each gives the other added dimension and visual depth. This makes it lighter to wear. It also drapes better than the solid layered and aran-style crochet fabrics.

How did Chainmaille come about?

I first saw a confusing photo of the stitch pattern in a book. I couldn’t make out what its texture was like, and the book offered no stitch diagram for it. (It turns out that a stitch diagram wouldn’t have helped me, I just had to crochet it first.) I now understand why the photo confused me: a layered crochet texture is hard to capture in a two-dimensional image. If light shows through the layers, that also adds mystery.

Tunisian crochet letters spell V-O-T-E against a rainbow aran crochet background.
This poster is approx. 12″ x 14″. Ten colors of our Lotus yarn, a cotton & rayon blend.

For me, the Chainmaille design is all about immersing oneself in a fascinating crochet fabric. There is no shaping or complicated assembly. Turning it into a cowl is simple enough: just seam it into a tube. Leave it unseamed for a neck warmer, or make it longer like I did to wear as a scarf. (Or gift to a man.)

A Chainmaille Crochet Along took place last month (July 2015) at Mosaic Yarn Studio in Mt. Prospect, Illinois. Have a look at this wrap-sized Chainmaille on display in the shop!

I met with a CAL participant, Susan Kenyon, at the Chain Link crochet conference in San Diego a few weeks ago. Susan and I seem to share the same kind of enjoyment of this fascinating crochet stitch pattern. It sounds like the CAL was fun.

Posted on 5 Comments

Crochet Cable Boot Cuff Pattern in Progress

Lucky Twist Bootslip folded over boot top

New Crochet Cable Boot Cuff Pattern!

The Lucky Twist Boot Cuff in action!

A few days ago I sent out issue #65 of my Crochet Inspirations newsletter: “Mock Cables in Slip Stitch Crochet.” I’m getting questions from readers about the dark brown crochet cable boot cuff photo (shown below). I crocheted that one in November 2012. The gray striped one is fresh off the hook.

The 2012 brown one is actually a prototype of the new crochet slip stitch Lucky Twist Mitts. It’s my newest downloadable pattern. A matching Lucky Twist crochet cable boot cuff pattern is almost finished.

Update: The boot cuff pattern is done!

The early brown Lucky Twist swatch helped me test lots of things. For example, how stretchy the limp five-ply merino yarn would be as a mitt (not enough). How much to taper the ribbed edge with short rows. I wondered about the speckled dyeing and overall dark brown tones.

As I mentioned in the newsletter, I had to dramatically brighten these photos just so that the cabled stitch textures would show up! So in real life I’d need to be standing in full sunshine to see the cabled surface texture in a dark brown yarn. The short amber color flecks are pretty, but they distract a bit from the cables.

First swatch of Lucky Twists Boot Cuffs pattern

This was also the first boot cuff prototype I’d ever crocheted. So I learned about:

  • Finished dimensions for a good crochet cable boot cuff pattern.
  • Stitch surface textures and yarn colors that show up well on that area of the body. (Lighter colors help.)
  • Should one or both edges of a boot cuff taper? (I prefer it tapered at one end only.)
  • How much yarn and time does it take to crochet boot cuffs? (About as long as crocheting just 14 inches of a scarf!)
  • Thickness of yarn and of stitches that fit inside the boot top. (Medium weight yarn seems fine for the boots I own.)
  • Folded, unfolded, scrunched. All ways are fun!

Crochet Boot Cuffs, 2012 and beyond

Back in 2012, crochet boot cuffs were such a new trend that they might have just been a one-season fad. That November I traveled to northern Illinois to teach a crochet retreat. It was a boot-wearing opportunity that I don’t often get here in Florida.

It was in Illinois that I started the brown crochet cable boot cuff pattern prototype. I’d be able to test how much warmth they add, and if I enjoy wearing them.

I discovered that crochet boot cuffs feel great! I wore them over dark tights with skirts. They stayed put. I enjoyed wearing them all ways – scrunched, folded over the boot, and unfolded. Down low into the boot or up near the knee. I did find that I wanted longer ones that covered more of my legs for warmth.

Posted on 3 Comments

Double Strand Crochet: Oh, The Overflow

I found too many double strand crochet images to show in issue #63 of my newsletter!

The topic is crocheting with two (or more) strands of yarn held together. Here’s a gallery of my double strand crochet projects and designs over the years:

Please leave a comment, I love comments! Especially as I tinker with new upgrades to this blog.

To scroll through more recent posts, click here: Quickposts.

Posted on Leave a comment

Crochet Swatch Puzzler

Most of the time I can pick up a crochet swatch and identify its top (last row crocheted) and bottom (foundation row). I save crocheted swatches for reference, so it’s important to me to be able to do this confidently and accurately.

Here’s a swatch that puzzles me at first, each time I see it. Then I remember helpful identification clues.

A crochet swatch that's not easy to "read"
Is this crochet swatch right side up?

The swatch in hand puzzles me almost as much as this photo of it.

Being able to quickly identify how a crochet swatch was created is a special skill. It may take many years of crocheting to develop it.

This is true for images of crochet (photos and drawings) as well as for the actual piece.

The single most helpful clue about this swatch is that it’s Tunisian crochet.

This means it’s likely that we’re looking at the right side of the stitches. Tunisian stitches usually all face the front, and look distinctly different on the back. Usually.

I can quickly make sense of a new-looking Tunisian crochet swatch if I can identify where the return row stitches line up. The return row is when the loops are worked off of the crochet hook. If I know whether the crocheter is crocheting leftie, then I know which direction the return row stitches should be traveling. They go toward the right edge if crocheted right-handed. (I’m right handed.)

Thirdly, I know two basic ways to make Tunisian crochet lacy. You can:

  • Use the Tyo (Tunisian Yarn Over stitch), and/or
  • Add chain stitches during the return rows.

This issue of my Crochet Inspirations Newsletter briefly contrasts the two kinds.

I’ve started a project page for this in Ravelry. I’ll add updates to it as the project takes shape.

Posted on 1 Comment

Lab Experiment: I’m Customizing a Tank Top with Crochet

Pink Tank Top in Progress, Close Up

This is my first attempt at customizing a tank top with crochet, so I’m using a $4 scoop-neck tank top from Walmart (White Stag brand).  Update: It’s coming along well! See this followup post.

It looks dowdy on me straight off the store shelf, so I’ve drastically cropped it and turned the neckline into a deep V.

The crochet you see adds length along the bottom hem. I’m using standard sport weight yarn and a US/F (3.75 mm) crochet hook. The steel hook shown in the photo above is the largest sharp-headed crochet hook I have. I wish I had one that’s slightly bigger for pulling through loops of sport weight yarn.

The Real Reason I’m Doing This

Fancy triple-treble stitch clusters in a zigzag pattern add drama to the picot hem of the peplum I added to a storebought tank top.
Crocheting the bottom hem.
Armholes & neckline next.

What is it like to crochet DesigningVashti Lotus yarn onto t-shirt fabric? Is sport weight yarn a good match? (If I have to use lace weight yarns, I might as well just crochet the whole darn thing.) What does the texture of this yarn look like with a plain cotton machine knit fabric? 

I have mill ends of this “Pink Sugar” color; the dyeing looks more tonal than solid (not in this photo though). Do I like it? What is it generally like to pair Lotus colors with my tee shirt colors?

Can I use a super sharp crochet hook when customizing a tank top with crochet? I want to be able to start crocheting right onto fabric and get a result I like. Would I enjoy doing it more than sewing along the cut edges first? (I sealed the cut edges with an invisible permanent washable no-fray liquid.)

Customing a tank top with crochet to give it a well defined v-neck and picot-trimmed armholes.

How will it all hold up to wearing, machine washing and drying, and the Florida sun? Will the no-fray liquid add enough strength to the edges?

How will I like wearing it? Will I find I have a preference for customizing a tank top with certain kinds of crochet stitches? What if the crochet adds too much weight to the top?

Lots of what-ifs. Will I want to do something similar with my cashmere sweaters? ::gasp::

I have a few pullovers that I want to convert into cardigans. Ideally, give them a roomier fit while I’m at it. Heck, add beads. Cashmere love is a many splendored thing.