I set up a permanent home for my crochet tutorials and tips. Over the years I’ve posted some crochet how-to stuff on one blog and some on another. Still more are tucked away in newsletters, pattern PDFs, and class handouts. Eventually I’ll get all ten years of them under the “Learn” tab, which you can find at the top of every page of this new website. Huzzah! It feels so good to do this.
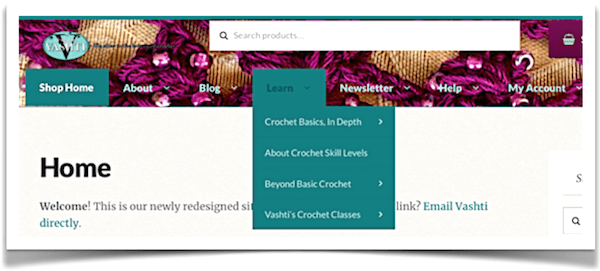
Crochet Tutorial Categories So Far
As you can see in the photo above, the Learn menu now has these two major categories:
Crochet Basics in Depth–For newer crocheters and anyone who likes a more thorough treatment of all things crochet. (My goal is always to write what I haven’t already read elsewhere.)
Beyond Crochet Basics–If it’s something that might be considered an Intermediate skill or beyond, it goes here. Newer crocheters are welcome to use this section too. I try to connect each advanced or specialized topic directly to a basic crochet skill so that adventurous beginners can use some of it too.
Each category has a few how-to topics in them so far. Some will sound familiar to you if you’ve used my patterns or read my newsletters, such as “Hook-Led Gauge” in the Crochet Basics section and “When to Crochet BETWEEN Top Loops” in the Beyond Basics section.
Newly Updated
I’m rewriting each one—a little or a lot! Even if I’ve already posted a topic somewhere else. (I enjoy writing but it’s slow-going if I have to find the original images and optimize them.)
Please let me know if you use one of my crochet tutorials here and the images are not clear enough. I’m still adjusting the image optimizing settings of this new site to get them truly…optimal.
Three More Tutorial Categories
I’ll be bringing back the Tunisian and Slip Stitch crochet sections that my old site had, but they had not been updatable for seven years. By the time I’m done revising them and adding lots of juicy tutorials, they might have nothing in common with the old ones! These will also be housed in the Learn menu:
The New Tunisian Crochet
Fun With Slip Stitch Crochet
Crocheting Jewelry
All three* are technique based unlike the first two that are purely skill based. The standard crochet skill level model tends to default to regular crochet, so these Tunisian and Slip Stitch categories should complement the skill categories neatly enough.
*Even though the jewelry crochet group is project based, I think of its tutorials as having a technique focus because it’s a specialized application of mostly regular crochet. (I don’t think my old site even had a page for crochet jewelry.)
Four 2008 photos from my crochet archives: the crochet is a cardigan in Tunisian crochet strips. An unpublished pattern; the yarn is unusual and discontinued (a felted spaghetti-like texture due to the lycra), but you can see it complete and modeled on its project page in Ravelry. The flower became the Fearless Leader of the Crochet Liberation Front’s Flower of Power Ring!
In the latest newsletter (#84 Crochet Ruffles Old and New) I briefly mentioned upcoming posts (and videos! Yay soon!). Here’s why: I’ve built up extensive crochet archives over thirteen years of professional crocheting. For example, my Flickr albums alone contain 1.5 million crochet photos.
The most important reason is that I’ll be able to digitize and tag the paper-based bits I’ve filed. This is so important for easy retrieval. It’s also protective: I live at sea level in a hurricane zone. In between hurricanes, it gives me easy posting ideas for this blog (& social media places) that could help or inspire other crocheters.
My crochet friend Julie M. inspired me to take stock of it all when she saw all the materials I’d brought to a class and asked, “How do you organize all your swatches and files?!” Some of it is digital and the rest is stored in my house. Is it working for me?
The ultimate test of my filing system is how quickly and easily I can retrieve everything I need for a new newsletter topic, a crochet class topic to develop, or a call for design proposals to answer. All of these have themes that cut across several kinds of materials and details. Tags work the best for this, and tagging is a digital thing. So the more my crochet archives are digitized and tagged, the better. (Safer from hurricanes too.)
Shared Crochet Archives: Places
Want to follow along with my crochet archive sharing? I’ve test-posted two other things so far: both to Twitter first, then to Pinterest and Facebook, although I may shift how/where/when these get posted. As always, updates on anything Designing Vashti will appear in the right-hand column of my newsletters, and here in this blog.
The two other test-posts are crochet tips with associated images. My goal is that they are worth liking, saving, and sharing by many crocheters. These illustrated tips will likely fall into “tracks”, such as Tips for Beginners posted on “Newbie Tuesday” (catchy!–wish I’d invented it), Skill Refiners (tips for Intermediate or Experienced skill levels), and “Crochet Pro Tips” (more for aspiring crochet designers etc.).
I also have quotations from fashion designers, artists, writers who inspire me with their wisdom and approach to their work. I think of them as my mentors and might post some of these bits to my Tumblr account.
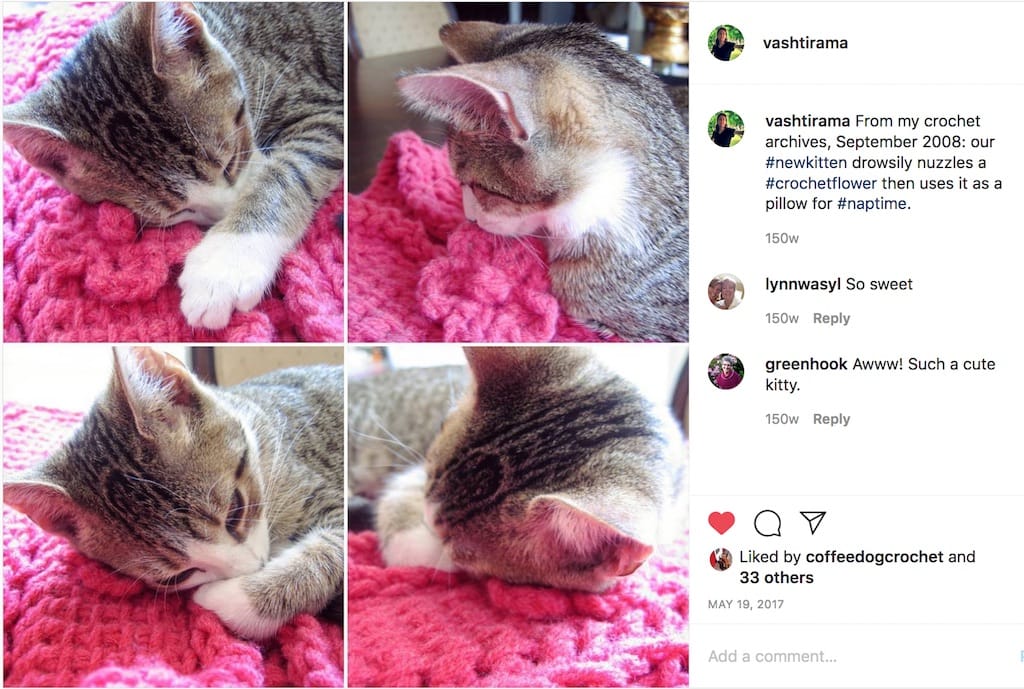
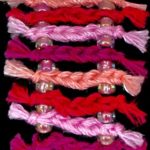
Today’s post above is not a crochet tip, just pure charm. Maybe on Fridays?, or maybe as a Sunday/Monday boost. I love when other crocheters and knitters post pure eye candy: stitches close up in fibers and colors that make me want to pick up my hook. It’s instantly replenishing, as if I’ve just emerged from a spa!
In the previous post I listed five decisions we’ve already made by the time we’ve made a starting slip knot in the yarn, and six options we have for doing more with the starting yarn end. Below I compare the advantages and disadvantages of different slip knots.
Reinforced with a twist (two leftmost photos). Three-loop slip knot (upper right). Fancy “jury mast knot” (lower right).
A Creative Start
Crochet happens when a loop can be pulled through another loop. So much creative freedom in this!—including the very first step we take when starting a new crochet project. With options come new advantages.
Simple and quick to make, remember, adjust, and use to start crocheting the first stitch.
The slip loop blends in as a stitch: it forms the top two loops of the first chain stitch.
✅The beginner’s slip knot is a great choice for #1 through #5, with a few minor exceptions.
(Slight) Disadvantages
The basic slip knot is not truly invisible.
It’s usually invisible enough, but occasionally not in certain yarns and project types. The thicker the yarn, the bigger the knot when you start crocheting. A knot in the center of a motif, flower shape, or nose of a stuffed animal can make it more noticeable.
It’s not particularly pretty.
The basic slip knot adds no beauty or polish when it’s noticeable. For me it’s because it lacks symmetry. The yarn end doesn’t hang straight and centered from it. The knot itself is a bit lumpy (sort of like a tiny fist). It looks like what it is: a simple, common, serviceable knot.
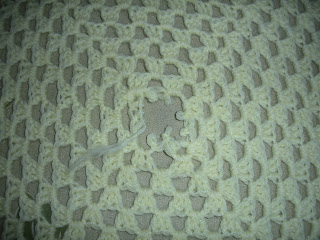
If the starting yarn end is clipped too short and/or the yarn is slippery, watch out. The knot could loosen and even unravel in certain projects (see example at right).
Ever seen an old lace or granny square afghan with only the centers unraveled? It’s sad how common this is and how easily it could have been prevented.
Alternatives: Advantages
Given that…crochet is great for everything from delicate lace dresses to sturdy beach totes and slipper soles; from super strong pet leashes to artistic jewelry; from weightless shawls to heavy coats and afghans, and still more! —
And…that many crochet projects are actually “started” over and over, like granny square afghans (each granny square starts in its center), Irish crochet lace (separate shapes are assembled later), and intarsia (patterns of colors with varying lengths of yarn), —
Doesn’t it make sense that some crochet projects could benefit from specialized ways of starting them?
6. Pretty.
A clearly visible starting slip knot could be intentionally decorative. Imagine one that looks symmetrical and has a charming, fancy, or fascinating texture. It could also be functional. A dense and bulky one would serve as a stopper for a large-holed bead. (I’ve often needed a good knot for this purpose!) It could also add weight to the ends of fringe for a nicer drape. See my Buff Slip Knot.
7. Temporary.
Some crocheters and knitters have a blanket “no knots” policy. Temporary knots are easy. Just make your basic slip knot really loose so that you can undo it later. Or, crochet right into it as if it’s a foundation chain. This way, the knot makes it easy to start crocheting, but you’re not stuck with it permanently.
8. More than one starting loop.
I keep discovering more uses for starting with more than one loop. Make a simple slip knot variation that produces two (or more) starting loops, then start crocheting with one of them. The remaining starting loop(s) can be used as a button loop or hanging loop for your finished project.
9. Reinforced strength.
Add a twist or an extra wrap while making the basic slip knot reinforces its strength and security. I need this reinforcement when using extra slippery or wiry yarns and threads. See some in the first picture above.
10. Change the angle of the yarn ends.
Yarn ends hang bent from basic starting slip knots.
“Change the angle of the yarn ends” may sound odd, but for me it’s a new way of looking at starting knots. When my yarn end is visible as fringe, sometimes it’s noticeable to me that it doesn’t hang straight. This is because our basic slip knot causes the yarn end to hang at an angle. I’m currently looking for starting knots that cause the starting yarn end to hang differently. I like the Buff Slip Knot so far.
11. Attach to something with a starting loop.
I’ve needed a way to start crocheting while also neatly, elegantly attaching it to something when I’ve made: watchbands, a belt with a buckle, and certain pendants for necklaces. I’m currently looking for new favorite starting knots in this category.
A Note about Knots
Remember I mentioned that some crocheters and knitters have a NO KNOTS policy? Perhaps some of them mean tight knots. A tight knot can weaken the yarn over time. It’s also unsightly, intruding on a buttery, spongey look and hand.
I almost always use knots when I start crocheting, but I don’t pull them into tight hard lumps. I rely on reinforcement from a long woven-in yarn end more than on a knot if I can. It depends on each project. I’m especially careful in areas that will have to sustain strain and weight. That would be the shoulders of a sweater, the motif centers and seams of a blanket, the toes and heels of socks, a bag bottom and its handle attachments, and so on.
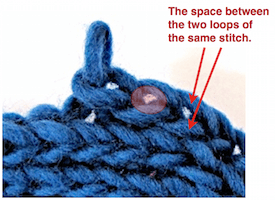
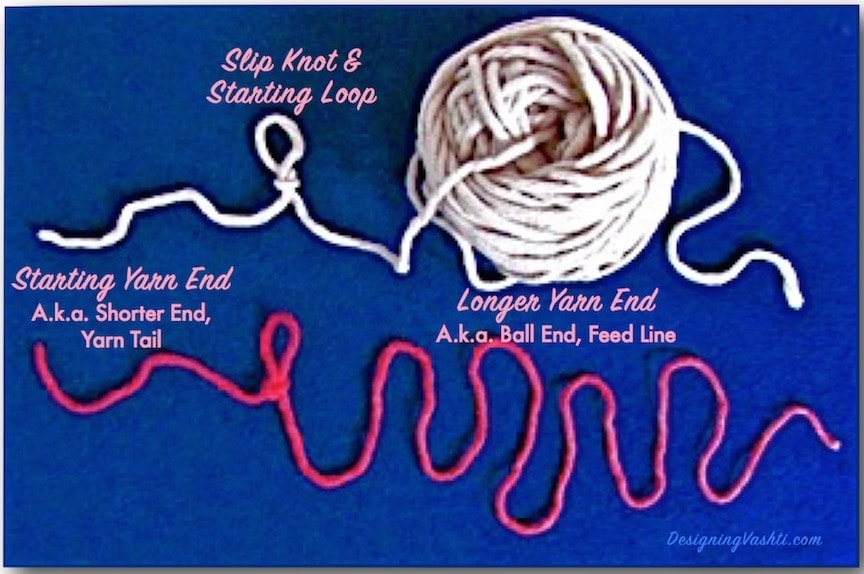
Some folks call the short end the “yarn tail” and the other end the “supply end” or “the yarn coming from the ball”. View full size.
More to It Than it Seems
Crochet beginners need to know how to leave a long enough one (see #2 below) when they making their basic slip knot. Of course the other thing to know is which end to start crocheting with, and if beginner chooses the shorter end they figure it out soon enough!
Very little is usually written or said about the starting yarn end. What else is there to know? The starting yarn end comes with built in decisions—decisions we non-beginners may not realize we’re making. I’ve listed five below. If you’re a new crocheter, just read through them for now.
In addition, we could be putting the starting yarn end to work for us. I’ve listed six ways at the end of this post. That humble starting yarn end may be the most underestimated part of a crochet project!
New to Using Yarn?
If you’re new to using yarn as well as new to crocheting, keep the yarn simple for now: use a 36″ or so {91 cm} piece (I mentioned it previously). A shorter yarn length like this avoids unnecessary yarn-based issues, like whether the yarn is in a hank or other difficult-to-use form, or how to even find the yarn end when it’s tucked away well.
This will also make it easy for you to keep both ends of the yarn in sight at all times. The first end we use is the starting end (or occasionally a yarn tail), and the other end is called the longer end, ball end (because it leads to the rest of the yarn), feed line (feeding from the ball), working end, supply end.
Five Hidden Decisions
We make five decisions (maybe more) with the starting yarn end every time. They’re hidden because most of them are made automatically, or are not seen as having options.
1. Which End?
Every ball of yarn has two ends. Depending on how it’s wound, you may have easy access to both: one wound around the outside of the ball, the other coming from its center. (See example in the upper photo). The end in the center can be surprisingly hard to find! When you do it will be wrinkled. The outer end is smoother and easier to find.
The first decision we make is which end we choose as our starting yarn end. Sometimes it matters (that’s for a future post); often it doesn’t. The center end is my first choice because the ball won’t roll around as I pull more yarn from it.
2. How Close to the End?
The next decision is how close to this end we make the starting slip knot. In other words, how long should the starting end of yarn be for a crochet project?
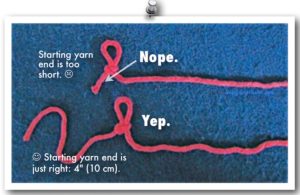
Making the slip knot too close to the yarn end results in a yarn tail (starting end) shorter than at least 4 in (10 cm). Full size.
The standard guideline is 4″/10 cm long. Why? It’s just long enough to be threaded onto a yarn needle later and woven in (sewn securely into nearby stitches so that it stays invisible). It’s not too long to waste yarn or get in your way.
A common exception to the default 4″-long starting end of yarn is 6“/15 cm long, for example when the yarn is especially slippery. Some yarns need more weaving in to stay put.
⚠️Never snip the yarn end close to the knot unless you’re specifically, rarely, directed to in a pattern for a certain effect, such as for stubby fringe. It otherwise looks poorly finished. Worse, it could loosen and cause seams or other stitches to unravel.
3. Which Kind of Slip Knot?
Most crocheters always use one of two types they learned as a beginner, so this counts as a hidden decision. Knot tyers know several more, and some offer extra features. More experienced crocheters avoid the knot part and just wrap a loop around the hook for their starting loop. (A chain stitch is self-knotting at its base, so a starting knot is optional.)
4. Adding Beads?
If you wish to have beads strung on your yarn so that you can slide them up and into stitches as you crochet them, string them onto the yarn before you make that slip knot. You could cut the yarn later to string beads on, but the knot you’d add would be pretty inconvenient with beads. (There are alternate ways to add beads, which is for another post.)
5. Assign a Special Task?
Give the starting yarn end some odd jobs to do. A few of these tasks below count as beginner-level, especially the first two. Some may take a bit of planning ahead, so once you make that slip knot, you’ve essentially made a decision against certain special tasks.
Special Tasks
The starting end is already securely attached, so you can use it to hold extra yarn in reserve for later. If you had to attach a new piece of yarn later for the same tasks, you’d have three yarn ends to weave in instead of just one. Keep this list in mind and you won’t underestimate the starting end of yarn as your skills grow.
⚠️When a starting end of yarn is very long, beginners are especially at risk of confusing the ends. Make sure you don’t crochet with the starting end instead of the ball end.
1. Sew/String on Buttons and Beads
A moderately long starting yarn end (12″ to 24″/30–61 cm) is helpful in case I might wish to:
Sew on a button.
String on a big accent bead.
Create beaded chain fringe. (I’d still be attaching more yarn if I decide to add a fringe edging, but at least I wouldn’t have to weave in the starting end of yarn that’s too short.)
I’ve often used the starting end of yarn for the first two tasks for crochet jewelry. By now I reflexively leave a longer end when I swatch a new jewelry idea just in case I need it; also see #3 below.
2. Seaming
For some projects, a much longer starting end of yarn can be reserved for seaming later. It’s the best yarn for this because it’s already attached, and I often prefer a crocheted seam. I don’t always know how much yarn I’ll need for the seam; my general guideline is to multiply the length of the seam by 3 or 4 for a slip stitch seam and longer for a single crochet seam.
For this option, and for the next one, it helps to wind the starting end of yarn onto a bobbin or scrap piece of cardboard.
3. New Jewelry Clasp
Sometimes when designing new crochet jewelry I’ll use a long starting end of yarn to crochet a clasp later. At least 36″/91 cm long gives me options for adding a range of jewelry clasps without having to attach a separate length of yarn.
4. Both Ends Together
You might start off crocheting a long starting yarn end together with the ball end. I’ve done this when starting at the center of a rectangular or oval shape so that the foundation chains are more substantial, since I’ll be crocheting Round 1 into both sides of the chains. In other words, I’m crocheting the foundation double-stranded—with two strands held together—but I didn’t need to add a separate length of yarn (with two more ends to weave in later!) to do so.
5. Add a Simple Finished Edge
For small projects and simple edgings, you don’t need a crazy-long starting yarn end. An edge of slip stitches and chains or of single crochets would require roughly the same amount of yarn as a crocheted seam (see #2).
I’ve done this most often with coffee cozies. With the starting end of yarn I slip stitch around the bottom rim to firm it up. It also looks nice.
6. Improve a Join or Add a Few Stitches Later
Rose and lavender shawl points were completed later with fancy beaded picots, thanks to the reserve yarn of their long starting ends.
Sometimes a beginning is prettier when you save it for the end! For newer crocheters, this means you don’t have to sweat what your first round of stitches looks like, especially if it’s a spiraling round. Maybe it looks stringy, uneven, or lumpy. You can use your starting end and a yarn needle to smooth the area with a few darning stitches where you joined your round. Or, slip stitch a new edge with a crochet hook (see #5). It may help to unravel the starting knot first.
A more advanced example is when I start a shawl in one corner and it has a fancy built-in edging. I can get its edge to look like the other corners if I come back to it and crochet its first few stitches last. It’s a low-stress option that also makes the pattern easier to write and to follow.
There are probably many more handy uses for a long starting yarn end. Have I left out any special tasks?
One Last Thing
The starting end of yarn determines whether your starting slip knot is fixed and secure, or can be pulled loose enough to allow a seam to unravel! See my earlier post about these two different slip knots. Look closely at the starting yarn ends.
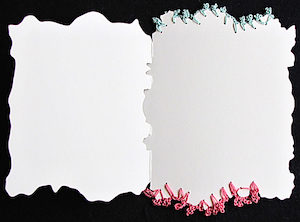
Isn’t this greeting card crochet experiment lovely?
I made it about four years ago. The recipient was touched by it. I’m glad I took a photo before I gave it away—I smile whenever I see it.
My goal was to try crocheting a fine irregular edge in a freeform way. (I had already crocheted chunky, evenly-spaced borders into other things, such as with the Venus Flytrap Action Toy, and the Cheerful Chores.) tablecloth
The first step was to punch tiny holes randomly spaced along a portion of the card’s irregular edges. Instead of poking holes with a needle, I found a 1/16″ single hole paper punch at my local craft store. I’m glad I did. The holes are clean-edged and look like the card came with them.
Randomly spaced holes can vary in distance from each other, and from the edge of the card. When you’re crocheting into these holes, you just have to chain more to get to a hole that’s farther away, and chain fewer to get to a closer hole.
In standard pattern language, this is eyeballing (i.e. freeform), because it’s adjustable instead of being a fixed pattern. This automatically puts it in the Intermediate Skill Level category.
Sometimes I slip stitched (sl st) into a new hole, then chained one (ch 1) so that I could sl st again into the same hole.
The picot petals are just long picots. I added extra chains before the sl st or single crochet that closes the picot.
Greeting card crochet is a useful Intermediate Level skill to know for other kinds of crochet too.
I’ve listed a few other links below to other crocheters’ blog posts about greeting card crochet edgings. Each blogger describes a similar step of adjusting the number of chains to accommodate the space between the holes.