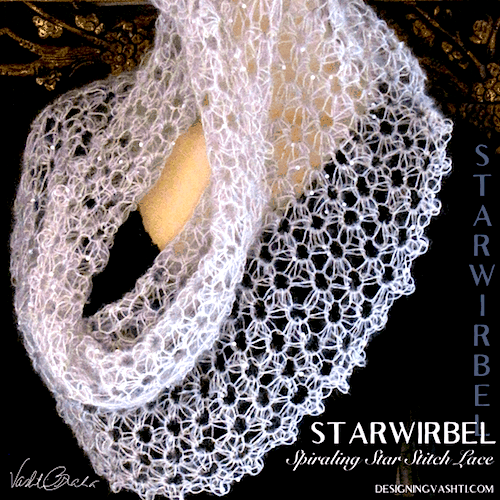
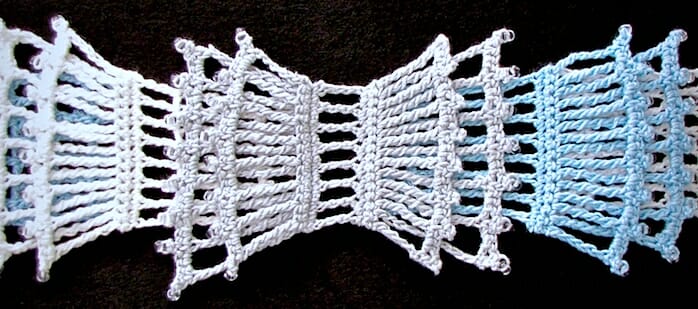
Updated on 7/18/18. View full size Starwirbel images. This is a conveniently clickable group of things I mention in The Starwirbel Way: Lacy Star Stitches classes. I teach the next one on July 26, 2018 in Portland OR. See student feedback. I show a lots of published and unpublished star stitch designs in this class and try new things with the stitch for each class! Each illustrates the stitches and techniques learned. — Vashti Braha
Thinking of signing up for this class? I wrote this post for you.
Looking for more of Vashti’s star stitch designs? See all of her self published star stitch designs here. See all of her unpublished star stitch projects here (log in to Ravelry first to see all of them). These are self-updating links.
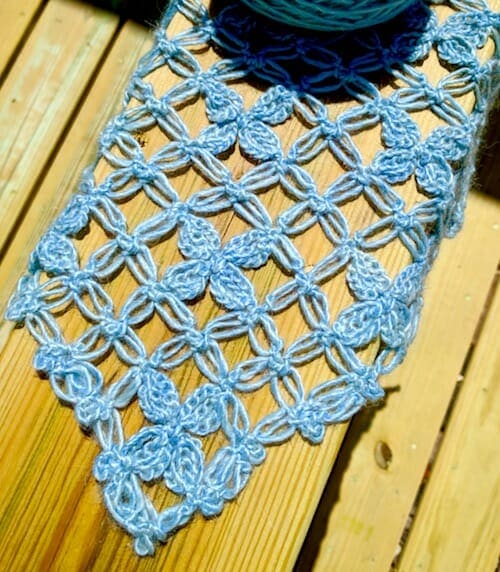
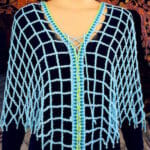
Want to see what I’m working on? This will be Flowerfall, a hanky-hem waterfall vest that I can wear when I teach 21st Century Love Knot Adventures this July in Portland, Oregon. I’m now two-thirds done.
Several Class Skills in a Vest
I’m designing Flowerfall to be a visual aid for several skill levels. I’ll also be adding the pattern to my shop for those who can’t attend the class.
Updated things you can do with this mesh, such as this waterfall vest.
How the yarn choice affects the stitch.
Another view of this diamond mesh would be the love knot sections of Lovelace. (It’s so iconic that the stitch is synonymous with the mesh in some how-to sources from the 1800’s to now.) Then, compare it with the Electra Wrap’s triangular love knot mesh.
For Students With a Bit of Experience
How to increase and decrease this mesh, and add picots as one way to finish the edges as you go.
The when, why, and the how-to: making love knots with slip stitches instead of single crochets (UK: dc).
My new favorite way to keep love knots from loosening later if the yarn is slippery.
A new way to crochet into love knots that I recommend for a project like this one.
For Those With More Experience
How to do corner to corner (C-2-C) love knot mesh in which you start in one corner and end in the opposite one.
How to sprinkle in other stitches with the classic love knot mesh to create lacy new stitch patterns!
Multi-Purpose Visual Aids = Ideal
This is my seventh year shipping teaching aids across the USA for crochet classes. I teach four to six different topics per event. Visual aids are everything! I always end up with a lot of crochet items to ship.
In the past few years I’ve started designing class items that combine several points of information in one. Not only do I cut down on the shipping this way, it’s a fun design challenge. I also love coming up with how a design for one class topic can double or triple as a visual aid for other topics I’m also teaching.
Self-Healing Stitch Alert
An example of this is I’ll be adding armholes to Flowerfall by cutting them open. Know what this means? It’ll also be a great visual aid for the Self Healing Stitches and How to Cut Them class! I might even bring it to the Tunisian on the Diagonal class if I don’t make a Tunisian one in time. Even though Flowerfall isn’t Tunisian, it’s an example of an easy shape to crochet from corner to corner in any stitch. (Flowerfall is even relevant to my slip stitch classes. It’s the first design I’ve done with slip stitch love knots.)
I’ll post again about this design so that you can see its modified diamond shape, how its armholes happen, and different ways to wear it. I’m smitten ? . Flowerfall’s Flickr album has three photos so far.
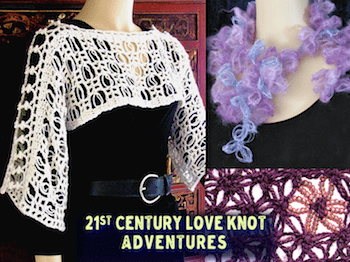
Updated on 7/18/18. View the above image full size. This is a conveniently clickable group of things I mention in 21st Century Love Knot Adventures classes. I teach the next one on July 25, 2018 in Portland OR. See student feedback. I show a huge amount of published and unpublished crochet designs in this class and I try new love knots for each class! Each illustrates the stitches and techniques learned. — Vashti Braha
Thinking of signing up for this class? I wrote the Crochet Class in a Vest blog post with you in mind.
21st Century Love Knot Adventures
In crochet, the Love Knot is also known as Lover’s Knots and Solomon’s Knots. Before 1950 it was most commonly known as “Knot Stitch” and occasionally “Hail Stone Stitch.”
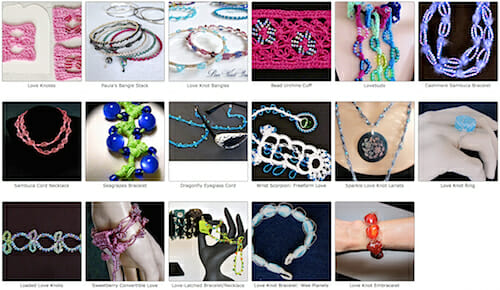
Sparkle Love Knot Lariat is a simple beaded jewelry cord.Pattern.
Lovepod Boa features a “Lovepod” stitch variation: pattern.
Embracelet is one of my first love knot designs. A free blogged pattern here. Also see this tutorial!
Vashti’s Forthcoming Love Knot Patterns
As of 7/18/18.
Yveline features a new use for love knots: surface crochet embellishments! (Link goes to 6/15/18 blog post “First Look: Yveline, a Tunisian Wrap”.)
Flowerfall is the result of several different love knot mastery skills, intended for display in the 2018 class. (Link goes to 4/23/18 blog post “A Crochet Class in a Vest”. Also see “Flowerfall Vest Update”.)
Fun! These are self-updating search results in Ravelry. All patterns with lovers knot/solomon’s knot in order of the most recently published first (437 patterns as of 4/05/18; it was 385 patterns as of 5/31/16). Here are search results for all love knot projects in order of most favorited first.
Older sources were first compiled for the 2012 class. All links work as of 4/05/18.
Two edging patterns were originally printed in the book Ripple Sweaters, Yokes & Edgings by Adeline Cordet in the year 1920 (now in the public domain).
James Walters’ Solomon’s Knot window hanging http://www.crochet.nu/scjwc/work/hangings/index.html. Excerpt: Only Solomon’s Knots show you how the yarn will behave when the individual strands within a stitch are allowed to separate and drape – some want to tension themselves like fine hair-springs from old watches, others are more squidgy and dribbly, and some, if they’re long enough and completely relaxed, will twiddle up into cork-screws.
When tall stitches look very different from each other, or lumpy, stringy, loose, or too short, we just need to take more control of them. Especially vexing is when the top loops look loose and loopy! My solutions below will help you crochet even the very tall stitches that look downright handsome. First, some basics of crochet.
Tall & Taller Crochet Stitches
A basic rule of crochet is if you already know how to do the double crochet stitch (US: dc, UK/AUS: tr), it’s easy to understand how to make the taller ones. Here’s how to crochet the dc into a row of stitches:
Yarn over andinsert your crochet hook under the top two loops of the next stitch of the row. Yarn over and pull up a loop; you now have three loops on your hook. *Yarn over and pull the loop through two of the loops on your hook, then repeat from the * once: only one loop remains on your hook.
An amazing feature of crochet is there’s no limit to a stitch’s height. Start with the double crochet stitch as the model for crocheting any taller stitch. Here’s how to make a treble, the next taller stitch:
Yarn overtwo times (instead of once for a dc). Insert your crochet hook under the top two loops of the next stitch of the row like you would for a dc, yarn over and pull up a loop; you now have four loops on your hook. *Yarn over and pull the loop through two of the loops on your hook, repeat from the * until only one loop remains on your hook—for a treble, that’s twice more.
With each taller stitch (double trebles and so on) you yarn over more times and then work the loops off of the hook in pairs, just like you do to make a dc and tr. The only difference is that you have more pairs of loops to work off.
What About Tall Stitch Variations?
Aquarienne has very tall Tunisian crochet stitches.
Note that I’m sticking closely to the basic stitches here. That means I’m leaving out:
other types of tall stitches, such as the extended ones of half-step heights,
These non-basic stitches have the same problems with loose top loops. My tips below will help.
A Better Start
Our goal is no slack in our loops beyond what’s needed for crocheting at our normal smooth and easy gauge. This is not about crocheting tighter. It’s about identifying where we let extra yarn creep in.
Buff your crochet hook surface.
Even slight, imperceptible residue will cause you to need a bit more slack in your loops. For a few seconds I vigorously rub the whole stitch-making zone of the hook with a soft cloth (preferably microfiber or chamois). I do this when I start a new project, resume crocheting one after a long break, or daily during peak summer humidity.
Adjust the initial loops.
The loop that’s already on your hook will become the top two loops of the new stitch. I tug on it gently to tighten. The loop should still slide freely along the main part of the hook (not the narrower tapered neck of it).
Let’s start a triple treble (US: trtr, UK/AUS: quadtr). I yarn over four times and immediately slide all the loops together while tugging a bit on my yarn. This removes unnecessary slack. They should still slide well on the hook as a neat, snug group. Keep your thumb or forefinger on the group so that they don’t loosen as you start crocheting.
It’s easy to overlook how much extra yarn we add to a stitch if the yarn overs spread out along the hook. (Keep this in mind for lacy Tunisian crochet too!) This will become a quick automatic movement after a while.
Better Stitch Making
While working the loops off of my hook in pairs, I pull up a bit on the loops. This has two benefits.
Lifting adds elegance.
If you think of the base of a stitch as having two “feet” planted in a stitch, then pulling up a bit higher while working the stitch creates longer “ankles” and a streamlined body. I first learned this about the dc from Pauline Turner in her Crocheted Lace book (Martingale, 2003). She explains why even experienced crocheters can have trouble getting a doily to lie flat if their stitch heights vary from the designer’s.
Lifting while making your tall stitches will help you get row gauge for filet lace projects. Feel free to add a chain to your turning chains if lifting makes your row a whole chain taller.
Use the “reserve” yarn.
Not all of the yarn is coming from the ball of yarn to complete the stitch. Some comes from the “reserve” yarn that’s wrapped around the hook. As I crochet I’m almost miserly about the yarn coming from the ball as I pull up a bit, yarn over, and pull through two loops at a time.
Try it: go slowly and watch how more yarn gets pulled off of your hook if you restrict the flow of yarn from the ball.
Part of this motion is that I’m also tilting my hook at a sharp angle. The head is pointing almost straight down as I pull a loop through the next two loops on the hook. This helps the yarn slip from hook and into the stitch at a pretty angle.
The stitches comes out uniformly neat and orderly looking. These subtle crocheting adjustments will become automatic and feel natural.
The Yarn Matters
Crocheting a tall stitch involves a lot of wrapping. A right-handed crocheter wraps the yarn around the hook in a counter-clockwise direction. It either untwists a yarn, or adds more twist, depending on whether the yarn starts out with a clockwise or counterclockwise twist (a.k.a. “S-twist” or “Z-twist”).
This is really noticeable sometimes. The tall stitches look stringy or uneven for several reasons:
It’s hard to work the loops off the hook evenly without splitting the plies of yarn.
A yarn flattens when it loses twist. This affects how the stitch looks.
Separated yarn plies add a stringy look to the surface of a completed stitch.
The fiber blend matters. Slippery yarns add challenge, and so do yarns with uneven bumps. Sometimes trying different crochet hooks helps (remember to buff them first).
When you’ve tried everything, it’s not you. Occasionally,tall stitches are going look looser no matter what you do! Blocking might help.
This probably sounds about as fresh and exciting as “take time to check your gauge” but the transformation is so worth it.
Tall crochet stitches are structurally complex. Blocking gives the yarn strands a chance to absorb the energy you added with all the wrapping and looping, and to meld evenly into a stable column.
Your tall stitches will respond even more handsomely to blocking if your yarn does. Natural fiber content helps because it responds so readily, but you can also block some 100% acrylic yarns with steam very carefully.
Crochet’s lacy beauty really shines through with the tall stitches, doesn’t it? I fall in love with crochet all over again when I use them.
Many crocheters have been trained to see the slip stitch as a humble little stitch that is very useful, though limited. It has such a simple structure that there couldn’t be much to it.
Or could there?
Pictured above: “Bosni-Misti-Möbi”, a recent teaching project. It’s a true mobius (i.e., seamless infinity rounds with no turning) of 100% Bosnian-type slip stitches, with stacked color pooling and a Bosnian lattice border engineered to maintain the same color uptake (stacking) of the rounds as the rest of the stitches.
It’s Global
A venerable old subcategory of Slip Stitch Crochet is known in many countries by different names. English speakers have called it Bosnian Crochet, Muslim Crochet, and Shepherd’s Knitting. In Norwegian it is pjoning, and in Swedish it’s krokvirkning, smygmaskvirkning, and bosnisk virkning.
It may be the oldest form of crochet.
Many crocheters and knitters remember seeing their relatives from other countries such as Morocco, Bosnia, Poland, Norway, and Sweden, crochet thick, dense socks, mittens and hats with slip stitches. The fabric is so dense that mittens made from it are very warm, durable, and soft.
Some of these traditional slip stitch items are even waterproof.
Not only is the fabric practical, it’s beautiful! Two simple versions of the slip stitch can be all that’s necessary to create the intricate patterns of textures and colors of this centuries-old art form.
Slip Stitch Crochet is an Unmapped Frontier
Unmapped frontier in English, anyway. The known territory for us is tiny: new crocheters learn that they need slip stitches when joining a round, or for traveling invisibly across other stitches, such as when crocheting doilies, granny squares, and other motifs.
Unfortunately we also learn that this is all it’s good for. Please see my Slip Stitch Fake Facts page, which corrects the persistent misinformation.
I’m loving “big-hook slip stitch” for beginners—and for making larger garments fast! Please feel free to use thicker yarns and larger crochet hooks than the ones listed in these patterns.
It’s precisely because the diminutive slip stitch has such a simple structure that a seemingly insignificant change in how it is crocheted results in large-scale effects. Merely changing the hook size or yarn type can be enough to create something stretchy enough to be worn as a “magic tube” scarf, or slinky enough to seem to pour over the shoulders. Change the entry point of the stitch, change the direction of entry, change the direction of working, change the ‘yarn over’ that completes the slip stitch, and more.