Posted on 5 Comments

Day 1 of 50: Crochet Conference Prep

“Day 1 of 50”?

Yes. Fifty days of updates. Fifty is 7 weeks-and-a-day, a nice round number. I need all 50 because I’ll be teaching 5 different 3-hour classes at a crochet conference while managing a booth in its market. It’s epic.

A friend is preparing to teach at the same event for the first time, and another friend is considering it in the future. They’re on my mind as I do this prep again. (It’s my 2nd time having a booth and I think the 6th time teaching lots of classes.)

I’m going to track my progress and thoughts out loud as I go. Some days it’s teaching prep, other days it’s booth merchandise/yarn company stuff, and always lots of swatching and designing. Most days it’s a jumble and I’ll blog a highlight of it. Years from now I’ll enjoy looking back over this.

Today I Cross a Big Teaching Item Off the List

The yarn used in a crochet conference class can matter immensely. Having also taken many crochet classes, I know how hard it is for students to choose which yarns to bring to class.

I asked a yarn company if they would sponsor my Stitch Games class at the crochet conference. This means they would donate enough yarn for all the students to use. Today they said yes

This makes my week. Their hand dyed yarn is my first choice for this class! (Below are swatches of this company’s yarns in soft colors. These are tests for other class topics.)

I’ve used it so much while developing the Stitch Games swatches and designs. I know its fiber, weight, bounce, and twist work for key stitch patterns, and I find the color sequences are dependably easy and fun for crochet. I want each student to have the best possible experience learning something unfamiliar. This yarn helps guarantee it!

This colorway is custom hand dyed for my local yarn shop. It’s called “Grape Jelly” and is based on the colors of the Crown Jellyfish photographed by the yarn shop owner in Fiji’s Rainbow Reef.

Bare Bones Scarf is crocheted corner to corner as a “game” in which you assign stitch groups to yarn colors! It’s one of three patterns in the Crochet to the Colors Playbook.

Posted on Leave a comment

On The CGOA Runway: Doris Chan’s Lotus Bolero and Lace Pants

Vashti Braha models Doris Chan’s crochet designs in Lotus yarn.

CGOA member Irene Iannelli brings her photography-savvy husband, Alex, to Chain Link conferences. Here’s one Alex snapped at the 2014 summer fashion show banquet, during the guild’s 20th anniversary crochet conference.

Doris Chan designed the lace pants and the bolero in her signature construction method of crocheting in the round from the top down. The drape and fit feel naturally comfortable and sleek. She waited to design these garments until we developed the Lotus yarn for them. They’re made for each other.

Click on the photo for more details on the patterns. Bolero pattern and our Lotus yarn are in the shop.

Even Alex and Irene’s adorable toddling daughter modeled on the runway for the first time! July 26, 2014 at the Radisson in Manchester, New Hampshire.

Posted on Leave a comment

I Wore Starwirbel as a Ponytail Lace Veil

I’ve been waiting for photos to surface from this summer’s CGOA’s Chain Link crochet conference (end of July in Manchester NH). Here’s the only one I have from the night I wore a crochet lace funnel cowl as a short veil covering my ponytail! You can barely see it in the first photo. In the second photo is Starwirbel – the flaring star stitch spiral of fine sequined mohair and silk.

It was fun and judging from the comments I received, it worked! I wouldn’t have thought of pinning a lace capelet as a veil-like hairpiece, but I was dressed in mostly black with some paisley and a sparkly silver belt. I wanted to include Starwirbel, but not as a cowl…and…voilà: un voile!

Posted on 2 Comments

Star Stitch Crochet Class Resources

Four kinds of star stitches: corrugated cowl, striped scarf, quilt-like coverlet, sheer glittery lace capelet.

A Star Stitch For Every Purpose is the name of a sold out three-hour crochet class that I taught in July, 2014 at the 20th anniversary annual conference for the national crochet guild (CGOA). I researched over 200 sources from the 1840’s to the present. Class materials included a spiral-bound booklet of star stitches and a step by step how-to section.

Star Stitch: Visit These First

Star Stitch History

The earliest example of star stitches I’ve found so far is in an 1881 issue of a Norwegian magazine. It’s remarkable to me how seldom star stitches have appeared in crochet books since 1881.  

When star stitches do appear in a book or online, they can vary in ways both subtle and dramatic. It’s mainly because it’s a compound stitch. It multiplies the opportunities to vary each step along the way.

This is true not only when completing each star, but also when crocheting the next row into it, and what stitches are in that next row. For example, you can crochet stars into stars – with turning or without. You can alternate a row of stars with a row of, say, single crochet stitches. These simple choices change the look of the stitch, and the experience of crocheting them.

Key historical sources

  • 1881: Nordisk Mønster-Tidende.
  • 1886: Knitting and Crochet.
  • 1891: The Art of Crocheting, by Butterick.
  • 1891: Home Work, by A. M. (Toronto).
  • Late 1800’s: Weldons Practical Crochet, First Series (London).
  • 1910: Fleisher’s Book #8.

More Resources

  • I’ve been unable to locate a print copy of two Japanese “Star Crochet” books mentioned in class, but here is the ISBN for one of the volumes: 978-4-579-11323-1.
  • Star Stitch projects and design prototypes as I add them to Ravelry: https://www.ravelry.com/projects/vashtirama .
  • For more star stitches as I create them, bookmark this Star Stitches photo album in Flickr.
Posted on Leave a comment

From Crochet Design Idea to Professional Proposal

Resources Page for Presentation given by Vashti Braha: From Crochet Design Idea to Professional Proposal  CGOA Professional Development Day, Reno NV September 12, 2012

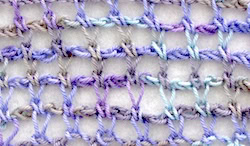
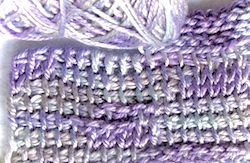
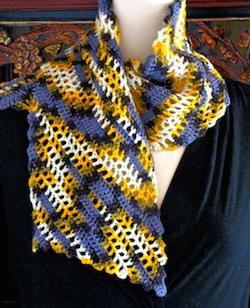
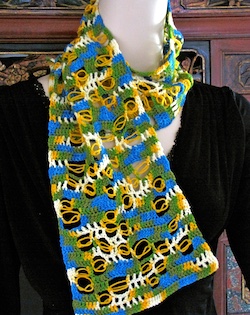
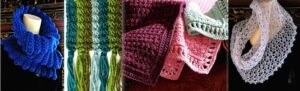
Clickable links are listed below under four subheadings, but first!  A Gallery of Ten Crochet Photography Challenges I’ve Encountered (out of Thousands)  Click or double-click on a photo for details.

1. Creating, Choosing, Sharing Images of Swatches, Sketches, and Designs


2. Why Photography Skills for all Crochet Professionals are Important

Photography has been a challenging journey for me. I’m a crochet designer and teacher first. Perhaps this is why I was slow to realize that every photo I take is also my intellectual property (therefore a business asset) with the same potential infinite value as a crochet design. The more rights one retains to each type of original crochet-related content (whether photo, diagram, text, video, etc.), the more capital one has. Forever. Content to be used as the rights holder sees fit, especially in the unforeseen opportunities the future holds. In other words, do yourself a big favor: err on the side of sitting on the full rights to too much content, because chances are your future self will be glad you did. I speak from experience already! Regarding photography for example, I only waited 2 years to learn how saving my seemingly superfluous photos pays off.

I may never see myself as a professional photographer, but everything I’ve learned about it has been worth the effort, both personally and professionally. Understanding how cameras and light and angles work is nice; even better are the unexpectedly deeper and almost spiritual things photography is teaching me, like: the kinds of beauty I used to overlook; what I want to see and what’s most ‘real’ to me; choices of visual subtexts (those ‘1000 words’ that pictures speak), and just plain what’s important to me about crochet. A surprise fringe benefit is that as I page through the latest crochet magazine or book, I now also detect other points of view non-crocheting pro photographers take, either by default or by direction.

As a crochet designer who finds project photography challenging, the best thing I’ve done is to allow myself the time to take baby steps:

  • If all I do is keep the camera very still, I’m already ahead. It can singlehandedly produce a great raw photo for isolating key details later at the editing stage. Sounds obvious, but it’s a special skill to do this for certain kinds of shots. Surprisingly, it has also taken me a long time to recognize when a photo is subtly out of focus.
  • I block everything, even jewelry. Otherwise the camera will blab loudly to everyone that I didn’t, and I’ll have to retake the photo {shudder}.
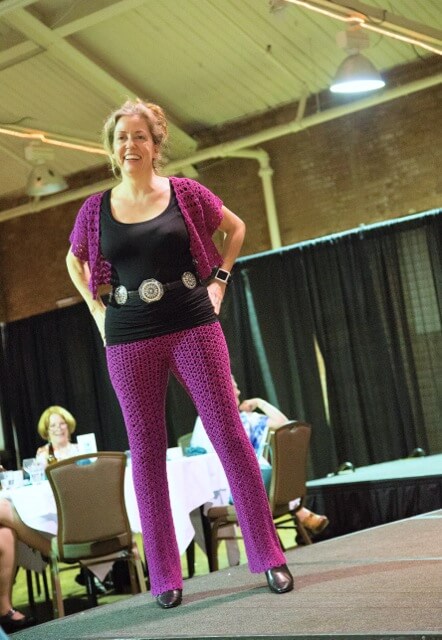
  • Having at least one mannequin is fabulous, mainly because using live models for any kind of crochet photography is overwhelmingly complicated for me. Photographing crochet on/with live models require a whole different skill set. I’m going easy on myself and still learning so much with still photography. Another surprise for me has been the strong opinions I hear FOR or AGAINST crochet or knit designs photographed on live models!
  • I refuse to obsess about perfect light. There’s no way I’m getting up at dawn to photograph anything! No way am I delaying a new pattern release just because a tropical storm is brewing! However, the more I’ve thought about this, the more I wonder if this is a luxury I have in Florida, where I usually deal with too much light. The more photos I take of crochet, the less light I need, especially when my priority is to emphasize a stitch texture, or the intricate interaction between fiber type, yarn construction, stitch pattern and drape. I can add light during photo editing, but taking away too much light is trickier.
    • As a result, I avoid buying specialized paraphernalia that clutters up my house or makes it feel too much like a photographer’s studio. I often just put up a low three-fold cardboard screen to mute the Florida sun. Having a range of simple light modifying tools and backgrounds at hand, such as folding foam-core boards, frees me from waiting for only one ideal hour of indirect sunlight or a weather-perfect day.
  • Photoshop will just have to wait its turn. Until more non-photographers’ faces relax when they talk about using Photoshop, I’m making the most of iPhoto and supplementing with iWatermark and whatever the current incarnation of the online Picnik is – and enjoying myself while mastering the basics.
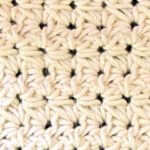
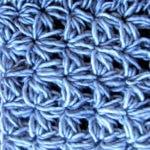
  • I learn a new setting on my camera when I’m good ‘n’ ready. My favorite option so far is the macro setting (on my Canon it looks like a flower symbol). It’s especially great for any beaded crochet, fancy stitches, and step outs (tutorials). I practiced for months with different close up ranges to recognize the macro ‘sweet spot.’ I wish I’d taken a few macro pics of the beaded seam of Tunisian Petals (see my blog link below about this)
  • I turn a crochet photo session into a relaxing event. I do a batch at a time. I often jot down a specific shot I need for a pattern or blog post, because I don’t always remember by the time it’s ‘photo shoot day.’ Depending on the time of day, I may turn up the music, pour a glass of wine, and relax into the job. Or in the morning I may get all sporty and aerobic about it, especially if I’m cleaning up the room reaching to get artsy angled shots, changing backgrounds, moving mannequins around etc. I might chat on the phone, or listen to my husband’s TV show. I avoid a lot of caffeine, though, for a steadier hand.

Helpful Links for Crochet Photography Newbies:


3. Submissions Guidelines for Crochet Pattern Magazines:

Submissions Guidelines for Pattern Book Publishers:


4. Recommended Miscellaneous Resources for New/Aspiring Professional Crochet Designers:

Note: even though some of these links offer advice about expired calls for proposals, the information is still relevant for future calls.