Expedient Cowl-Capelet

Beginner slip stitch crochet with a big hook!

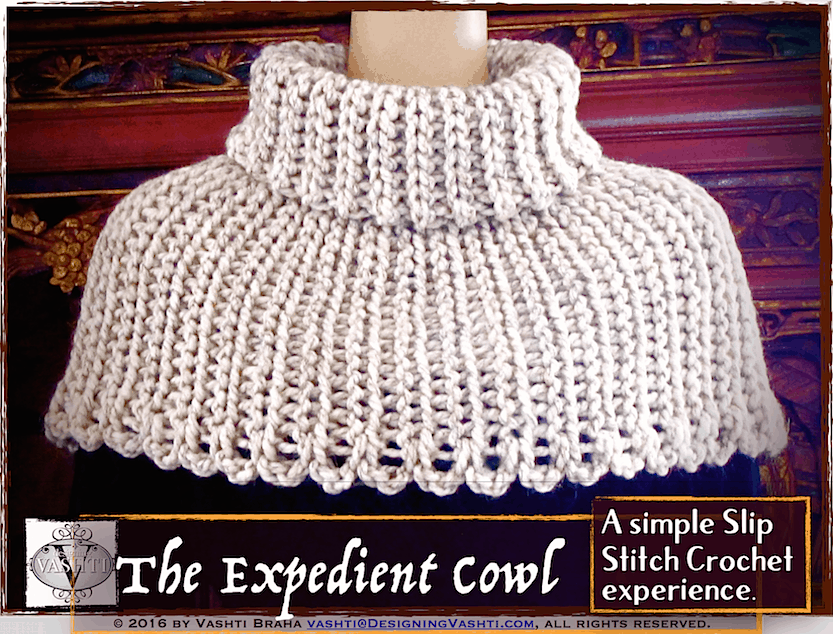
This stretchy 100% slip stitch crochet pattern contrasts two simple kinds of slip stitches. Crochet this fast, cozy, satisfying capelet-style cowl in one piece with a big crochet hook and thick yarn.

It took me one evening to crochet with a jumbo crochet hook and two balls of thick yarn. It’s exactly the accessory I’ve been needing for an unpredictably chilly season: warm, snug, breathable, and easy to put on.

All you need to use for this “expedient” satisfaction are the two most familiar slip stitches (front loop only, and back loop only).  Simply alternating groups of front and back loop slip stitches provides smooth shaping because they vary in stitch height. (See the Slip Tectonics Cowl for an interesting demonstration of this.) An occasional short row enhances the way Expedient Cowl pours over the shoulders.

Skill Level

Easy Intermediate. This pattern is a good introduction to slip stitch crochet technique, so I’ve included tips that help students of my “Slip Stitch Crochet 101” classes. If you’re new to slip stitch crochet, Eva’s Ribs Scarf is a free beginner pattern of all back-loop slip stitch that you can try if you’d like some practice before beginning Expedient. Some beginners find front-loop slip stitch easier to start with than back-loop—an easy pattern to try this stitch with is the Slipster Slackscarf.

You’ll have the opportunity to learn these skills:
✤ How to crochet jumbo-sized slip stitches with thick yarn and a big crochet hook.
✤ How and why to crochet back-loop and front-loop slip stitches within the same row.
✤ How to count rows of back-loop slip stitch as ribs, vs front-loop rows.
✤ How to do simple and occasional short rows.
✤ How to use the designer’s row direction diagram, a handy tool with slip stitch crochet.

Finished Dimensions

Neck opening circumference 17″ {43.2 cm}, stretches to approx. 42″ {106.7 cm}.
Shoulder opening circumference 42″ {106.7 cm}, stretches to approx. 64″ {162.6 cm}.
Height is 17.5″ {44.5 cm} from neck opening to shoulder opening, edged; 13.5″ {34.3 cm} when collar is worn folded over.

Materials

  • Crochet Hook: Size P {11.5 mm} crochet hook or size needed for gauge. Note: size P in some brands are 12 mm instead, which is fine too.
  • Yarn: Lion Brand Wool-Ease Thick & Quick Tweeds (6oz/170g, 106yds/97m per skein, 86% Acrylic, 10% Wool, 4% Rayon), color Wheat, 2 full skeins used.

Yarn substitution advice: choose a yarn thickness classified as a #6 Super Bulky Weight or look on the yarn label for a recommended crochet hook size range of US M/13 {9 mm} to US Q {15 mm}. These yarns have also been called Super Chunky, Roving, or Polar Weight.

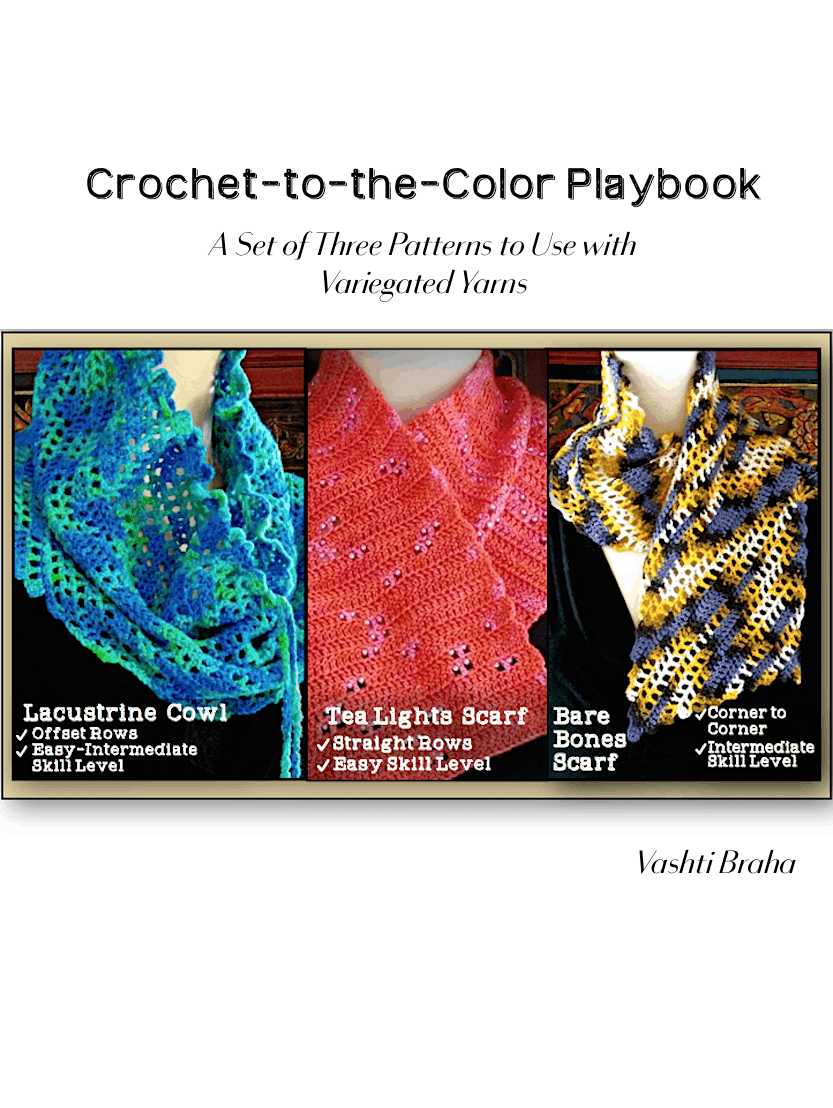
Crochet to the Color Playbook

This 11-page booklet has three scarf patterns, and introduces a kind of freeform crochet that I love to use with richly hand painted yarns. This method has one-of-a-kind outcomes—like a game! All three scarf designs are self-edging and reversible.

This “stitch game” is a fun way to juggle some variables to bring out asymmetrical and startlingly edgy looks in classic crochet stitches. You get one-of-a-kind results each time you try a colorful new yarn with one of the three scarf patterns in this set:

  1. The Easy-level Tea Lights Scarf is based on the practice swatch.
  2. The Lacustrine Cowl is Easy-Intermediate because it uses offset rows.
  3. The Intermediate-level Bare Bones Scarf starts in one corner.

As the introductory playbook for the Level I stitch game, this three-pattern set uses just two basic crochet stitches and discusses game strategy with them. It includes several examples of game swatches. (The Level II playbook will add even more variables by using more stitches in new ways.)

Table of Contents 

  • How to Do the “Crochet to the Color” Method
  • Skill Levels & New Skills List, page 2
  • Yarn Selection Tips, page 3
  • The Practice Swatch & Game Strategy, pages 3-5
  • About the Three Projects in this Booklet, page 5
  • Materials Needed, page 6
  • Pattern Terms, Abbreviations, Special Stitches, page 6
  • The Patterns, pages 7-11
  • Questions & Feedback, & About Level Two, page 11

This pattern set presumes that you already know how to crochet these basic stitches: chain, single crochet {UK: double crochet}, and double crochet {UK: treble crochet}. A familiarity with filet crochet is helpful. In this booklet the color leads the crocheting instead of a filet chart. Each result is unique because each crocheter will naturally apply the game rules a bit differently.

You’ll have the opportunity to learn these skills

  • How to evaluate different kinds of variegated yarns and create new effects with them.
  • How to “crochet to the color” in traditional filet rows for a fresh randomized effect.
  • How to prevent a gap after the first double crochet of each row (single crochet method).
  • How to do the foundation double crochet, and start and end rows with increases or decreases.
  • How to crochet a scarf diagonally from one corner to the other, and customize its dimensions.
  • How to include beads in a stitch game project.

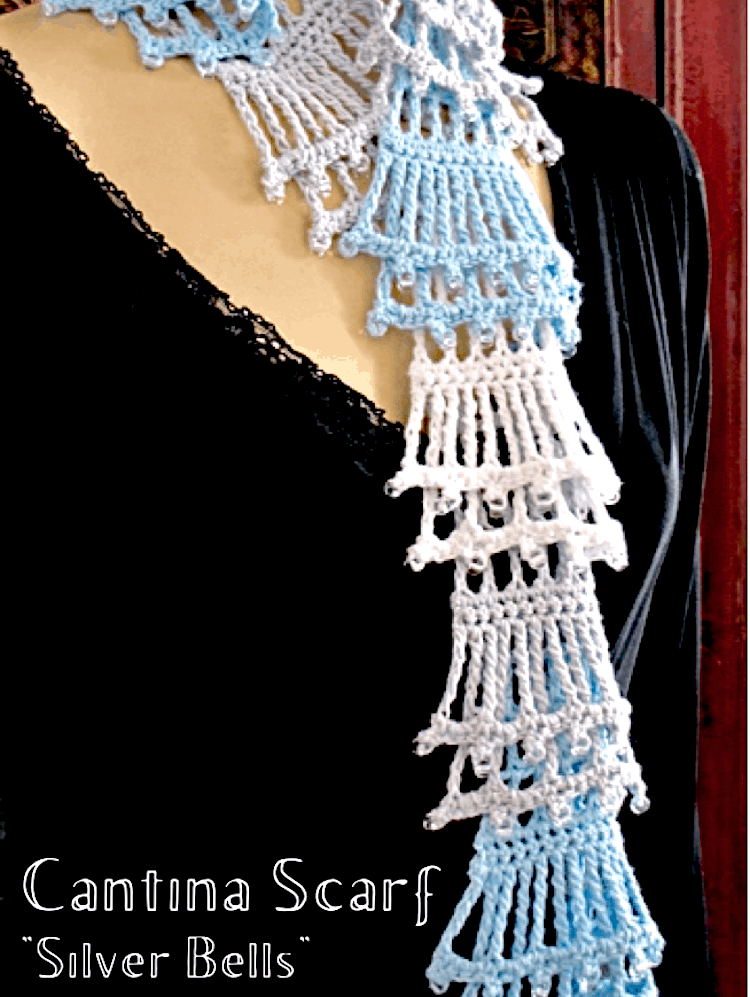
Cantina Scarf: Flounced Filet

Cantina Scarf is the yarn-partying sister of the Emdash and Antoinette scarves. Like Antoinette, this one’s a holiday-inspired design; in silvery colors and beaded picots, the flounces remind me of silver bells. 

This is a fast and portable filet crochet project in the Easy skill category. The pattern includes optional intermediate-level skill-building refinements: Special Turn, Centered stitches, and Standing stitches. It naturally lends itself to color changes and scrap amounts of yarn. The beaded option is low-fuss because you only need string on enough beads for one flounce at a time.

After using this pattern you will know (if you didn’t already):

  • How to start a new filet stitch row with a neat, even edge.
  • How to crochet filet stitches so they stack up in centered columns.
  • How to crochet polished-looking super-tall stitches for dramatic effect.
  • How to create quick and lovely layered lace flounces.

Finished Dimensions 

50″ x 5″ at flared points (127.0 cm x 12.7 cm). Change these dimensions using guidelines provided in the pattern. UK and Australian equivalents for American measurements, yarn weights, and stitch terms are in brackets { }.

Materials

  • Crochet Hook: US G6/4mm or size required for gauge. 
  • Yarn used: DesigningVashti Lotus Snacks (52% Cotton, 48% Rayon; 85 yds/77.7 m per 1.16 oz/33 g ball). For 3-color “Silver Bells” version, 1 ball each of Satin Grey (MC), Crystal Blue, and White Blaze. For 13-color rainbow version, 20 yds/18.3 m (7.7g, or ¼ of one ball) per color. To substitute, choose a #2 Fine Weight yarn with a recommended crochet hook size range of US E/4 {3.5 mm} to US G/6 {4.0 mm}. These yarns may be called Sport or Heavy Sock {Light DK, 5-Ply}.
  • Seed beads, optional: 15 beads per flounce (i.e., per 4″/10cm of scarf length). I used jumbo size 1/0. If you change the width of your scarf, the number of beads per flounce will change.
Posted on 1 Comment

Deluxe Crochet Hook Diagram: Free Download

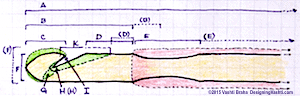
Part of the crochet hook diagram I sketched for "Beyond Crochet Hook Debates" issue 71.
I’ve greatly expanded this page since first posting it in 2015, when it was a follow up to newsletter issue 71, “Beyond Crochet Hook Debates”. It’s also now part of an ongoing Crochet Basics series.
 

Thumbnail of Vashti's deluxe crochet hook diagram PDF

At first glance the crochet hook is a very simple tool, so why are there so many different kinds? What makes crocheters fiercely devoted to some and not others? You could make your own crochet hook by carving a notch into the end of a stick or dowel and sanding it smooth. I realized how carefully designed hooks really are when I reshaped a store-bought one.

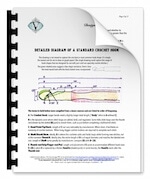
Please enjoy my deluxe crochet hook diagram and a “hook heat map” from my newsletter (free PDF)Complete Diagram of a Standard Crochet Hook.

Creating a crochet hook diagram also helped me tease out the finer elements that make all the difference between one hook and another. My first sketch grew into a comprehensive map! It brings together terms from several different sources.

How Many Crochet Hooks?

How many crochet hook sizes should there be? How many crochet hooks does a crocheter need? It turns out the answer is different for every crocheter because it depends on about five factors, below.

Consider the yarn you like to crochet with.

Some crocheters are very partial to one or two yarn thicknesses, called weights. Medium or worsted weight is a crowd-pleaser, for example. If you like to crochet with yarn of any weight, from cobweb to roving, you need a few different hook sizes for each of the eight yarn weight categories (#0 Lace to #7 Jumbo)!

How about fiber types?

I’m still surprised sometimes when a crochet hook gets along much better with one yarn than another. If you like to experience the full menu of fibers and fiber blends, from the fuzziest to the slipperiest all spun in different ways, you’re going to need hooks with different head shapes and surface finishes.

  • I really notice this when I crochet with a non-yarn like wire, jewelry cords, and fabric strips.
  • I can pick up a lot of speed with a hook that has a glossy aluminum finish except with very glossy silk yarn. That’s when a brushed matte finish is better.
  • When a fluffy microfiber (synthetic) yarn drags on a giant plastic hook because of static electricity, I switch to a wood hook.
  • When a yarn is dense and round like spaghetti (Jelly Yarn, rayon-wrap cordé, wire, tubing, leather lacing, etc.), a crochet hook with a roomy “bowl”[see diagram] is much better than one with a slit-style bowl.

What kinds of things?

Want to try every possible kind of project, from beaded jewelry to exploded lace to sturdy totes to thick blankets to…so many more kinds of things!? Projects can require very particular crochet hook sizes, styles, and finishes.
Situations, events, and physical conditions.

I have favorite hooks for marathon crocheting (when I have a big crochet deadline to meet). You might like to have a hook set just for traveling like I do; for plane flights I try to avoid metal hooks. Plastic and wood hooks are lighter in my bag, and less quick to slide down between seats to be lost forever.

For those crocheters with hands that are particularly small or large, sensitive to cold, tire easily, are arthritic or in recovery from surgery, and so on, there are crochet hooks specially designed for you. Look for hooks in ergonomic shapes. You can also add your own ergonomic handle with clay, pencil grippers, wrapped fabric, and other materials.

What if you need to crochet in a low- or no-light situation? Light-up hooks, and those that don’t match the color of your yarn are best.

Any special techniques or stitches?

Like to try dramatically different stitches like bullions, split clusters, and picking out that bump loop of single crochets? Tunisian and double-ended crochet? Crochet along the edge of fabric? Cro-tatting? The right crochet hook for the job sure makes a big difference with these.

Loop Picking”: Hooks with a pointier head are very helpful when trying to pick specific loops to crochet into. Camel crochet is a classic case. I usually reach for one when I do Tunisian or slip stitch crochet. Some brands are naturally pointier. I like how easy it is to file the heads of my inexpensive bamboo hooks in different shapes to learn what works best for me.

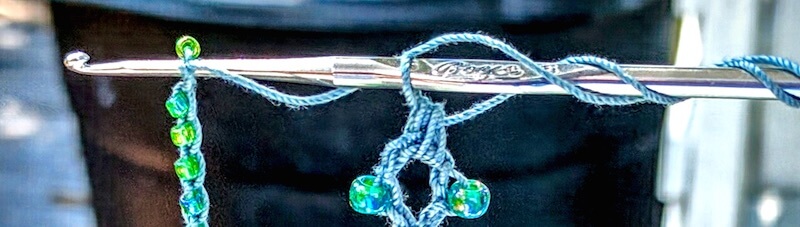
Beading: I need to have steel crochet hooks of several sizes on hand. You’ll need some with hook heads that are small and streamlined enough to pull a loop of thread or yarn through bead holes. Tulip has done this with their bead crochet hooks.
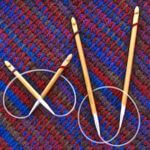
Tunisian: (Projects can really vary, so I’m going to do a separate post on Tunisian hooks.) Generally I need the length of the hook head to be as short as possible [see diagram], and I need the surface to be frictionless with the particular yarn.

Hard Crochet”: The 1970’s crocheter Mark Dittrick emphasized the difference a large steel hook (size 0 or 1: 2.35–3.25 mm) makes for his ultra tight and stiff sculptural crocheting.

Crochet Hooks as Treasure

Did a family member teach you how to crochet? My mother taught me. I treasure her crochet hooks and the brown moiré jewelry wrap that she used as a hook case.

When you teach a family member, you create a future where your favorite crochet hooks will be cherished!

If you know someone who would like this detailed crochet hook diagram, please be kind and send them to this blog post so that they can download their own copy directly. Right-click this direct link to copy it: https://www.designingvashti.com/crochet-hook-diagram-free-download. Thanks!

The next post in this series is on the surprisingly rich topic of crochet hook sizing.
Posted on

Hand Chaining How To’s

How to videos are a great way to learn hand chaining. I viewed several this past week. My favorites are listed below.

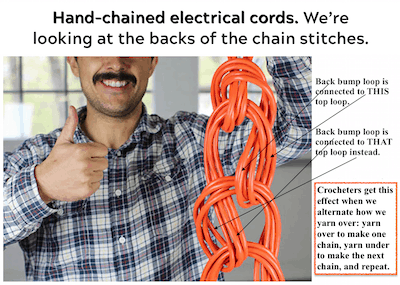
A man holds up electrical cords that have been hand chained together for a more manageable length.
Here’s an example of a knot tying approach to hand chaining. Image is from artofmanliness.com; text is mine. For a front-facing view of chains with mixed yarn overs, see my Yarn Overs, Yarn Unders post.

After watching so many hand chaining videos, I found that only some show how to do it the crochet way. Other videos show a knitting style, or as a form of knot tying.  I’ve chosen a few video links for each approach so that you can try them and see which you like best.

Hand Chaining the Crochet Way

This is the chenille yarn that Kathleen Sams shows in her crochet video (see link below).

Hand chaining the crochet way means you’re using your fingers or whole hand the same way that you’d use a crochet hook. In crochet, if we put a loop on the crochet hook by winding the yarn around it, it’s called a yarn over. It’s also possible to just “grab” the yarn with the hook and pull it through with no actual yarn over. This has sometimes been called a yarn under. The yarn over is the standard, correct one.

Watch for when a hand chaining video shows the yarn over, or the yarn under, or mixes them. It’s tempting to use the yarn under when hand chaining because you can just reach through a loop, pinch the yarn, and pull it through. The simple pull-through of the yarn under makes for very quick hand chaining! However, if you plan to do most of your crocheting with a crochet hook, the yarn over is a very good habit to establish. 

Three videos that show yarn overs:

These next three videos show yarn unders:

  • Donna Wolfe of Naztazia.com starts off her video showing hand chaining by pinching the yarn with her two fingers to pull it through a loop: a yarn under. When she shows how to do the same thing with a crochet hook, she uses a standard yarn over.
  • Watch Kathleen Sams make hand chaining look so fast and easy with yarn unders and the thickest chenille yarn ever!
  • ThePreschoolMommy adds adorable sound effects to her yarn unders: “The fingers go ‘Hel-LOO’ and bite the yarn and pull it through.”

By the way, in most of these the adjustable slip knot is made instead of the locking one. Donna Wolfe uses the locking slip knot. Now try some of the other videos below for contrast. Whichever one you enjoy the most is the best one for you!

Hand Chaining the Knitting Way

Hand chaining with a knitting approach means that a finger or hand is held like a knitting needle while a loop is worked off of it. A possible advantage is that one tends to work at a smaller scale, keeping the loops closer to the fingers. This can help one to control the size of each chain stitch.

  • This video is a good example of a knitting style of hand chaining. She keeps a loop on her left finger, wraps the yarn over it with her right hand, then pulls the loop over the new loop and off the finger. (It reminds me of spool knitting, if the spool had only one peg.).
  • Laura Eccleston of Happyberry Crochet does it the same way.  She cautions that it is fiddly, not very easy.
  • Here’s a variation by Beadaholique. She uses beads and beading thread for making a necklace.

Hand Chaining the Knot Tying Way

The most noticeable thing to me about a knot tying approach is the terminology. A rope is bent, which is called a “bight,” and then pushed through a loop. Terms like “sinnet” or “knot” are used; never “stitch.”

There are a few other differences too. The purpose of hand chaining in these videos seems to be of practical interest mainly to men who need to make long lengths of heavy rope more manageable for storage, cleaning, or for a “quick deploy” survival bracelet. It’s also called a “zipper sinnet” and “chain shortening” because it quickly unravels when the rope is needed. It ranks as one of the Four Knots You Need to Know.

Here are a few knot tying videos on hand chaining:

Which videos do you enjoy? Which one can you do the most quickly? Which one produces the nicest-looking chain stitches for you?

Updated November 2018. It’s part of an experimental blog post series: Vashti’s How to Crochet Book