I have a pack of three large Moleskine notebooks. They started out identical and very plain. I use two of them for crochet work. How to distinguish them all from each other? Hmm.
Moleskine + crochet go together so nicely. I see folks using the notebooks for crochet journaling, and crocheting covers for them. They’re great for me too except in two ways.
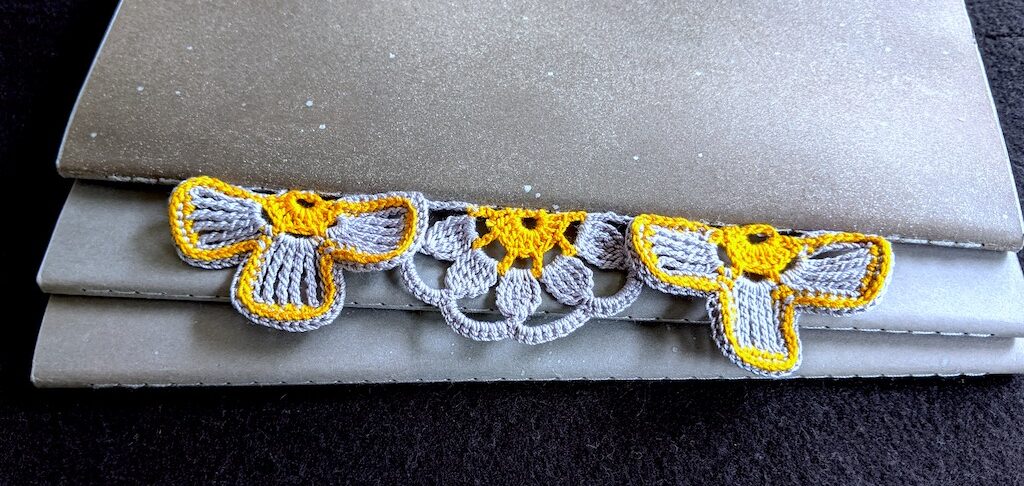
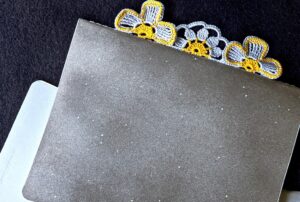
I can’t wait to show you my new crochet solution. The spine of my crochet notebook now sports a title in a universal language.
Pre-Crochet Prep
I mention this because I needed to try a paper-coating idea before adding the crochet to its spine. This is why its cover color ends up differing from the other two in this image.
First, about the cover. It’s plain cardstock. (My old design notebook was a fat spiral-bound graph paper pad with a durable plastic cover.) I like this slim one better, although its rather absorbent cover retains every scuff and stain. Its medium gray color is also fading.
First, I lightly spray-painted it with fine silver glitter. Then I used a fat metallic silver paint marker to add random speckles of different sizes, and a border. These cover up spots and marks.
Unfortunately, even though it’s spray paint, the glitter rubbed off. After I took the next photo below, I lightly sprayed a few layers of glossy sealer on it. It works on the glitter and adds a durable feel to the cover. It also darkened and changed the gray color of the paper, even more than the spray paint did.
You can also see how the upper notebook has faded and yellowed a bit compared to the unused one under it.
The Crochet Fix
Here’s what I said when I started swatching the first of these three flower pieces:
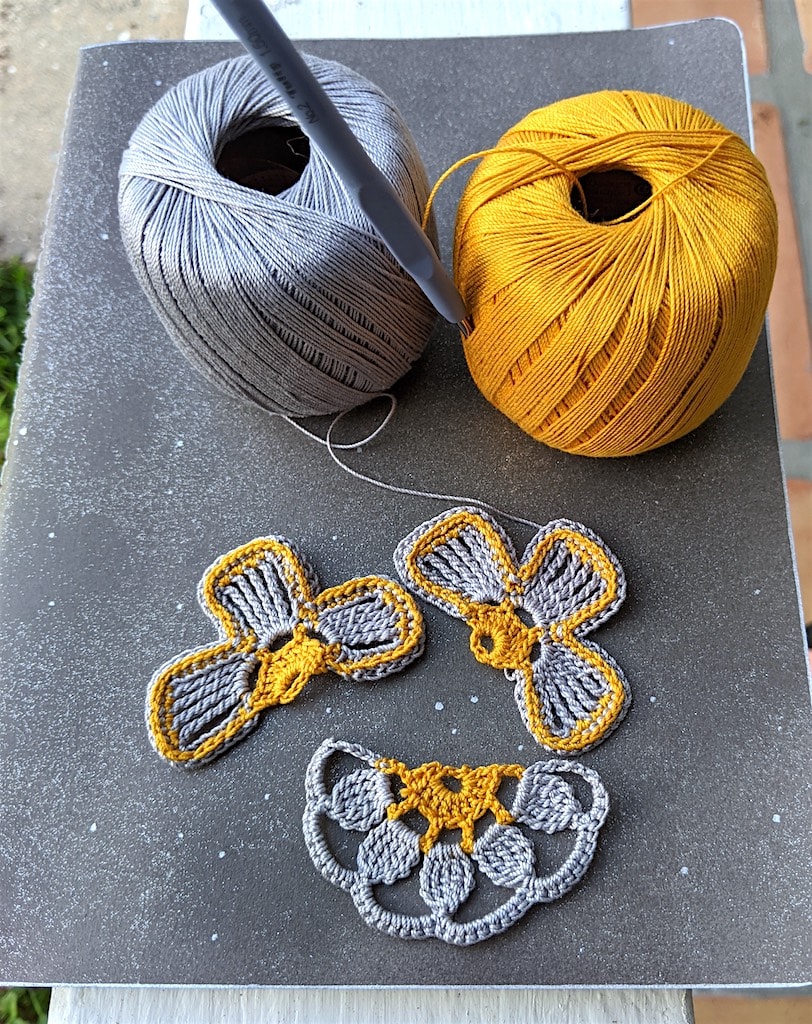
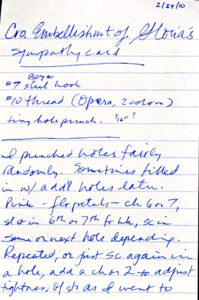
I’m trying out a tall-stitch flower motif but as an edging, and alternating an old gold color with an old silver color of thread I bought in Paris to see what happens with a glass of wine, to then see if this is the way I want to spruce up a Moleskine notebook. If it is, I shall blog it.
I’m wondering if this Scheepjes Maxi Sweet Treat crochet thread might satisfy my longing for the discontinued Opera thread ?
I adapted these flower pieces from flowery motif patterns in old Duplet magazines in my Tall Stitch Virtuosity class prep pile. The color changes made it easy to cover yarn ends, so weaving ends wasn’t an issue.
The second of the three notebooks is for slip stitch teaching thoughts. It will be fun to crochet a spine trim for it with slip stitches.
Crocheting Into Non-Crochet
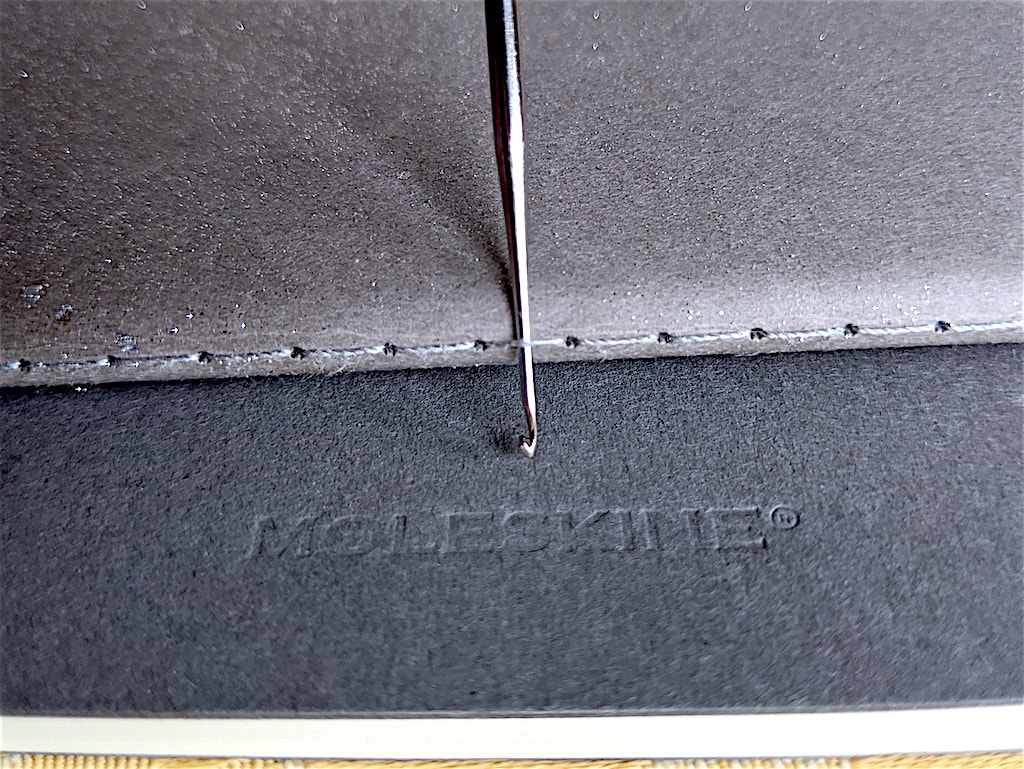
I’ve blogged before about crocheting along the edge of a greeting card, a t-shirt, and foam sheets. (Crocheting a wide border onto a plastic-coated tablecloth is an adventure I thought I blogged; link goes to its Ravelry page.) I’ve even crocheted pages of a book together. I don’t recall ever wanting to stick a crochet hook into the saddle-stitch binding of a simple notebook before.
My Plans Changed as I Swatched
I figured I’d pick a half-flower I liked and then create a whole repeating strip of it to form an edging. Instead, my Moleskine crochet ended up being 3 flower fragments that I attached one by one. I so love it.
The other thing I assumed was that I’d crochet right onto the notebook binding. This was the original inspiration! I worried more and more about weakening the binding string. Ultimately, I fastened off the third flower piece with a very long yarn end. I used this to sew each crocheted piece to the binding with a sewing needle and simple overhand stitches.
Moleskine’s no-frills design is easy to find in other brands too. I love Moleskine’s rounded corners and the paper quality.
I’m not sure this Moleskine crochet idea would have occurred to me if it weren’t Day 27 of the Great Quarantine! Maybe it would have, but would I have followed through on it? Or blogged about it?