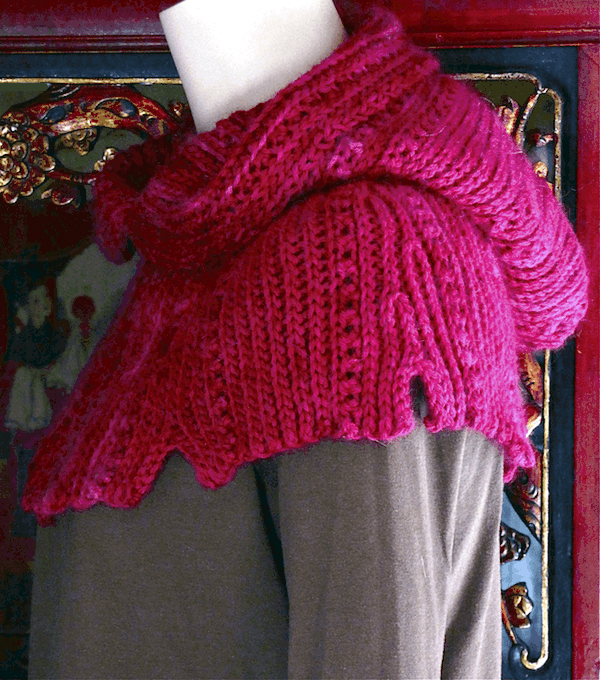
Thaxton Hooded Cowl

Thaxton Hooded Cowl: Slip Stitch Crochet

This pattern offers two lengths plus a seaming alternative that creates a true hood. Even without a seamed hood, it’s long and stretchy enough to cover the head in the style of a wimple or “snood.”

This is my warmest, favorite winter accessory. It features my all-time favorite type of ribbing: crochet slip stitches worked into the back loop.

Luxuriously roomy, stretchy, warm and squishy, the Thaxton Cowl will keep your upper back and chest toasty whether worn like a collar or unfurled into a hood.

It’s a close-knit yet 100% crocheted cowl. The rows run from top to bottom of the cowl opening, so it’s crocheted side-to-side for change of pace. The lovely short row wedges allow it to flare at the shoulders yet cozy up to the neck. When not worn as a hood, the full-length version is long enough to be triple-folded. The shorter, yarn-conserving option is still roomy. The Notch scarf is based on these textured wedges.

Skill Level

Intermediate. Short rows are an Intermediate skill. Also, the hook-led stitch gauge is much looser than most crocheters were taught to use when they learned how to make their first slip stitches.

The slip stitch is elementary crochet, and I find that crocheting slip stitch short rows is a breeze. It adds just enough spice to a simple stitch to create that “Just one more row!” fun. If you haven’t tried slip stitch short rows yet, start with Slip Slope Scarf.

I’ve kept pattern abbreviations to a minimum and include International English equivalents for American terms.

?After using this pattern, you will know (if you didn’t already):

  • How to crochet stylish and stretchy slip stitch ribbing
  • How to shape a ribbed cowl with short rows
  • How to add decorative accents to short-rowed ribbing
  • How to seam a flared cowl into a hooded capelet
  • How to use a hook-led stitch gauge

Finished Dimensions (Unstretched)

21″ long (from neck opening to shoulder opening) X 22″ circumference at neck, widening to 43″ circumference at shoulder {53 cm X 56 cm & 110 cm}. Extra length is for doubling or tripling as a cowl when not worn over the head as a hood. The shorter cowl option can be easily be folded over once and is 16″ long {41 cm}.

These roomy dimensions are a guideline. They allow for the slightly tighter slip stitch ribbing that I see many crocheters making. (If your stitches are tighter, the overall finished dimensions of the cowl and hood will be smaller.) Pattern includes customizing options if your stitches are coming out tighter or looser so that you can end up with the fit you prefer.

Materials

  • Crochet Hook: Size J/US10/6.0mm hook.
  • Size #4 Medium yarn: Misti Alpaca Tonos Worsted (50% baby alpaca, 50% merino wool, 218yd/200m per 3.5oz/100g skein), 2.5 skeins (approx. 550 yds/500m) of color TW10 (raspberry red) for the roomy longer hooded cowl pictured; 2 full skeins (approx. 440yds/400m) for a shorter cowl.

Substituting a yarn: The best fibers for this project add bounce and plump stretchiness to the cowl because of their wool or acrylic content. A special upscale yarn with tonal hand dyeing adds to the experience. Choose a #4 medium-weight yarn that lists a crochet hook size range from US H/8/5mm-J/10/6mm on its label. These yarns may also be referred to as Heavy Worsted, Aran, Afghan, and occasionally “Light Chunky” Weight.

  • Stitch markers: Two or more until you can recognize the last slip stitch of each row.
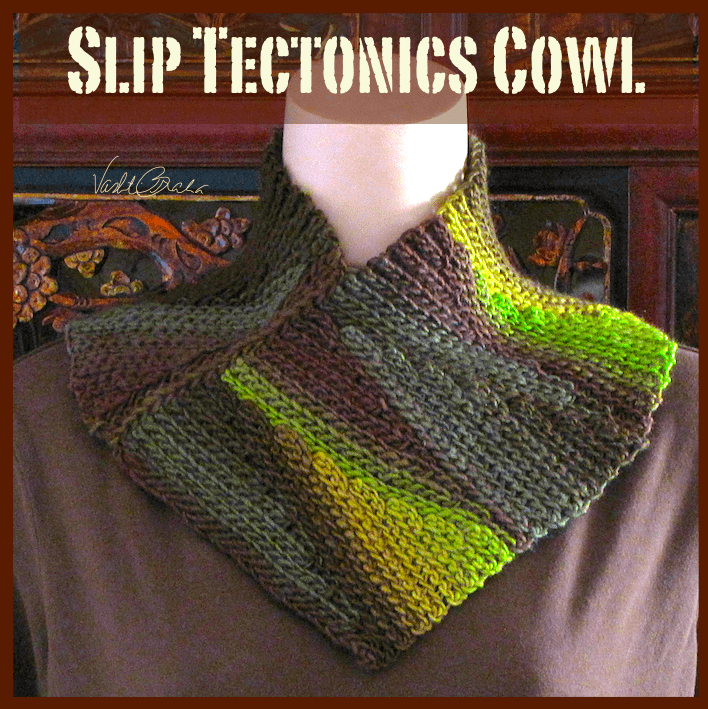
Slip Tectonics Cowl

Learn to crochet short rows with different slip stitches for a self-shaping, self-striping crocheted cowl scarf, neckwarmer, long loop scarf–even a mobius-style infinity scarf! (See Finished Dimensions, below.) It’s a cozy, stretchy, warm, snug crochet mens scarf in a neutral color. Fun, fast, and easy to crochet special technique.

This 100% slip stitch crochet scarf is a handsome study in short row wedges. The subtle contrast between two kinds of slip stitches adds natural shaping. It cozies up to the neck and drapes effortlessly at the shoulders. The result is a comfortable cowl to wear. It’s stretchy, thin, and dense–just right as a toasty layer under a winter coat.

The stitch pattern looks more complicated than it really is. With a larger than usual crochet hook, it crochets up faster than you’d think. I devoted Issue #29 of my Crochet Inspirations Newsletter to this inspiring technique of using slip stitches for short rows.

Skill Level

Intermediate. The slip stitch is an elementary stitch, and I find that crocheting short rows with slip stitch ribbing is a breeze. It adds just enough spice to the easy stitching to create that “Just one more row!” fun.

However, short rows are considered an Intermediate skill, and the stitch gauge is much looser than most crocheters learn to use when making their elementary stitches.

Start with these training wheel patterns (some are free): Bling Bam Bangles, Slipster Slackscarf, Eva. Graduate to short rowing with slip stitches: Luckyslip Mitts (originally designed as a final project of my Slip Stitch 101 classes) and Slip Slope. After Tectonics you’ll be ready for the speedy Expedient Capelet, the fluttery Undaria, and the lacy Swoop Loop!

Pattern has few abbreviations and includes International English equivalents for American measurements, yarn weights, and stitch terms. The English equivalents are in brackets {}.

After following this pattern you will know (if you didn’t already):

  • How to crochet a stylish and stretchy neckwarmer or loop scarf
  • How mixing slip stitch types can add subtle texture & drape contrasts
  • How to add designer touches to slip stitch short rows
  • How to use a hook-led stitch gauge

Finished Dimensions

Cowl is 25″ (hem)/ 21″ (neck) x 6.5″ deep {64 cm & 54 cm long x 17 cm wide}.

For a long loop scarf, 350 yds of yarn would probably result in a 6.5″-wide scarf with at least a 60″ circumference {17 cm wide, 153 cm circumference]. Give it a half-twist before seaming to turn it into an ‘infinity scarf’–a moebius loop scarf. To increase width, use a larger hook size with thicker yarn.

Supplies List

  • Crochet Hook: Size K/US10.5/6.5mm.
  • Yarn Shown: Crystal Palace Mochi Plus (80% merino wool, 20% nylon; 95yd/87m per 1.75oz/50g ball): 2 balls of color 554 “Fern Rainbow.”

Substituting a yarn: The best yarns for this project are wool or acrylic blends because they add bouncy loft. Cotton yarns do not add this bounce. Long color changes in a self-striping yarn, or subtle tonal shades of a hand dyed yarn, work great for this design! Choose a plump #4 medium-weight yarn that lists on its label a crochet hook size range from US H/8/5mm-J/10/6mm. These yarns may also be referred to as Heavy Worsted, Aran, Afghan, and occasionally “Light Chunky” Weight.

  • Recommended if you’re new to slip stitch crochet: up to 17 stitch markers (until you can recognize the last slip stitch of each row).

Aero Wrap

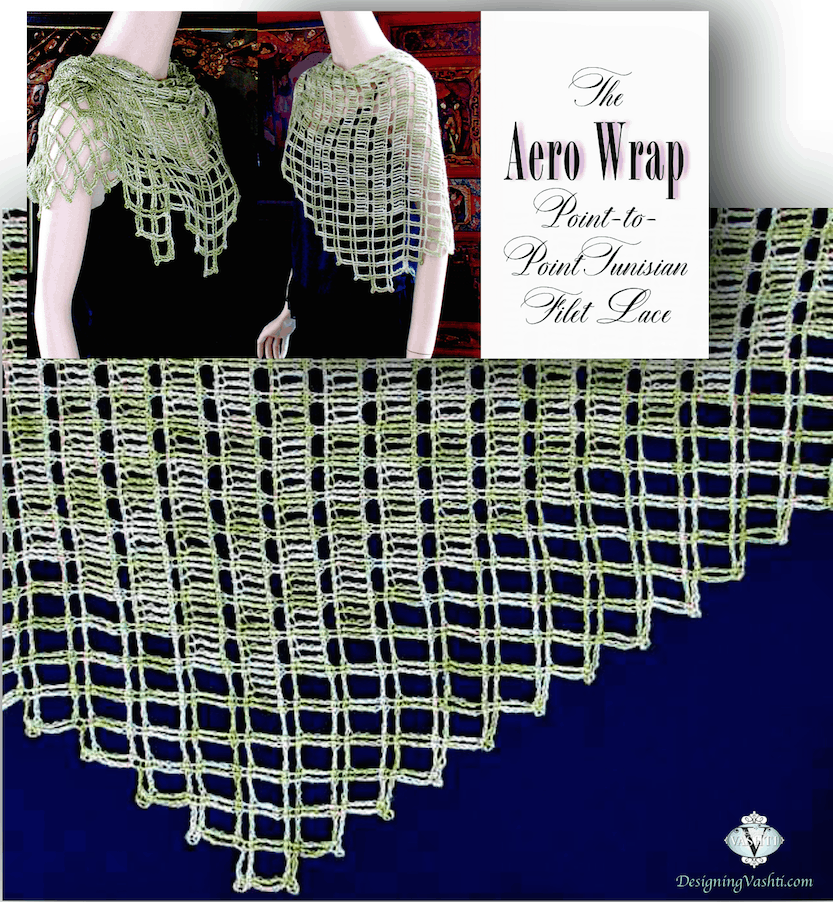
Crocheting and wearing Aero is an elegant experience of Tunisian crochet lace. With fine silk yarn and the add-as-you-go beading option, the beauty of the lacy stitches hanging from your hook will inspire “just one more row!”

I developed this point-to-point stitch pattern and love it because I can build up more stitching speed than usual with Tunisian crochet. I also found its filet logic easy to memorize.

Tall stitches and open spaces create a Tunisian version of traditional filet crochet. Writing my newsletter on lacy nets inspired it. And, the stitch pattern looks nice enough on both sides to call it reversible.

Crocheting a triangular wrap from point to point makes it easy to use any amount of light weight yarn you have on hand. If you use a smaller amount of yarn than I did, the wide, shallow triangular shape will come out scarf-sized. (The pattern is created the same no matter how much yarn you use.)

Skill Level

Advanced Intermediate. Aero combines Tunisian stitches that may be familiar to those who have already ventured beyond the Tunisian Simple Stitch: the Tunisian Yarn Over (Tyo), Tunisian Double Treble {UK: Tunisian Triple Treble} (Tdtr), and twisted stitches. To see if you’re ready for an Intermediate-level Tunisian pattern, review this quick checklist.

It’s best if you have crocheted at least one Beginner or Easy level Tunisian crochet pattern first. Warm Aeroette started out as a practice swatch for students in my Aero classes! Other good stepping stones to Aero would be Ennis Revelation and Aery Faery. I’ve kept pattern abbreviations to a minimum and include International English equivalents for American terms.

?After using this pattern you will know (if you didn’t already):

  • How to create dramatic new filet lace with Tunisian crochet stitches
  • How to crochet a triangular scarf or wrap from point to point and the delightful convenience of crocheting the edging as you go
  • How to add beads to the as-you-go edging without pre-stringing them
  • The power of simple blocking to transform Tunisian crochet lace

Finished Dimensions

The pictured green wrap is 21″ at deepest center point and 61″ wide from point to point {53 X 155 cm}. Crocheting a shawl or scarf from point to point makes it easy to use any amount of yarn you have on hand, and to make it the size you wish.

Materials

Crochet Hook: Size F/US5/3.75 mm Tunisian hook, at least 13″/33 cm long. You can use a shorter Tunisian hook for the shortest beginning rows, and then switch to a longer hook as it becomes necessary for comfortably holding all loops on the hook. If you are going to add beads, you’ll need a steel crochet hook that is small enough to fit through the bead holes and pull through a loop of your yarn. (I used a .75mm Tulip hook labeled #10. Other brands may label the same mm size with a different number.)

Yarn used for pictured scarf: Handmaiden Sea Silk (70% Silk, 30% Seacell® 437 yds/400 m per 3.5 oz/100 g ball), 1 full skein.

Yarn substituting advice: This pattern will work with any amount and weight of yarn. To match the effect of the pictured wrap, look for a yarn weight of #1 Super Fine (“Fingering”) {UK & AUS 3 Ply}; or one recommending a needle or hook size range of B/US1/2.25 mm – D/US3/3.25 mm on its label. If this is your first time crocheting into the loops of Tunisian Yarn Over stitches, try to find a yarn that has subtle color changes like the tonal hand-dyed one shown. It was a bit challenging at first to make tall stitches with slippery yarn, but I quickly grew used to it.

Small scale for weighing yarn: recommended if you’re using an odd number of skeins of yarn, or partial skeins.

Beads (optional): At least 50 size 6/0 (“E Bead”) beads and a steel crochet hook small enough to fit through the bead hole and pull a loop of yarn through it. Triple your quantity of beads if you’ll be adding 3 beads to a stitch at a time (see photo in pattern). For the green Aero I used 1 bead per 2-row repeat for a total of 44 beads; I had to discard a few that had small holes. The number of beads you need will vary because the usable holes of your beads are likely to vary, and because you may get fewer, or more, row repeats from your yarn.

The Eva Sweater

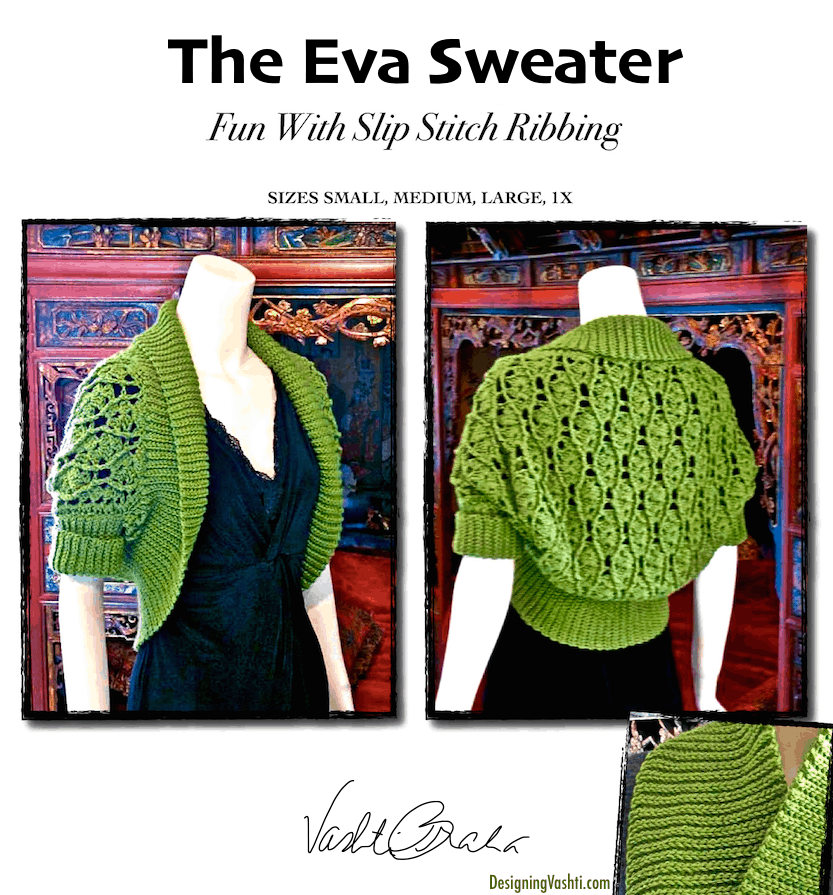
Eva is a fun way to crochet a sweater: start with stretchy scarf. This one features buttery plush slip stitch ribbing. Crochet lace onto it and you’re basically done. This easy-to-make sweater is often called a “cocoon shrug” and the fashionably wide ribbing does the shaping. Eva stays on the shoulders!

Pattern includes helpful images, stitch symbols for the lacy back, and an assembly diagram. International English equivalents to American measurements, yarn weights, and stitch terms are provided in brackets.

Skill Level

Easy Intermediate. The construction is an uncomplicated yet uncommon way to crochet a shrug by assembling rectangular pieces, then seaming them as you go. Pattern is written with a limited amount of abbreviations. 

After using this pattern you will know (if you didn’t already):

  • How to turn a rectangle into a comfortable “cocoon” or “cutaway”-style sweater
  • A fun, quick, and ingenious way to crochet a ribbed shrug
  • The design appeal of crochet slip stitches worked in a looser, “hook-led” gauge

Finished Dimensions

This sweater is a cutaway type shrug or cocoon, so it is designed to be worn open in front. The ribbing is so stretchy that it gives a shaped fit. Pictured sweater is a size Small to Medium.

Size Small-to-Medium: A few extra rows of the lace section are added to give the Medium size more length at the back waist and a bit more width at the bust. This option would also work for a taller size Small person, or for someone who is long-waisted.

  • Width at Bust: Fits actual bust sizes from 32″ to 36″ {81 cm–91.5 cm} the best. 
  • Back Length: 16.5″–19.5″ {42–49 cm} not including ribbed band.

Size Large-to-1XA few extra rows of the lace section are added to give the 1X size more length at the back waist and a bit more width at the bust. This option would also work for a taller size Large person, or for someone who is long-waisted.

  • Width at Bust: Fits actual bust sizes from 40″ to 46″ {102 cm – 117 cm}. 
  • Back Length: 19″ – 22″ {48 cm – 56 cm} not including ribbed band.

Supplies Needed

  • Crochet Hook: Size US J-10/6.00mm or size required for gauge. A US K-10.5/6.50mm crochet hook (or one size larger than the one required for gauge) is needed for foundation chs only. A US H-8/5.00mm crochet hook (or one size smaller than the one required for gauge) is needed for seaming only.
  • Three Stitch Markers
  • Yarn Shown: Berroco VintageTM (50% acrylic, 40% wool, 10% nylon; 217yds/200m per 3.5oz/100g), color #5175, 4 skeins.

Substituting a yarn: The best fibers for this project add bounce and plump stretchiness because of their wool or acrylic content. Choose a #3 light- to #4 medium-weight yarn that recommends on the label a crochet hook size range somewhere between US G/7/4.5mm-I/9/5.5mm. These yarns may also be referred to as DK (Double Knitting), Light Worsted, or Worsted weight.

Frostyflakes Scarf/Wrap

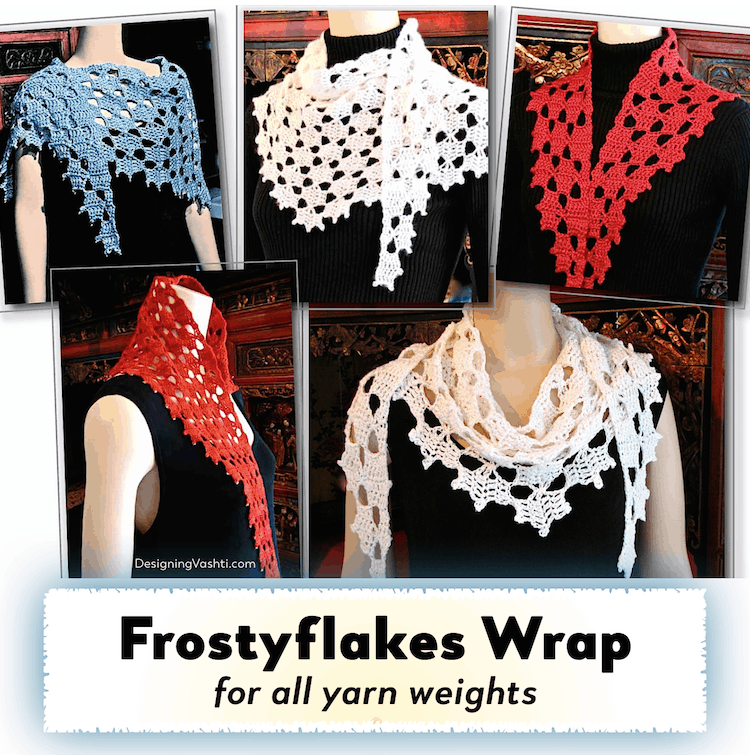
Frostyflakes Wrap styled 5 ways in 5 different yarns

A great crochet pattern for using one skein of a nice yarn to make a quick and stylish gift, or to use up any amount of yarn in your stash. Choose a yarn from the finest lace weight to a light worsted weight, and any crochet hook from C/2.75mm to H/5mm. This wide, shallow triangular shape drapes beautifully as a scarf, neck wrap, or shawl. The corner-start (point to point) construction means that the rows are worked vertically, from side to side, and the edging is completed as you go. This means a lot of freedom to use any amount of yarn on hand.


See the discussion thread for the 2014 Frostyflakes Crochet Along in Vashti’s Crochet Lounge.

I blogged a gallery for this CAL.


The stitch pattern is reversible and is primarily double crochets (a stitch that works up very quickly for many crocheters). This design is great for just jumping in and starting with any yarn on hand, then seeing how it takes shape as you go. I reach for this project when watching TV, listening to audiobooks, or waiting for someone. Embellishing the edging with beads is optional and is worked as you go.

Stitch diagram included, along with tips and clickable links to online help.
Crochet pattern is written with a minimal amount of abbreviations and includes metric equivalents, and UK terminology for yarn weights.

After using this pattern you will know (if you didn’t already):

  • How to create a triangular wrap from one side corner
  • How to predict yarn amount needed and final size of wrap, so you can use any yarn
  • The delightful convenience of crocheting the edging as you go
  • How to crochet with beads for the as-you-go edging without pre-stringing them

Finished Dimensions

It’s easy to make your Frostyflakes longer or shorter, based upon the amount of yarn you have. Pattern includes instructions for customizing the size and predicting total yarn amount needed. Yarn amounts for finished dimensions are approximate, because yarns in the same weight category can give different results.

Materials

#0 Lace weight {UK & AUS 1 Ply & 2 Ply}
Red beaded “Holly” version (pictured in pattern) is 48 inches/122cm wide, 10 inches/25.5cm at deepest center point, using almost 35g (approx. 300yds/270m) of one 50g skein.
White beaded cashmere “Snow” version (pictured here) is 63 inches/160cm wide and 14 inches/35cm at deepest center point, using approx. 300yds/270m (all but 2g) of one 25g ball. This yarn works up at a gauge that is closer to the next thicker yarn category, a #1 SuperFine weight.)
Based upon the stitch and row gauges of these projects, the width changes in increments of approximately 1.5 inches/ 4 cm; the depth of the triangle changes in increments of approximately 0.75 inches/ 1.75 cm.

#1 SuperFine/fingering weight {UK & AUS 3 Ply or 4 Ply}
Width changes in increments of approximately 1.75 inches/ 4.5 cm; the depth of the triangle changes in increments of approximately 1 inch/ 2.5 cm.

#2 Fine/sport weight {UK Light DK, AUS 5 Ply}
Red alpaca-silk “Candy Apple” one skein scarf version pictured here (147yds/133m) is 42 inches/ 107 cm wide and 9 inches/ 23 cm at the deepest center point.
If I used two skeins (294yd/266m) instead, it would be approximately 56 inches/ 142 cm wide and approximately 13 inches/ 33 cm at deepest center point.
A swatch of Patons Grace, a sport weight 100% mercerized cotton yarn, came out stiffer than the others so I didn’t continue further with it.
Width changes in increments of 2 inches/ 5 cm; the depth of the triangle changes in increments of almost 1.25 inch/ 3 cm.

#3 Light/DK/light worsted weight {UK Double Knitting}
White silk “Mistletoe” version is 69 inches/ 173cm wide and 15 inches/ 38 cm at deepest center point using 300yd/270m of yarn.
Light blue Simply Soft “Silver Bells” version is 72 inches/ 182 cm wide and 16 inches/ 41 cm at deepest point using one 6oz/170g skein (315yd).
Width changes in increments of approx. 2.5 inches/ 6.5 cm; the depth of the triangle changes in increments of 1.5 inch/ 4 cm.

#4 Medium/Worsted/Aran Weight Yarn, #5 Bulky Weight/Chunky/Rug, #6 Super Bulky Weight/Roving:

These thicker yarn weights have not been swatched for this project because the Simply Soft weight, which verges on the thicker #4 Medium category, is the thickest yarn that I prefer to use with this design as a shoulder wrap or scarf. However, you’re welcome to try any thickness of yarn and I’d love to see your results. The pattern instructions remain the same.