Archived Crochet Newsletters: LIST

Have you arrived at this page from Ravelry, Facebook, a blog post, pattern PDF, or elsewhere? Welcome. This is the only place to find the complete list of my archived crochet newsletters, with update notes and direct access to each. Go directly to the list below.
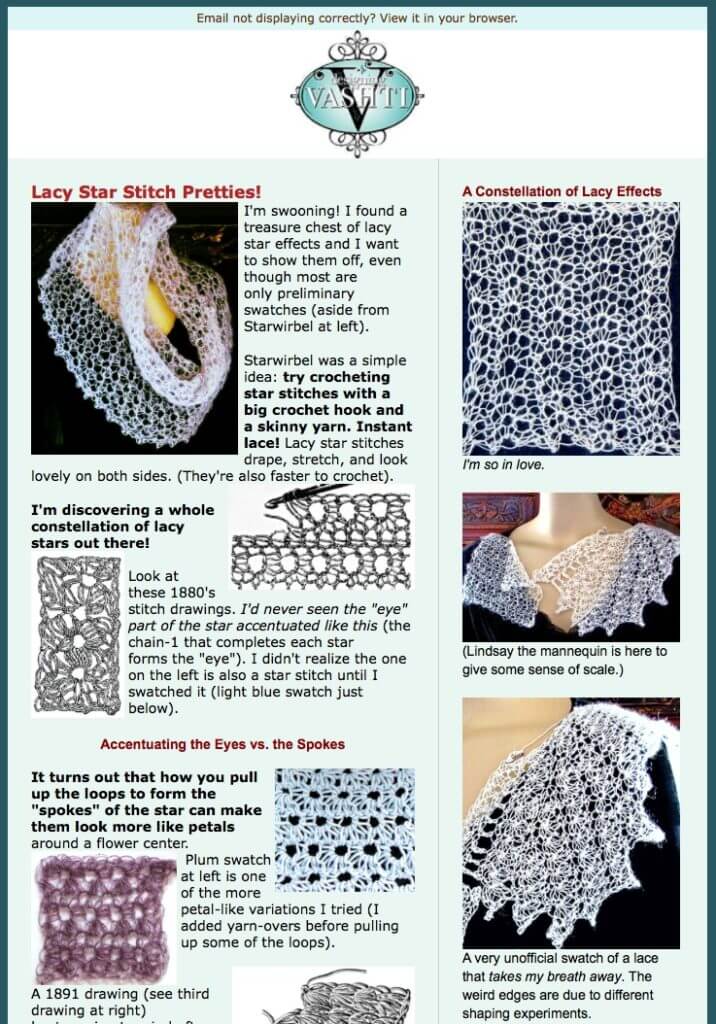
Archived newsletters: first page of a typical issue.

I proudly present a full backlist of my archived crochet newsletters. This page is a public log of my progress as I add each one to its permanent public archive on this site.

As I upload and update each back issue, I’ll add its direct link to the list below. Use the issue number (such as #60 for the one pictured) to find the issue you want in the list. If it isn’t clickable, it’s not yet republished.

The Originals, Enriched

Each of my archived crochet newsletters is in the process of getting its own permanent page on this website. You’ll be able to leave comments, bookmark and return to it, share, pin, and print out a copy. I love that I can add new stuff as the topic evolves. If I’ve updated it more than once, I’ll note the most recent date at the top of its page.

I’m generally preserving the original issues except for very light editing and link-fixing here and there. Many of the topics continue to evolve. Issue #2 is an example of when I add new material and some original notes that were squeezed out of the issue the first time around. This kind of stuff goes at the end of its page, clearly indicated. In the case of Issue #3, the whole issue got a dramatic overhaul!

How to Find an Issue

Know the number of the issue, or the general date it was sent?

The first-ever issue, #1, was sent September 2, 2010. Issue #100 went out September 1, 2019. Scroll through the list below by issue number, which is also chronological.

I always refer to an issue by its number.

Prefer to browse?

I created this page just for you. And for me, when I just want to scroll through the memories.

Have a topic in mind?

Have a topic in mind, but you don’t know the number or date of the issue(s)? I’m working on a way to display newsletters grouped in subcategories.

Vashti’s Archived Crochet Newsletters Complete List: 2010 to the Present

On a mobile device? Scroll to the left or right if you don’t see FOUR columns (Issue #, Sent Date, Original Title, Notes).

Issue #Sent
Date
Original TitleNotes
#12010-09-02 New Crochet Talk: Inaugural Issue
#22010-09-16A Super Crochet ManeuverUpdated title: Crochet Stitch Equivalents (Issue 2)
#32010-09-30A Very Different Kind of Crochet StitchUpdated title: Limpet Stitch: Crochet Half Hitches (Issue 3)
#42010-10-14Graphing Waterlilies
#52010-10-28A Fever for Neck Warmers
#62010-11-11Thick, Thicker, Thickest
#72010-11-24Tunisian for Yarn Bail Outs
#82010-12-09Commutative Property
#92011-01-06The Ribbing Issue
#102011-01-20Breaking Out of Tunisian Ruts 
#112011-02-03Fibers That ‘Sproing’ 
#122011-02-17Twist Some Loops 
#132011-03-03Shrugging Off Winter 
#142011-03-17Ireland, Japan, and Crochet Lace
#152011-04-01Unpacking V-Stitches 
#162011-04-14Flavor Burst Crochet  
#172011-04-28Fancy Cords in 360º 
#182011-05-13Deep Crochet Research 
#192011-05-26Netting vs. Lace  
#202011-06-09Travel Crochet 
#212011-06-23Wee Pebble Stitches 
#222011-07-08Crochet That Pours 
#232011-07-21If Stitch Patterns Could Speak         
#242011-08-04Mirroring Stitch Types 
#252011-08-18Tweak Those Gaps Along Row Edges?        
#262011-09-01Fun With Stitch Blocking  
#272011-09-15Stalking the Wild Slip Stitch  
#282011-10-06Mohairs for Crochet 
#292011-10-20Short Row Startle! 
#302011-11-05Yarns of Different Stripes 
#312011-11-17Sparkly Crocheting 
#322011-12-01Quick Crochet for Kids 
#332011-12-16Jumbo Hooks 
#342011-12-31Protecting Crochet Creativity 
#352012-01-14Draping Simple Shapes 
#362012-02-17Ribs, Old & New Grooves
#372012-03-08When Stitches Lean 
#382012-03-23A Jewelry Experiment Method 
#392012-04-24Love Knot Research 
#402012-05-14Pulling Up a Long Loop  
#412012-07-12Beachy Kimono & Ruana Shapes 
#422012-08-11“Inverse” (NOT Reverse) Crocheting 
#432012-09-27Silver Wire Crocheting 
#442012-11-08Dainty Eyelets for Winter Lace 
#452012-11-30Slip Stitch FAQ Blogged a version of this: Slip Stitch Crochet FAQ.
#462012-12-13Clones Knots, Open & Closed 
#472013-02-19Rayon Threads. Really? 
#482013-03-14Diagonal Tunisian Crochet Discovery 
#492013-04-20‘TEKSplorations’ for Tunisian LaceBlogged about the Tunisian Extended Stitch: Tunisian Extended Stitch Ripple.
#502013-05-16Those Crochet Stitch “Feet” 
#512013-06-18Lacy Summery Seams 
#522013-07-18Slip Stitches, Wool Breeds, & Plying
#532013-08-06Slip Stitch Flowers 
#542103-09-27How (& Why?) of Crochet Coffee Cozies
#552013-12-02Fun Yarn Tests, and – BIG NEWS! 
#562014-01-09Yarn Color Charms to Make 
#572014-02-14Which Beads Added Which Way?
#582014-03-13About That Bump in the Chain
#592014-04-01Star Stitch, the Tunisian Connection 
#602014-04-25Star Stitch Lace Pretties! 
#612014-06-06When Top Loops Are Optional! 
#622014-09-06Hexagonal Lace TypesBlogged overflow from this issue: Beaded Delta Crochet Types of Lace.
#632014-10-02Fun with Double StrandingBlogged overflow from this issue, Double-Strand Crochet, and more overflow: More on Double Strand Crocheting.
#642014-11-07Dramatic Tunisian Edge IncreasesBlogged a version of this: How to Increase Tunisian Crochet Blocks.
#652014-12-05Mock Cables in Slip Stitches Blogged the project: Crochet Cable Boot Cuff Pattern Progress.
#662014-12-21Hot Trend: Boot Cuffs! 
#672015-02-05That Weird Popcorn Stitch Step 
#682015-05-23Filet Net Textures, Rotated! 
#692015-07-04Wish Bracelets: Why Not Crocheted?
#702015-08-14Starting a Stitch with a Backtrack! 
#712015-09-19Beyond Crochet Hook Debates Blogged: downloadable Crochet Hook Diagram, and Crochet Hook Size Charts.
#722015-10-10“Long Tail” Crochet Blogged: Long Tail Crochet Foundations.
#732015-11-25How to Shape Star Stitches 
#742015-12-16Crochet a Filament of Cheer 
#752016-01-23It’s MORE Than an Invisible Decrease! Blogged a version of this: When to Crochet Between Top Loops.
#762016-02-12Heart Shapes with Slip Stitches Blogged a free heart pattern to go with this issue: Slip Stitch Crochet Hearts. Also see Crochet Bunnies Flat or Puffy.
#772016-03-08Find the Color Code of Short Striping Yarns         Related blog post: Rosebud Argyle Color Pooling Stitch.
#782016-05-02Möbius Mindbending Experiences  Related blog post: Mindbender Mobius News.
#792016-06-11Steek (Cut) Stitches the Fun Way ✂ Blogged the overflow from this issue: Steeking Crochet (Newsletter Overflow).
#802016-09-01Pattern Schematics for Insiders and Outsiders
#812016-11-04Crocheting Pendant Loops ➰ 
#822016-12-10Holiday 2016 + Foundation Star How-to[includes #82.5 (12/15/2016) Updates to Last Week’s Issue] 
#83 2017-02-28Hidden Pictures in CUT Stitches! 
#842017-05-05Crocheted Ruffles
#852017-07-07New Stitch Patterns 
#862017-08-10Edgings That Multitask 
#872017-08-24Announcing a Ruana ‘DAL CAL’ (design-along crochet-along) 
#882017-11-18Yarn Overs⤵, Unders⤴, and ‘Purlwise’Blogged overflow from this issue: Yarn Over, Yarn Under (Newsletter Overflow).
#892018-01-13Crochet Around a Ring *Differently* Blogged the design that inspired this issue: Last Minute Crochet Jewelry Gift.
#902018-03-04Elegant Tall Stitches
#912018-04-07Crocheting a Yarn’s Twist Energy 
#922018-05-19Clever Substitutions
#932018-07-21Unzip Foundation Chains
#942018-09-01Referring to Stitch Parts
#952018-10-19Color Revolution
#962018-11-29Choosing Holiday Projects         Blogged the charts of ideas: Holiday Crochet Project Habits.
#972019-02-10Crochet “Life Lists”                               Downloadable PDF of Crochet Bucket List.
#982019-04-06Tricky Tunisian/Afghan Hooks                  
#992019-06-07Barefoot Sandal Phenomenon
#100 2019-09-01It’s Issue 100!: Scaling Every Which Way
#1012020-04-25How I Reset Major Crochet Slumps
#1022020-06-13Wild Whys of Y-StitchesCurrently included in the Tall Stitch Class Resources Page until it gets its own permanent page.
#1032020-10-09Big Picture of CrochetUpdated title: What IS Crochet, Really?
#1042022-01-26The Paradoxical Return PassYou might be able to view it here until I add it to this site.
#1052022-04-22Ripple Stitch DNAView it here until I add it to this site.
#106ooo
Vashti’s Crochet Inspirations Newsletter all issues.

Subscribe

Become a Newsletter Supporter

Posted on 1 Comment

How I Crochet Two Rows at Once (Lacy)

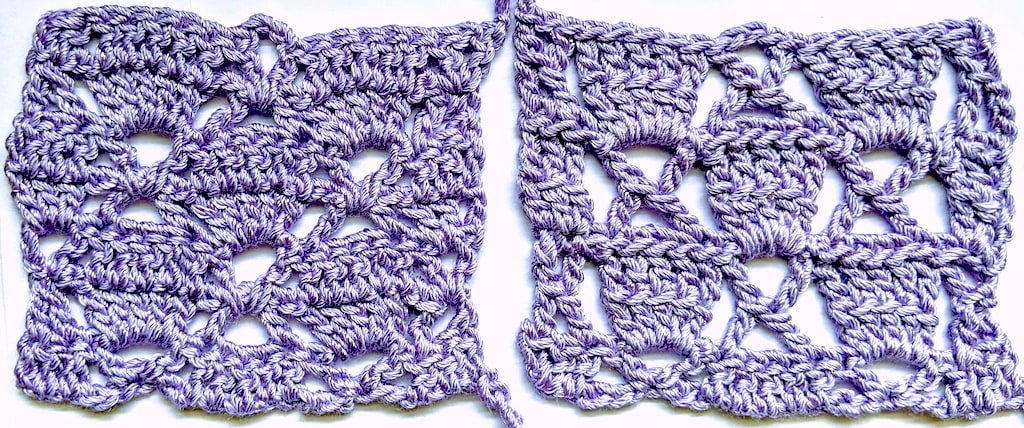
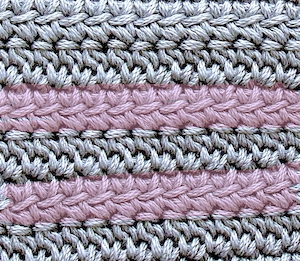
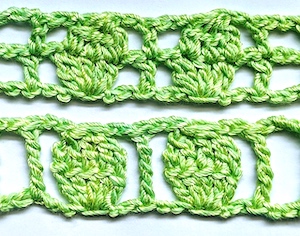
Crochet two rows at once of this lace stitch pattern by using X-stitches and shells of linked taller stitches. One-row version is on the right.

There’s more than one way to crochet two rows at once. You can also crochet three or more rows as one. I’ve only seen other people combine two rows with plain and fairly dense stitches, like rows of all single crochet or double crochet (in UK & AUS that’s doubles and trebles). I’m going to show you how I did it with a lacy stitch pattern.

The green swatches below are from my newsletter, issue #102: “Wild Whys of Y-Stitches”. I didn’t have room to include the lavender ones shown above. That means this post also qualifies as newsletter overflow, woo-hoo!

Crocheting two rows as one is a tall stitch “hack” that I stumbled on while researching X- and Y-shaped stitches with my upcoming online class in mind, Tall Stitch Virtuosity. In this post I’ll break it down, ending with actual row-by-row instructions for a 2-row stitch pattern, and for my one-row version of it.

Linked Stitches: Classic & Beyond

First, we all need to be on the same page about linked stitches if we’re going to crochet two rows at once.

A world of special effects with linking opens up when you can identify the individual strands of a tall stitch. I’m surprised how long it took for my eyes to distinguish what goes on in tall stitches, structurally. I used to think they were like bundles of muscles and ligaments.

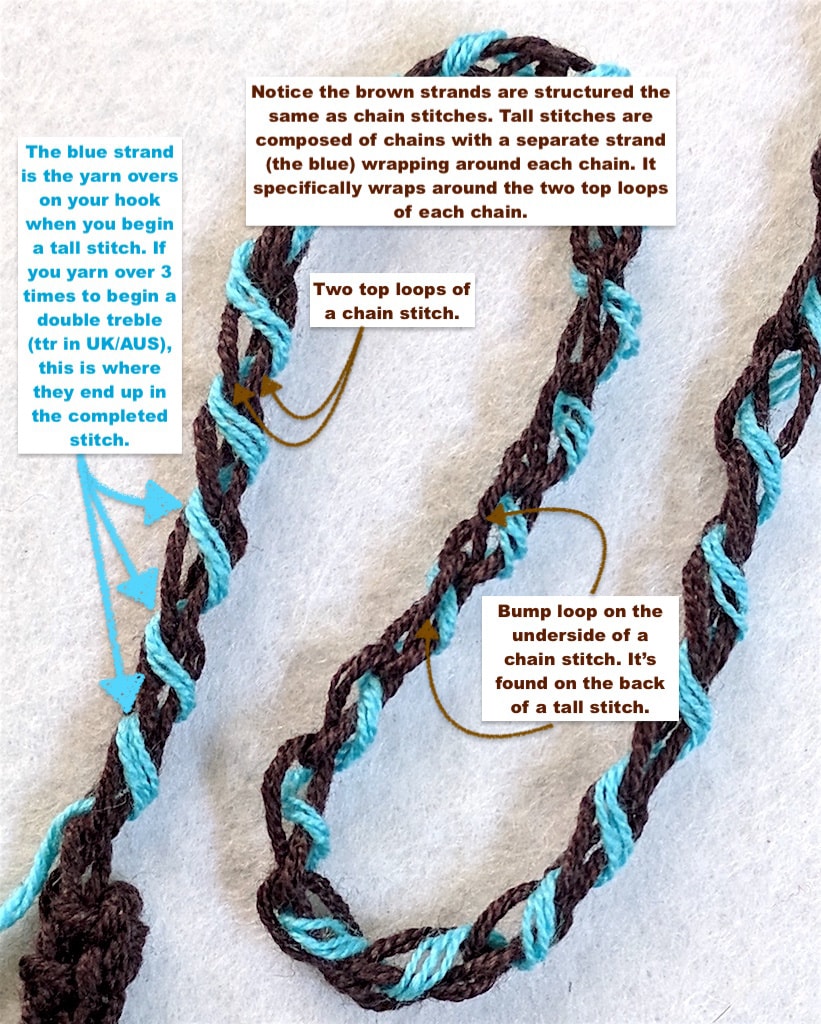
So, let’s dig in to what each strand is doing in the post (a.k.a. stem) of an astonishingly tall 2-color stitch. I loaded yarn overs onto my hook with blue yarn. Then I worked them all off the standard way (two by two) with brown yarn. I crocheted it loosely so you can see through the stitch:

Close up of a very tall crochet stitch. The yarn overs are done with a contrasting color to show that intiial yarn overs are a separate strand that wraps around a series of chain stitches. Together this creates the post of a basic tall crochet stitch.
I used this image in issue #94 of my newsletter, “Stitch Parts: Where We’re At” to compare Tunisian crochet similarities.
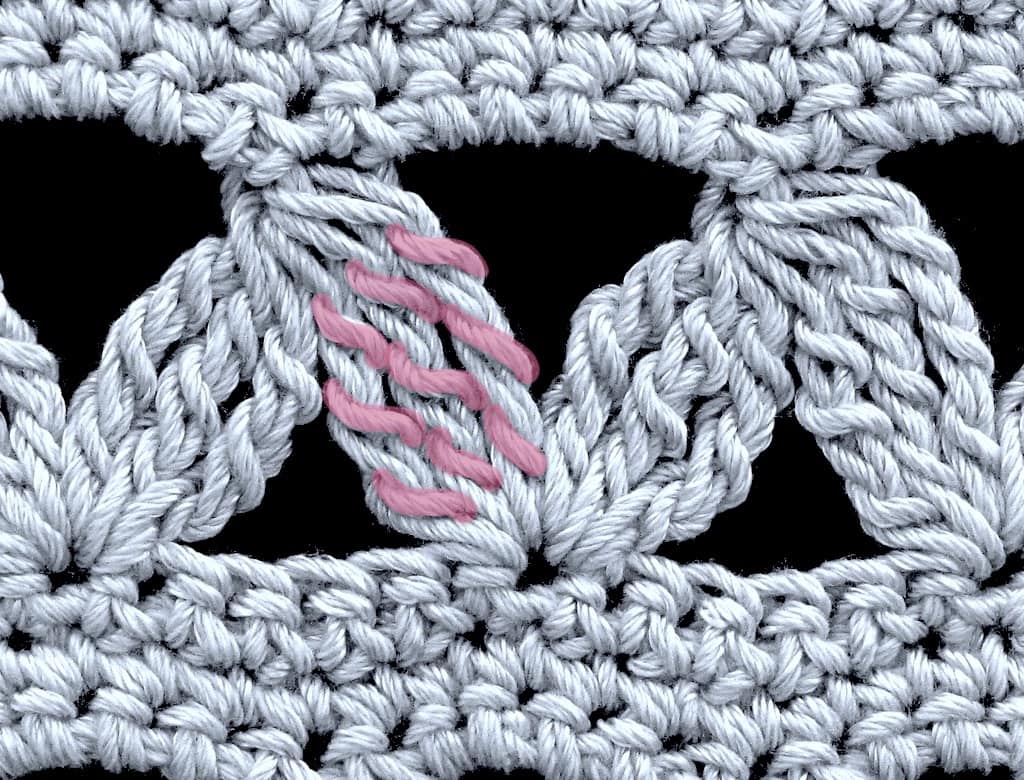
Close up of stitch pattern with tall stitch clusters; the yarn over strands have been tinted to highlight them within a cluster.

Find the Yarn Over Strands

Here’s a row of 6-dtr split clusters (dtr = double treble; in the UK/AUS it’s ttr). I yarned over 3 times to begin each dtr. The tinting shows where the three yarn overs end up in each stitch post.

Tip: Just count the yarn overs in a stitch post and you know which tall stitch was used…as long as it’s not a variation, such as an extended stitch.

Linking the Classic Way

A classic linked stitch is a tall stitch that is linked all along its post to the yarn over strands of the stitch just before it. I call this “classic” because it seems to be the default or expected way to do a linked stitch, even though in actuality the ways to link them are infinite.

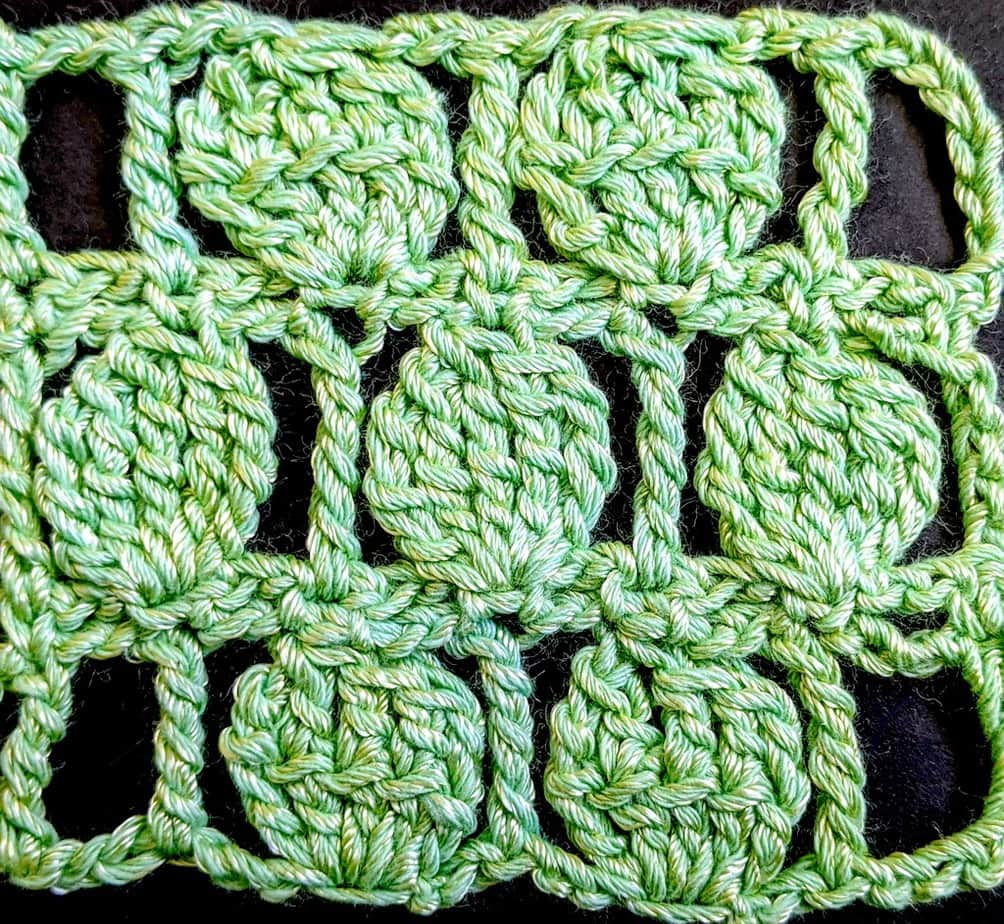
The classic method welds them together from top to bottom. In photo A below, all of the tall stitches are linked in three places. The right cluster is “classic”: all 3 yarn overs link to the 3 yarn overs of the previous stitch. In photo B, this is what you get when you link the yarn over of each double crochet of every row.

In photo C, I forgot to link the clusters in the middle row. The clusters in the bottom and top rows are linked only with the middle yarn over. Can you see the horizontal strands where they’re linked? It causes the cluster to flatten just a bit and to move as one unit, almost like a coin. I like their surface texture. They’d probably become stiff and a bit concave if I linked them the classic way, with all three of their yarn overs.

I’ve used classic linked stitches as borders for Tunisian designs like Liebling and Graven. The pros and cons of classic linked stitches resemble those of Tunisian simple stitch (Tss):

  • It eliminates gaps between tall stitches. This may be its most common use. It also tightens the gauge a bit. It’s a great fabric for a bag (Sterling).
  • It changes the surface texture to the flatter woven look of Tss.
  • The fabric feels thinner. It has less stretch and less drape. Stitch fronts may bend slightly inward in a concave way. (Akin to the “Tunisian curl”.)
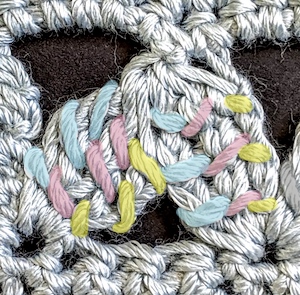
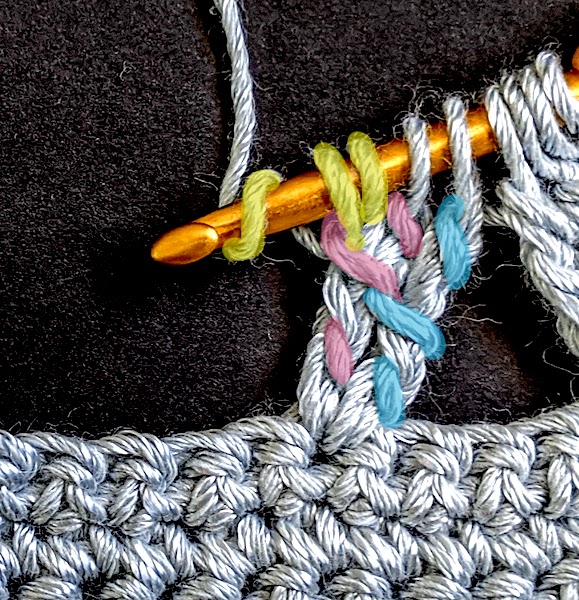
A dtr that is linked in only one of its 3 yarn overs.

Selective Linking

Here’s a row of 3-dtr clusters in progress; I’m linking only their middles. The 3 initial yarn overs of each dtr are tinted. See how the middle pink and blue yarn overs are linked? The other blue and pink ones are not.

Yellow-tinted yarn overs for a new dtr are on the hook. See that the 2nd yellow one is linked to the 2nd pink one? Here’s how:

Yarn over (counts as 1st of 3 initial yarn overs in yellow); insert hook down through the top of the the 2nd (pink) yarn over of the previous dtr, yarn over and pull up a loop in it (counts as 2nd of 3 initial yarn overs); yarn over (counts as 3rd of these yarn overs). To complete stitch, insert hook in same stitch of row as the previous two dtr, *yarn over and pull up a loop, yarn over and pull through two loops on hook, repeat from * twice. In this case for a cluster, yarn over and pull through the remaining loops on the hook.


Crochet Two Rows at Once, Creatively

I hope you’ll explore what you can do with linked stitches. Here are some that need future blog posts.

  • X- and Y-stitches are very much like linked stitches; the main difference is the next stitch is started in the side of the stitch post, not just linked to it. For an X or Y shape, the next stitch is shorter, like a branch crocheted onto the “trunk” of a taller stitch. I needed X-stitches for the lavender swatch (top of the page) to be able to crochet two rows at once. The two-row version has a V-stitch crocheted into an inverted V-stitch. Isn’t that a two-row X?
  • I’ve discussed where to link, and how many times to link in the same stitch. What about how you might link. The equivalent of a slip stitched link is where you insert your hook in a strand of the previous stitch and leave it on the hook (don’t yarn over and pull up a loop in it). The opposite would be to start a taller stitch there: it worked for me when I crocheted a letter A-shape.

A Sample Two-Rows-as-One Pattern

  • Pattern abbreviations: ch = chain stitch, dc = double crochet (UK/AUS tr), dtr = double treble (UK/AUS ttr), sc = single crochet (UK/AUS dc), st(s) = stitch(es), yo = yarn over hook
  • Special Stitches:
    • Shell = [2-dc cluster, dc, 2-dc cluster] all into designated stitch
    • 2-dc cluster = *yo, pull up loop in designated stitch, yo and pull through two loops on hook, repeat from * in same stitch, yo and pull through all loops on hook.
    • Split Cluster = [*yo, pull up loop in first st of Shell, yo and pull through two loops on hook, repeat from * in same stitch], [yo, pull up loop in 2nd st of Shell, yo and pull through two loops on hook], [*yo, pull up loop in 3rd st of Shell, yo and pull through two loops on hook, repeat from * in same stitch], yo and pull through all 6 loops on hook.
    • Coin-Cluster = Yo 3 times, insert hook in next st, *yo and pull up a loop, [yo and pull through 2 loops on hook] 3 times, yo, insert hook in 2nd yo strand of previous st, yo and pull up a loop, yo, insert hook in same st of row, repeat from * four times, [yo and pull through 2 loops on hook] 3 times, yo and pull through all 6 loops on hook.

Original Two-Row Stitch Pattern

Chain 20 for a swatch. (Multiple of 6 stitches + 5.)

  1. Row 1: Dc in 8th ch from your hook, *ch 1, skip next 2 sts of row, Shell, ch 1, skip next 2 sts of row, dc in next st, repeat from *. Ch 5, turn.
  2. Row 2: Skip next 2 ch, *dc in next dc, ch 2, skip next ch, Split Cluster over next 3 sts of Shell, ch 2, repeat from *, dc in next dc, ch 2, dc in 2nd ch of turning ch.
  3. Repeat Rows 1 and 2 for pattern. Or, for Row 3 put Shells where the dc are, and dc where the Shells are to stagger the pattern.

The One-Row Version

Chain 23 for a swatch. (Multiple of 6 stitches + 7.)

  1. Row 1: Dtr in 11th ch from your hook, *ch 2, skip next 2 sts of row, Coin-Cluster, ch 2, skip next 2 sts of row, dtr in next st, repeat from *.
  2. If you don’t mind having the wrong side of Coin-Clusters facing every other row, repeat Row 1. To have them all face the right side, work this pattern in the round with no turning. Or, use this Row 2 as shown in the swatch: Ch 1, turn. Sc in first dtr, *ch 2, skip next 2 ch, sc in next st, repeat from * to the end of the row, placing last sc in the next turning ch after you skip 2 of them.
  3. Repeat Rows 1 and 2 for pattern. Or, for Row 3 put Coin-Clusters where the dtr are, and dtr where the Coin-Clusters are to stagger the pattern.

So I’d like to hear from you if you’ve had linking adventures, or troubles.

Want to crochet two rows at once of a favorite stitch pattern? I think some probably can’t be done, while with others there could be several ways to combine rows.

I’m eyeing a pattern right now that has 3 rows of single crochet, then 1 row of clusters. I’m mulling how I could turn its 4-row repeat into 2: turn a sc row + cluster row + sc row into one row, and have the sc row that separates them be the one row that faces the wrong side!

How to Fix Loose Loops of Tall Stitches

Pictured above: Cantina in beaded Lotus. Also see triple trebles in the Dessert Party Apron.

When tall stitches look very different from each other, or lumpy, stringy, loose, or too short, we just need to take more control of them. Especially vexing is when the top loops look loose and loopy! My solutions below will help you crochet even the very tall stitches that look downright handsome. First, some basics of crochet.

Tall & Taller Crochet Stitches

A basic rule of crochet is if you already know how to do the double crochet stitch (US: dc, UK/AUS: tr), it’s easy to understand how to make the taller ones. Here’s how to crochet the dc into a row of stitches:

Yarn over and insert your crochet hook under the top two loops of the next stitch of the row. Yarn over and pull up a loop; you now have three loops on your hook. *Yarn over and pull the loop through two of the loops on your hook, then repeat from the * once: only one loop remains on your hook.

An amazing feature of crochet is there’s no limit to a stitch’s height. Start with the double crochet stitch as the model for crocheting any taller stitch. Here’s how to make a treble, the next taller stitch:

Yarn over two times (instead of once for a dc). Insert your crochet hook under the top two loops of the next stitch of the row like you would for a dc, yarn over and pull up a loop; you now have four loops on your hook. *Yarn over and pull the loop through two of the loops on your hook, repeat from the * until only one loop remains on your hook—for a treble, that’s twice more.

With each taller stitch (double trebles and so on) you yarn over more times and then work the loops off of the hook in pairs, just like you do to make a dc and tr. The only difference is that you have more pairs of loops to work off.

What About Tall Stitch Variations?

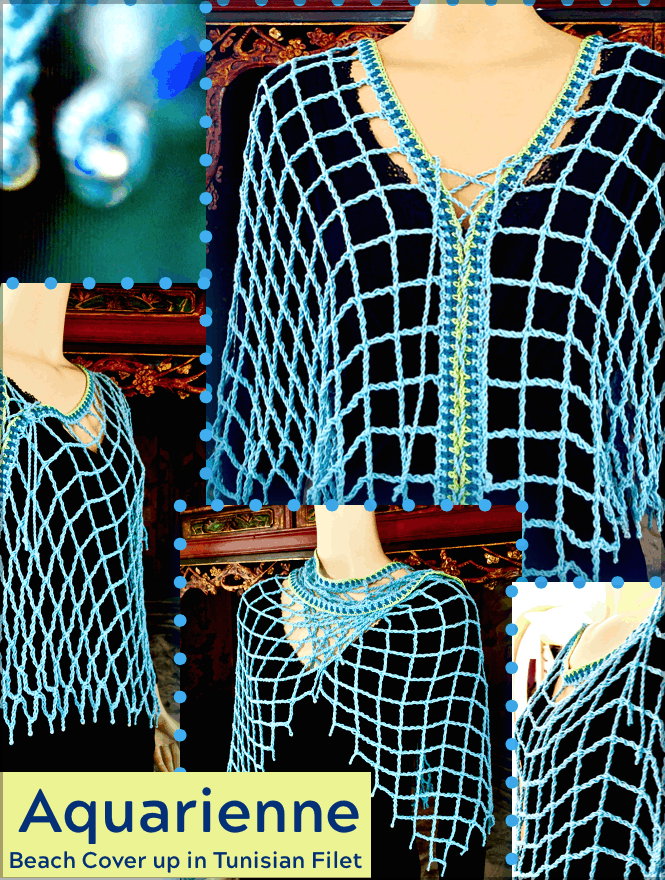
Aquarienne Beach Cover Up breaks the usual Tunisian crochet pattern conventions
Aquarienne has very tall Tunisian crochet stitches.

Note that I’m sticking closely to the basic stitches here. That means I’m leaving out:

  • other types of tall stitches, such as the extended ones of half-step heights,
  • other ways to add loops to the hook, and
  • more ways to crochet them into other stitches.
  • Also, tall Tunisian stitches.

These non-basic stitches have the same problems with loose top loops. My tips below will help.

A Better Start

Our goal is no slack in our loops beyond what’s needed for crocheting at our normal smooth and easy gauge. This is not about crocheting tighter. It’s about identifying where we let extra yarn creep in.

Buff your crochet hook surface.

Even slight, imperceptible residue will cause you to need a bit more slack in your loops. For a few seconds I vigorously rub the whole stitch-making zone of the hook with a soft cloth (preferably microfiber or chamois). I do this when I start a new project, resume crocheting one after a long break, or daily during peak summer humidity.

Adjust the initial loops.

The loop that’s already on your hook will become the top two loops of the new stitch. I tug on it gently to tighten. The loop should still slide freely along the main part of the hook (not the narrower tapered neck of it).

Let’s start a triple treble (US: trtr, UK/AUS: quadtr). I yarn over four times and immediately slide all the loops together while tugging a bit on my yarn. This removes unnecessary slack. They should still slide well on the hook as a neat, snug group. Keep your thumb or forefinger on the group so that they don’t loosen as you start crocheting.

It’s easy to overlook how much extra yarn we add to a stitch if the yarn overs spread out along the hook. (Keep this in mind for lacy Tunisian crochet too!) This will become a quick automatic movement after a while.

Better Stitch Making

While working the loops off of my hook in pairs, I pull up a bit on the loops. This has two benefits.

Lifting adds elegance.

If you think of the base of a stitch as having two “feet” planted in a stitch, then pulling up a bit higher while working the stitch creates longer “ankles” and a streamlined body. I first learned this about the dc from Pauline Turner in her Crocheted Lace book (Martingale, 2003). She explains why even experienced crocheters can have trouble getting a doily to lie flat if their stitch heights vary from the designer’s.

Lifting while making your tall stitches will help you get row gauge for filet lace projects. Feel free to add a chain to your turning chains if lifting makes your row a whole chain taller.

Use the “reserve” yarn.

Not all of the yarn is coming from the ball of yarn to complete the stitch. Some comes from the “reserve” yarn that’s wrapped around the hook. As I crochet I’m almost miserly about the yarn coming from the ball as I pull up a bit, yarn over, and pull through two loops at a time.

Try it: go slowly and watch how more yarn gets pulled off of your hook if you restrict the flow of yarn from the ball.

Part of this motion is that I’m also tilting my hook at a sharp angle. The head is pointing almost straight down as I pull a loop through the next two loops on the hook. This helps the yarn slip from hook and into the stitch at a pretty angle.

The stitches comes out uniformly neat and orderly looking. These subtle crocheting adjustments will become automatic and feel natural.

The Yarn Matters

Crocheting a tall stitch involves a lot of wrapping. A right-handed crocheter wraps the yarn around the hook in a counter-clockwise direction. It either untwists a yarn, or adds more twist, depending on whether the yarn starts out with a clockwise or counterclockwise twist (a.k.a. “S-twist” or “Z-twist”).

This is really noticeable sometimes. The tall stitches look stringy or uneven for several reasons:

  1. It’s hard to work the loops off the hook evenly without splitting the plies of yarn.
  2. A yarn flattens when it loses twist. This affects how the stitch looks.
  3. Separated yarn plies add a stringy look to the surface of a completed stitch.

The fiber blend matters. Slippery yarns add challenge, and so do yarns with uneven bumps. Sometimes trying different crochet hooks helps (remember to buff them first).

When you’ve tried everything, it’s not you. Occasionally, tall stitches are going look looser no matter what you do! Blocking might help.

Tall stitches love a good blocking.

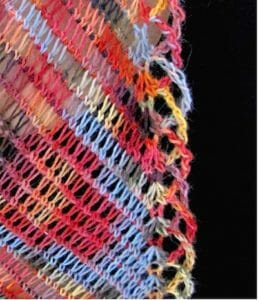
Close up of an edging of tall stitches along the diagonal edge of a triangular Tunisian shawl.
Tunisian Islander Wrap with a lattice edging of tall stitches.

This probably sounds about as fresh and exciting as “take time to check your gauge” but the transformation is so worth it.

Tall crochet stitches are structurally complex. Blocking gives the yarn strands a chance to absorb the energy you added with all the wrapping and looping, and to meld evenly into a stable column.

Your tall stitches will respond even more handsomely to blocking if your yarn does. Natural fiber content helps because it responds so readily, but you can also block some 100% acrylic yarns with steam very carefully.

Crochet’s lacy beauty really shines through with the tall stitches, doesn’t it? I fall in love with crochet all over again when I use them.

Inspired by the release of the Tokyo Jacket, an earlier version of this material was posted October 2, 2009 at an older blog.

How to Block Crochet Five Ways

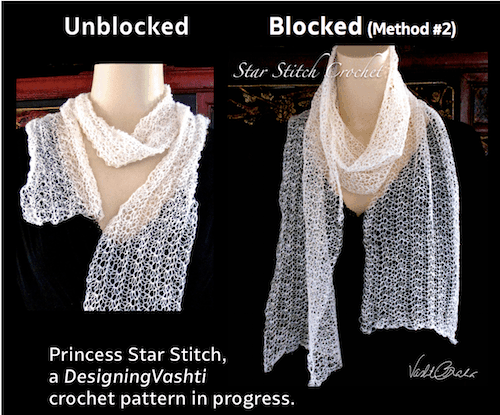
An antique, translucently lacy star stitch before blocking and after.
View the high-res version of the above image.

Some of us only use one or two of these five, but you may discover that you use more blocking methods than you thought. (I hope we all use at least one!)

One of the methods below could be the perfect finishing touch for your next crochet project, depending on your yarn and project type. They’re listed from the gentlest to the most aggressive. It also depends on your own preferences. I’ve found that each crocheter has a favorite method.

Special considerations for a specific stitch, technique, or project follow.

1. Dry Block (the gentlest method)

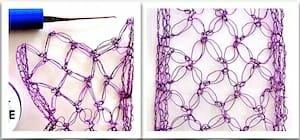
Love knot mesh crocheted in wire always needs to be "fluffed up" manually. I use a crochet hook to do this.
On the left, love knots crocheted in wire are “unblocked”. On the right I’ve manually “dry blocked” them using a fine crochet hook to open them up.

I also think of dry blocking as “hand ironing”. Crocheters do this without even knowing that it has a name. Stretch, spread out, and flatten your crochet piece on something flat. One’s knee always seems to be nearby! Using one’s knee or upper leg is not too bad for a small item, especially if you’re wearing jeans or other fabric that provides a bit of friction. (Don’t use it for measuring a gauge swatch though.) If your surface is hard and flat, such as a table, you can also press it with your hands, i.e. “hand-iron” it.

I’ve read that some crocheters prefer the softer and more handmade look of their thread lace when they dry block it only. (Wet blocking thread crochet is more common, and it can include a stiffener; see below.)

Isn’t wire crochet a great way to illustrate dry blocking?

2. Damp Block

Also known as spray blocking and blocking with mist. Spritz liberally with water, especially the edges, then spread out on a toweled surface to dry. Use a bath towel on a flat surface; the towel offers some friction that I find in most cases replaces the need for pins.

This method is my personal favorite. I blogged about it back in 2010. I also combine it with methods 3 or 4 below: usually I damp block every 6″ to 12″ of rows while I’m crocheting, and then do a final wet block when you’ve completed the project. I like damp blocking partly because it’s the most portable, and partly because it’s fast. It works great for the types of yarn I tend to work with: bamboo, rayon, and plant fibers in general; also merino and alpaca. For most of the year here in humid Florida, wet things simply take too long to dry. 

3. Wet Block

Wet blocking is when you fully immerse the crochet item in water. It’s a simple method that has several options for adding a whole range of effects to your projects. Practice wet blocking and it will develop into an art form. Try adding a fragrance, conditioner, fabric softener, or a stiffener to the water.

Depending on the yarn fibers and colorfastness, soaking can be a benefit or a liability. You can soak plant fibers like cotton, linen, hemp, rayon in warm or cool water a bit. This is Doris Chan’s favorite method.

For wools, immerse briefly in cool water to avoid fulling (felting), then remove excess water gently before spreading out on a toweled surface to dry. I like to add a little hair conditioner to the water if the yarn is wool or silk.

ShamWow super absorbent microfiber cloths are really helpful for speeding up the drying. I use them instead of, or on top of a bath towel on a table.

4. Steam Block

Steam blocking specifically uses the power of moist heat. This method can really pay off if you carefully test first. With practice you’ll develop the visual and tactile cues for how close to hold the steamer to your stitches and for how long, depending on the yarn. You’ll also develop a sense for which effects to aim for with a given yarn and stitch pattern. 

Why risk using this rather aggressive blocking method? It can give acrylic yarns the sheen and drape of silk. Steam blocking is an art that can bring out extra softness and luster in some silk, camel, and llama fibers too.

5. Pin Block

Pin blocking includes stretching an item on blocking wires while wet or steamed. The most important thing about pinning is to use rust proof pins. I don’t own blocking wires, but I sure admire the knitted lace wraps that have been blocked with them. (Personally and non-professionally, I have only ever pinned crocheted snowflakes.)

Special Blocking Considerations

You might enjoy this newsletter issue about the art of blocking crochet. 

Picots 

Tug and pinch each picot to round it out and make it visible, adding more water to them than the rest of the stitches, if necessary. Sometimes I roll each picot between my fingers to compress them and even out their roundness.

Love Knots

Most love knots are intended to be air-filled like a semi-inflated balloon. If yours are, spritz lightly with mist and damp block selectively: stretch and flatten stitches around the love knots. Gently smooth the love knots themselves so that you don’t flatten, deflate, stretch them out, nor weigh them down with too much water. You might feel like it’s not worth blocking them at all, but I tested this in my love knot classes and people could tell the difference.

Conversely, if you want yours to have the limp and collapsed look that is typical of the love knots in the tropics, feel free to wet block and perhaps even steam block them.

Lacy Tunisian Crochet

Class: Tunisian Eyelet Meshes (Crochet Meshes: The Weightless Wrap & Variations)
Blocking Weightless Wrap

The lacy Tunisian crochet that I’ve done responds beautifully to wet blocking. Aim for squared filet eyelets. I tug strongly on the return pass lines to straighten, flatten, and lengthen them evenly. Tug vertically on extended Tunisian stitches to fully extend them, if you used them. 

Garments

Wet blocking is the method here for the stylish fit, silhouette, and elegantly flowing, breezy movement many garments and accessories are intended to have. It’s no wonder that it’s Doris Chan‘s favorite method. Be sure to block the accessories that need to drape stylishly, such as wraps, scarves, collars, and even necklaces.

If you used acrylic yarn, steam blocking can bring out all the fashion drape and gleam, as if you used silk! 

Note that steaming some animal fibers will soften them enough to wear against the neck.

Home Decor

Home decor projects, especially doilies, snowflakes, and afghan squares (also flowers and other appliques) usually need to be as perfectly flat and square, or round, as possible. Wet blocking with pins, wires, or dowels is common with these items. Sometimes starch is added (especially for snowflakes). 

And finally…for all blocked items by all methods:

Let air dry completely, then admire your work and bask in the compliments!

This is a revised version of an earlier (October 2014) blog post at Vashti’s Crochet Pattern Companion. It also forms the basis of a chapter I wrote for the Crochet Guild of America’s Fundamentals of Crochet Masters Program.

Aquarienne Beach Cover Up

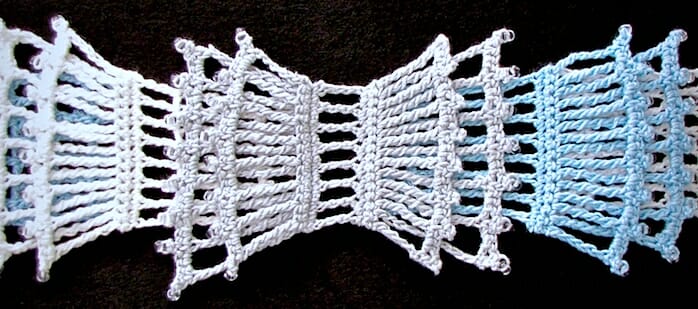
Aquarienne is a convertible layer of two identical triangles of filet Tunisian crochet. Each is crocheted point to point (a.k.a. side to side in this case). They’re edged as you go with sparkly “water droplets” (a beaded twisted fringe) because that’s how I roll.

No pre-stringing of beads required. Remarkably, only one 100g. (256-yard) ball of the main color yarn was needed, plus scrap amounts of two contrast colors. Filet-style Tunisian crochet is not a yarn gobbler.

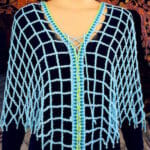
Lace together the colorful linen stitch band several ways: partially unlaced for a poncho, one-sleeved vest, or full-sized V-shawl. Wear the lacing in the front and back for a V-neck, or at the shoulders for a bateau neckline.

My goal was to design a breezy, versatile beach cover up that would be fun to wear here in Florida at the peak of summer (i.e. June to October).

Skill Level

Advanced Intermediate. Two simple Tunisian stitches make a one-row filet-style pattern. Its loose gauge and laciness add challenge; so does starting it in one corner and steadily increasing at one end of each row with a built-in beaded twisted-loop fringe edge. Don’t worry though! Pattern has professional stitch diagrams, a schematic, and video tutorial.

Stepping-stone patterns to build up to an Aquarienne experience would be Diamond Ennis. Also, Aero or Minuet.

After using this pattern, you will know (if you didn’t already):

  • How to crochet a strikingly open net of Tunisian crochet stitches.
  • How to crochet a triangle by starting at one point and ending at the opposite one.
  • How to add a finished edge with beaded twisted loops as you complete each row.
  • How to combine two lacy triangles to create a convertible garment.
  • How to apply principles of filet crochet to Tunisian stitches.
  • How to add beads without pre-stringing them.

Materials

Crochet Hook: Straight or Flexible Tunisian crochet hook at least 9” {22.9 cm} long: Size H/8 {5 mm} or size needed for gauge.
Regular crochet hooks Sizes 7 {4.5mm} and G/6 {4 mm} for border.
Yarn used, Main Color: DesigningVashti.com Lotus (52% Cotton, 48% Rayon; 256 yds/235 m per 3.5 oz/100 g skein): 1 full skein, color shown is Crystal Blue.
Very Small Amounts of two Contrast Colors: DesigningVashti.com Lotus Snack balls (52% Cotton, 48% Rayon; 85 yds/77.7 m per 1.16 oz/33 g skein): 1 ball each of Teal Glimmer and Bamboo Green.
Beads: 64 size 6/0 seed beads.
Notions: Steel crochet hook for hoisting a bead onto a loop of yarn. Scissors. Yarn needle. A paperclip, and a way to twist a long cord for lacing such as a kitchen hand mixer (optional; you could crochet, braid, or purchase a lacing cord instead).